
hydroponic nutrient solution recipe is one of those things that sounds intimidating until you actually make it once. I used to buy premixed bottles, guess at dosages, and still stare at sad lettuce like it was judging me. If you have ever topped off your reservoir and wondered why your basil suddenly looks pale, you are not alone. The good news is you can mix a reliable solution at home with a little measuring and a simple routine. I am going to share the exact approach I use, plus the little checks I do so I do not accidentally “season” my plants the wrong way.

Understanding Hydroponic Nutrients
Think of hydroponics like cooking without soil as your pantry. In soil, roots can rummage around for minerals. In water, you are the pantry. Your plants need the same core nutrients, just delivered in a clean, balanced way.
There are two main groups:
Macronutrients are the big ones plants use a lot of: nitrogen, phosphorus, potassium, calcium, magnesium, and sulfur. Micronutrients are the tiny but mighty ones: iron, manganese, zinc, boron, copper, molybdenum, and sometimes a pinch of chlorine.
The reason people struggle is not because nutrients are mysterious. It is because balance matters. Too much nitrogen can make leafy greens lush but weak. Too little calcium can cause tip burn, and it feels like watching your salad get ruined in slow motion.
Also, your water matters. If your tap water is hard, it already contains calcium and magnesium, which changes what you should add. If you are using RO or distilled, you are starting from zero, which is actually easier to control once you get used to it.
One more thing I wish someone told me early: pH is not a bonus feature, it is part of the recipe. If pH is off, nutrients can be present but “locked out,” and your plant acts hungry even when the reservoir is full.
When I am mixing and waiting for things to dissolve, I usually treat it like kitchen time. I will prep something fun like a drink, and yes I am that person who has a favorite list of cozy sips. If you want a cute weekend side quest, I love these homemade coffee recipes while you tinker with your grow setup.
DIY Hydroponic Nutrient Recipe
Alright, here is the part you came for: my practical, repeatable hydroponic nutrient solution recipe that works great for leafy greens and herbs. I will keep it simple, but accurate. This is a solid “general purpose” mix for lettuce, basil, cilantro, spinach, and similar crops.
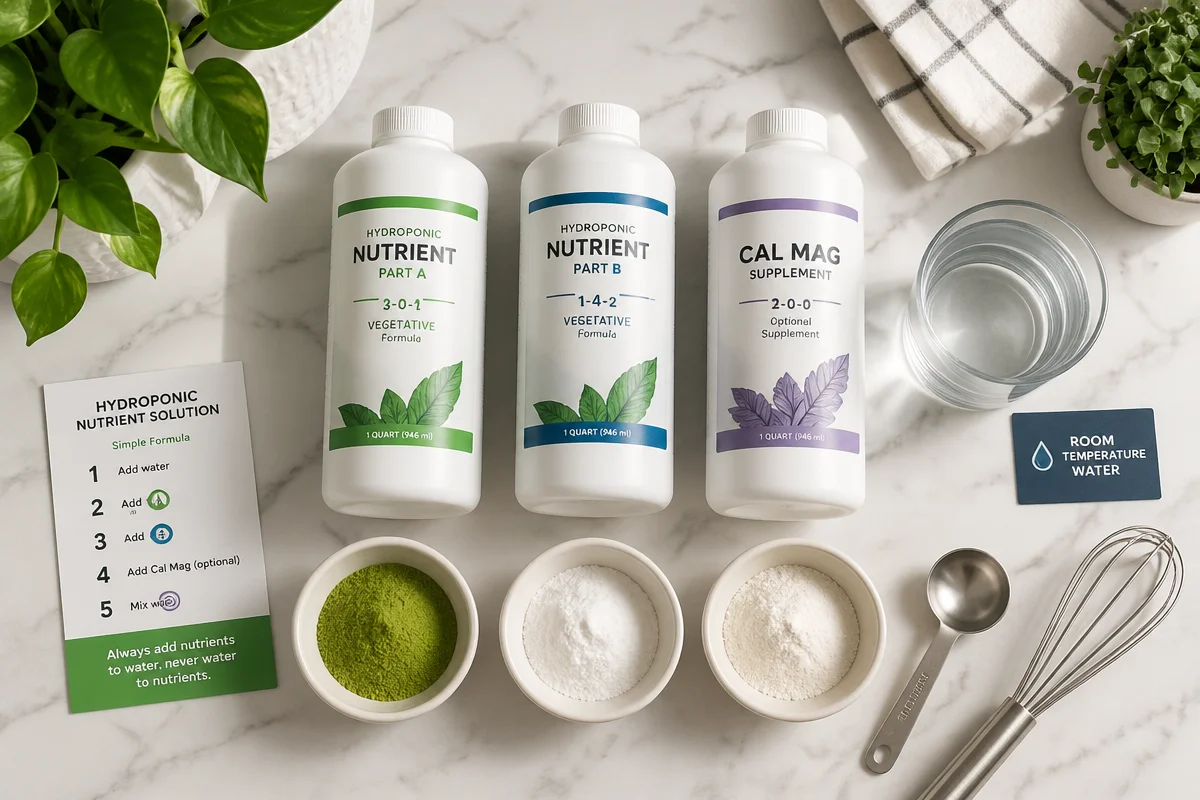
What you will need (my kitchen counter version)
- Two-part hydroponic fertilizer (often labeled Part A and Part B, or Grow A and Grow B)
- Optional Cal Mag (helpful if using RO water or if you see calcium issues)
- A clean bucket or reservoir
- Measuring syringes or a teaspoon set you do not use for food
- EC or TDS meter (this is your “saltiness” gauge)
- pH meter plus pH down and pH up
- Room temperature water
My basic mixing directions
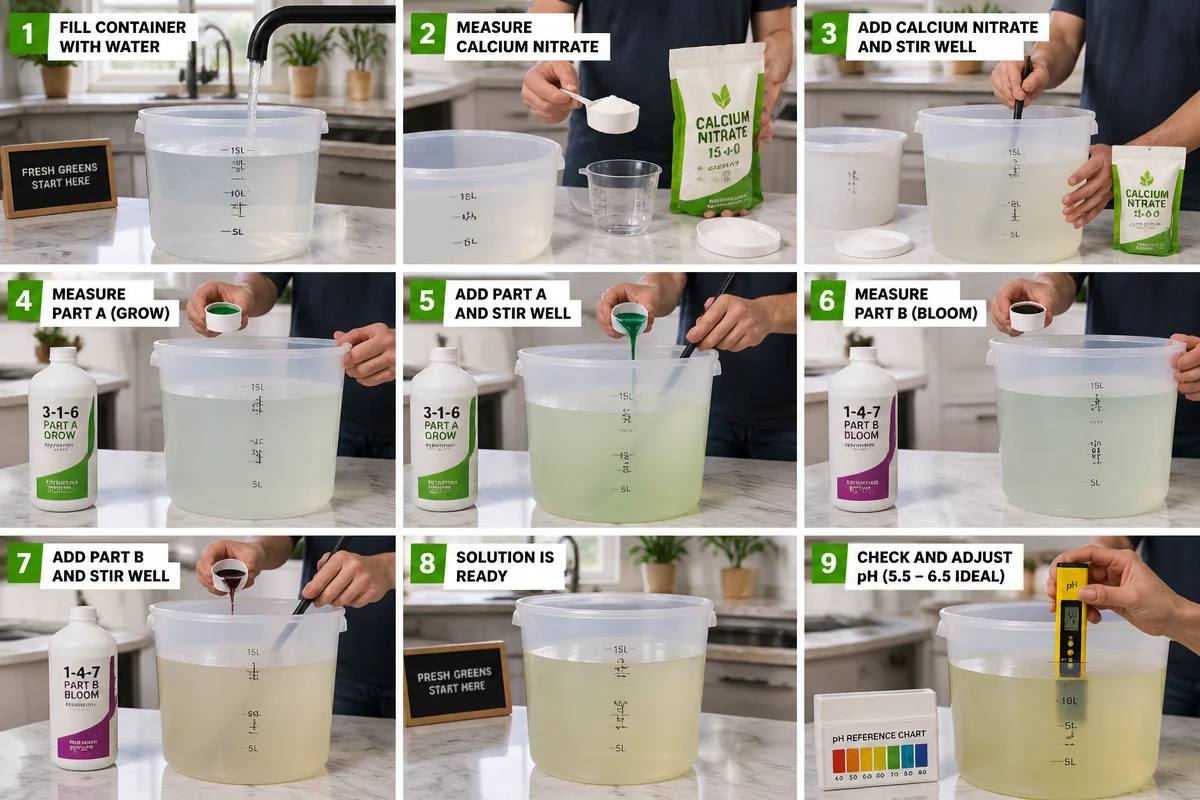
For a 1 gallon batch (about 3.8 liters), I do this:
- Fill your container with water first.
- Add Part A at the label’s “light feed” rate for greens.
- Stir well for 30 to 60 seconds.
- Add Part B at the same “light feed” rate.
- Stir again until fully mixed.
- If using Cal Mag, add it last (unless your product label says otherwise).
- Check EC, then adjust by adding a little more A and B in equal amounts if you need to raise it.
- Check pH and bring it into range.
Target ranges that keep me out of trouble:
Leafy greens and herbs: EC about 1.0 to 1.6, pH about 5.8 to 6.2.
Fruit crops like tomatoes and peppers usually like higher EC, but that is a different vibe and I do not push beginners there on day one.
Important little rule that saves headaches: do not mix Part A and Part B together in a measuring cup before adding to water. Add each one separately into the water with stirring between. If you mix them concentrated, some nutrients can precipitate and drop out, meaning your plants do not get what you paid for.
This is also where I remind myself to keep things relaxed. If I am doing a reservoir change and it is taking longer than I thought, I will set up something easy to snack on later. I am obsessed with grab and go breakfasts, and these 5 minute smoothie prep packs are perfect when you are elbow deep in plant projects.
My quick “first batch” tip: start lighter than you think. You can always increase EC next time. Overfeeding is harder to fix than slightly underfeeding.
Benefits of DIY Hydroponic Nutrient Solutions
Making your own mix is not just about saving money, although it definitely can. For me, it is about control and consistency. When plants look “off,” I want to know what went into the reservoir, not guess which bottle I used two weeks ago.
Here is what I notice most when I mix my own:
1) Less waste
You mix what you need. No half used mystery jugs sitting in a cabinet.
2) Faster troubleshooting
If leaves yellow, I check EC and pH first. If those are fine, I can look at lighting, temperature, or root health. Having a consistent nutrient routine makes every other diagnosis easier.
3) Better plant quality
When the nutrients are steady, my basil tastes stronger and my lettuce is crisp instead of bitter. It is like the difference between a rushed weeknight meal and something you actually took care with.
“I started mixing my own solution using a simple two part program and my greens stopped getting tip burn within two weeks. I thought I needed new lights, but it was my inconsistent feeding the whole time.”
Also, DIY is flexible. If you notice your water is hard, you can skip extra calcium. If you are on RO water, you can add Cal Mag and avoid that sad, crinkly new growth.
On weekends when I do a full clean and reset, I like pairing it with a real treat meal so it feels like a ritual and not a chore. If you need a “set it and forget it” dinner after reservoir day, my guilty pleasure is crispy air fryer chicken legs.
How to Choose Fertilizers
This part can get overwhelming because there are a million options. Here is my no stress method.
Pick a fertilizer made for hydroponics. Soil fertilizers can have particles or forms that do not dissolve well, and hydroponics is all about clean, fully soluble inputs.
Decide between powder salts or liquid concentrates.
Powders are usually cheaper per gallon and store well. Liquids are easier if you want convenience. I started with liquids because I wanted fewer steps, then moved to powders once I felt confident.
Look for a complete profile.
You want something that includes micros. If it does not, you will need a separate micronutrient supplement, and that is fine, just more steps.
Match the formula to the plant.
Leafy greens do great on “grow” or “vegetative” blends. Fruiting plants often need more potassium and a different balance later on. If you only grow greens, keep it simple and stay consistent.
Buy from brands that publish feeding charts.
Charts are not perfect, but they are a real starting point. When a brand gives clear instructions and typical EC targets, it is a sign they understand growers need repeatable results.
And one last practical thing: check your expiration dates and storage. Heat can wreck liquids over time. I store mine in a cool closet, and I always shake before measuring.
If you like having something fun to sip while you read charts and tinker with your system, this autumn herbal tea is cozy and makes the whole “plant parent” thing feel extra wholesome.
Nutrient Solution Concentration and Fertilizer Compatibility
This is where most “my plants look weird” stories start, so let us make it painless.
Concentration is basically how strong your solution is. EC is the easiest way to track it. Instead of obsessing over exact milliliters forever, you can use EC as your guide and adjust.
Here is my simple routine:
After mixing: measure EC and pH, write them down.
Midweek check: measure again. If EC climbed, your plants drank more water than nutrients, so top off with plain water. If EC dropped, your plants ate more nutrients than water, so top off with a lighter nutrient mix.
Compatibility matters because some nutrients react and form solids. If you see cloudy water or gritty stuff at the bottom, that is a red flag. Common causes are mixing concentrates together, adding silica incorrectly, or combining certain calcium products with phosphates in a concentrated form.
My safety rules:
1) Always add nutrients to water, not water to nutrients.
2) Stir between each addition.
3) Do not combine concentrates before dilution.
4) If you use extras like silica, follow the label order.
And yes, temperature matters too. Very cold water can slow dissolving. Very hot water can be rough on some additives. Room temperature is the easiest sweet spot.
Common Questions
Do I need an EC meter, or can I just follow the bottle?
You can follow the bottle, but an EC meter makes everything calmer. It tells you what is really happening, especially when your water source changes.
What pH should I aim for?
Most hydroponic greens are happy around 5.8 to 6.2. If you stay in that pocket, nutrient uptake is usually smooth.
How often should I change the reservoir?
For small home systems, every 1 to 2 weeks is a good rhythm. If it smells off, looks cloudy, or roots look unhappy, change it sooner.
Can I use garden fertilizer in hydroponics?
I would not. Many soil fertilizers are not fully soluble, and some contain things that can gunk up your system or throw off nutrient balance.
Why are my leaves yellow even though I am feeding?
Most of the time it is pH drift, low EC, or root issues. Check pH first, then EC, then make sure your roots have oxygen and are not sitting in warm stagnant water.
Alright, go mix a batch and enjoy the process
If you take anything from my kitchen table approach, let it be this: keep it consistent, measure EC and pH, and start a little lighter until your plants tell you they want more. This hydroponic nutrient solution recipe works because it is simple, repeatable, and easy to adjust as you learn your system. If you want deeper, research backed references, I like reading Hydroponics Systems: Nutrient Solution Programs and Recipes, and for a friendly walkthrough, this guide on How to Make Hydroponic Nutrients at Home: Step-by-Step Guide is genuinely helpful. Now go make your reservoir, give those roots some love, and enjoy that moment when your greens start growing like they mean it. 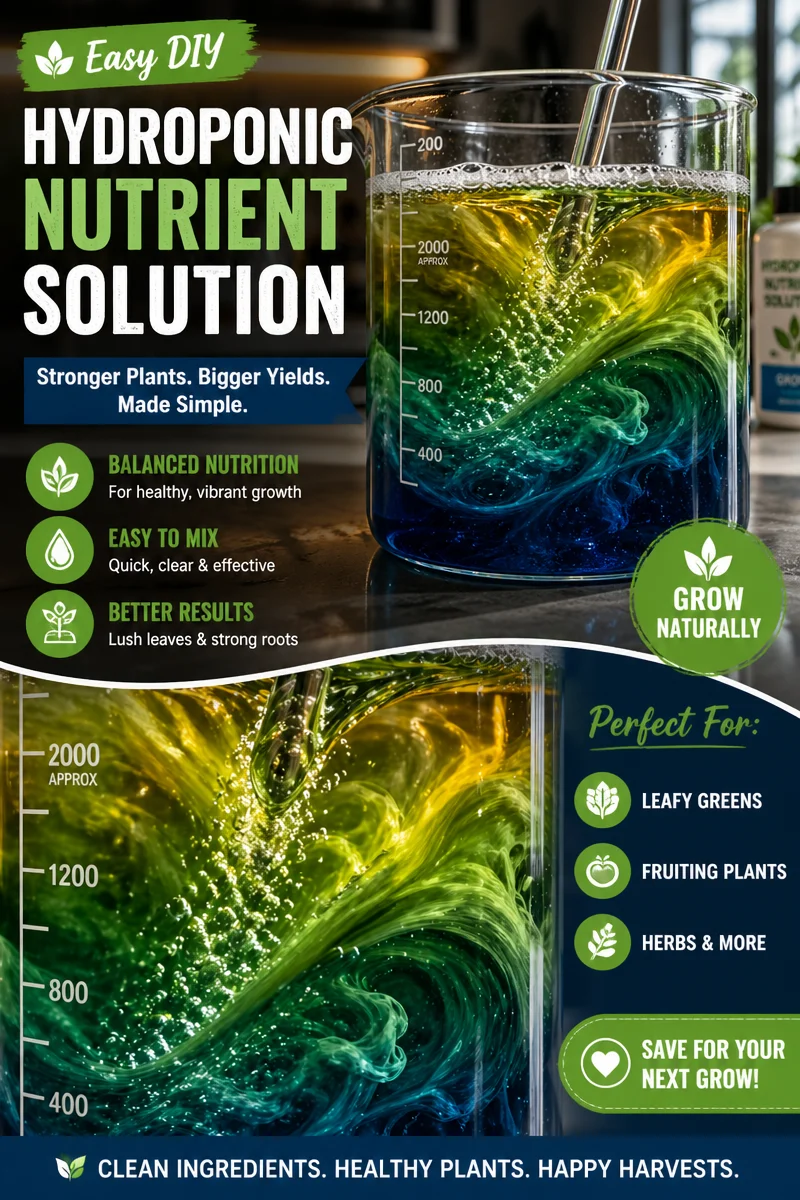
DIY Hydroponic Nutrient Recipe
A practical and repeatable hydroponic nutrient solution recipe that works great for leafy greens and herbs.
- Prep Time: 10 minutes
- Cook Time: 0 minutes
- Total Time: 10 minutes
- Yield: 1 gallon
- Category: Gardening
- Method: Mixing
- Cuisine: N/A
- Diet: N/A
Ingredients
- Two-part hydroponic fertilizer (Part A and Part B)
- Optional: Cal Mag (for RO water)
- Room temperature water
- A clean bucket or reservoir
- Measuring syringes or a teaspoon set
- EC or TDS meter
- pH meter plus pH down and pH up
Instructions
- Fill your container with water first.
- Add Part A at the label’s ‘light feed’ rate for greens.
- Stir well for 30 to 60 seconds.
- Add Part B at the same ‘light feed’ rate.
- Stir again until fully mixed.
- If using Cal Mag, add it last.
- Check EC and adjust if needed by adding more A and B.
- Check pH and bring it into range.
Notes
Start lighter than you think; you can always increase EC next time. Avoid mixing Part A and Part B together in a measuring cup to prevent nutrient precipitation.
Nutrition
- Serving Size: 1 gallon
- Calories: 0
- Sugar: 0g
- Sodium: 0mg
- Fat: 0g
- Saturated Fat: 0g
- Unsaturated Fat: 0g
- Trans Fat: 0g
- Carbohydrates: 0g
- Fiber: 0g
- Protein: 0g
- Cholesterol: 0mg
Keywords: hydroponics, nutrient solution, DIY fertilizer, gardening, plant care