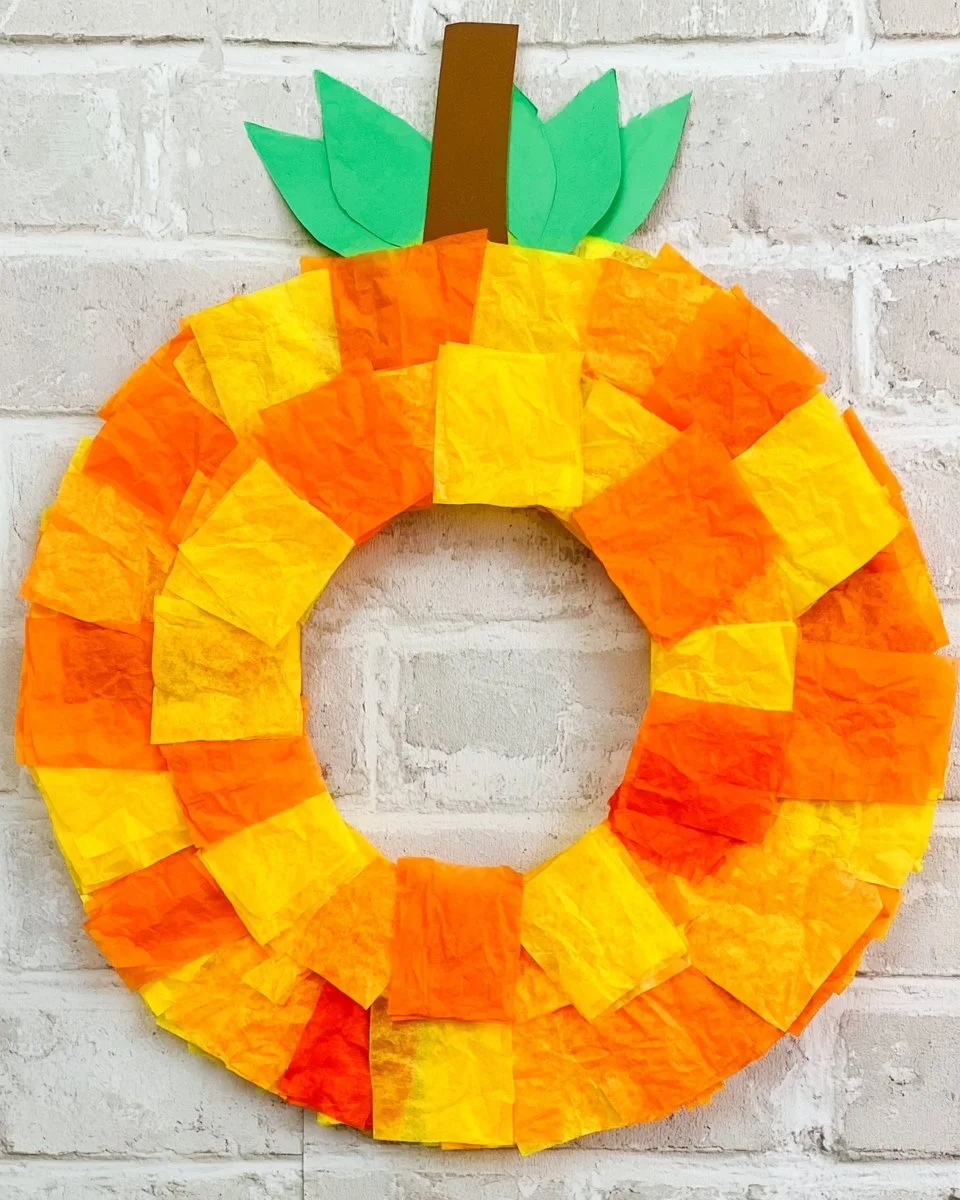
Creating a pumpkin wreath is an exciting and easy DIY project that adds warmth and charm to your home decor. This creative DIY idea is perfect for the fall season and Halloween. Whether you are looking for budget-friendly crafts or easy crafts for adults, this pumpkin wreath fits the bill. It’s a fun craft that can be made quickly with simple materials, making it an ideal option for those new to crafting.
In this article, we’ll guide you through every step of making a pumpkin wreath that’s perfect for seasonal decorating, and share helpful tips for beginners to create their unique version. Let’s dive into this fun project!
WHY YOU WILL LOVE THIS Pumpkin Wreath
The pumpkin wreath is a delightful and straightforward project that will spark your creativity. Here are a few reasons why you’ll enjoy making this decoration:
- Easy for Beginners: With simple steps, you won’t need prior crafting experience to create this wreath.
- Uses Simple Materials: You can easily find all the materials needed, often right in your home.
- Budget-Friendly: This is a wallet-friendly craft that doesn’t require expensive items.
- Quick to Make: You can complete the project in around an hour, making it a great option for busy schedules.
- Great for Home Decor: Ideal for enhancing your front door, windows, or walls during the fall season.
- Easy to Customize: You can personalize it to fit your style by changing colors or adding decorative elements.
PROJECT DETAILS
Skill Level
This project is designed for beginners, making it a perfect choice for those just starting with crafts.
Estimated Time
You can expect to spend about 30-60 minutes to complete your pumpkin wreath, allowing for some drying time for glue.
Approximate Cost
The total cost for materials is very low—around $10 to $15—making it an affordable option for DIY home decor.
Best For
This craft works well for home decoration, seasonal events, or as a handmade gift for friends and family.
Project Type
This is a no-sew craft that requires minimal supplies, making it ideal for anyone looking for simple crafts that are engaging and fun.
TOOLS AND EQUIPMENT NEEDED
Scissors
You will need scissors for cutting tissue paper into manageable squares and trimming the paper plate.
Glue
White glue will be used to adhere the tissue paper to the plate and secure decorative elements.
Sticky Tape
Sticky tape is helpful for attaching the ribbon securely at the back of the wreath.
MATERIALS
Paper Plates
The foundation of your pumpkin wreath, a paper plate serves as the base for creating your pumpkin’s shape.
Tissue Paper (in Yellows and Oranges)
Tissue paper will be torn into squares and glued onto the plate, forming the pumpkin’s body and giving it a festive look.
White Glue
This is essential for adhering the tissue paper to the plate and any other decorative elements.
Green and Brown Marker Pens
These markers will be used to color the leaves and stalk of the pumpkin for a realistic finish.
Green Ribbon
The ribbon will create a loop for hanging the pumpkin wreath, adding a nice touch to your decor.

HOW TO MAKE Pumpkin Wreath
Making your pumpkin wreath is a simple and enjoyable process. Follow these steps to create your beautiful decoration:
Step 1: Cut the Middle Out of the Paper Plate
Start by cutting out the center of the paper plate, leaving a ring that forms the base of your wreath. Save the inner circle as you’ll use it to make the leaves and stalk later.
Step 2: Prepare the Tissue Paper
Tear the tissue paper into small squares. You will need many pieces to cover the entire rim of the paper plate. Aim for a mix of orange and yellow, which will mimic the colors of a pumpkin.
Step 3: Apply Glue to the Plate Rim
Take a thin layer of white glue and apply it around the rim of the paper plate. Be sure to spread it evenly so that the tissue squares stick well.
Step 4: Attach the Tissue Paper Squares
Begin placing the tissue paper squares onto the glued rim. You can overlap the pieces to create a fuller look. Cover the entire rim of the plate completely with the tissue paper.
Step 5: Create Leaves and Stalk
Using the inner circle of the paper plate, cut out leaf shapes and a stalk for the pumpkin. You can design these however you like. Once cut, use the green and brown marker pens to color them in.
Step 6: Attach Leaves and Stalk to the Wreath
Once the wreath base is complete and dried, glue the pumpkin stalk and leaves to the top of the wreath. Make sure they are securely fastened for the best visual effect.
Step 7: Make a Hanging Loop
Cut a short length of green ribbon. Use sticky tape to attach it to the back of the wreath at the top. The ribbon will create a loop for hanging your finished pumpkin wreath.
Step 8: Display Your Wreath
Your pumpkin wreath is now ready! Hang it on a door, window, or wall. It’s a lovely addition to your autumn and Halloween decorations.
TIPS AND TRICKS
- Choosing Materials: Use vibrant tissue paper for a more appealing look. Craft stores often have deals on craft supplies.
- Cutting: For more uniform tissue squares, consider folding the paper before tearing it, which can help maintain consistent sizes.
- Gluing: Apply a thin layer of glue to avoid a messy finish. Too much glue can also cause the tissue paper to wrinkle.
- Avoiding Common Mistakes: Be patient when applying the tissue paper. Let it dry fully before moving on to the next step.
- Better Finish: Ensure that the edges of the tissue paper are well adhered to the plate for a clean appearance.
- Saving Money: Look for leftover materials from previous crafts. This is perfect for creating a budget-friendly DIY project.
- Making It Last: Store your wreath in a cool, dry place when not in use. It can be displayed year after year with proper care.
- Working Safely: Always use scissors carefully, especially if children are helping you.
VARIATIONS AND CUSTOMIZATION IDEAS
- Different Colors: Use different shades of orange, yellow, and even brown or white tissue paper for various pumpkin styles.
- Different Sizes: Create larger or smaller versions of the wreath based on the size of the paper plates you use.
- Different Patterns: Try using patterned tissue paper for a unique look that adds an artistic flair.
- Personalized Versions: Add names or seasonal greetings written in marker on the wreath for a personalized touch.
- Seasonal Versions: Consider making a winter variation using white tissue paper to create a snowman wreath!
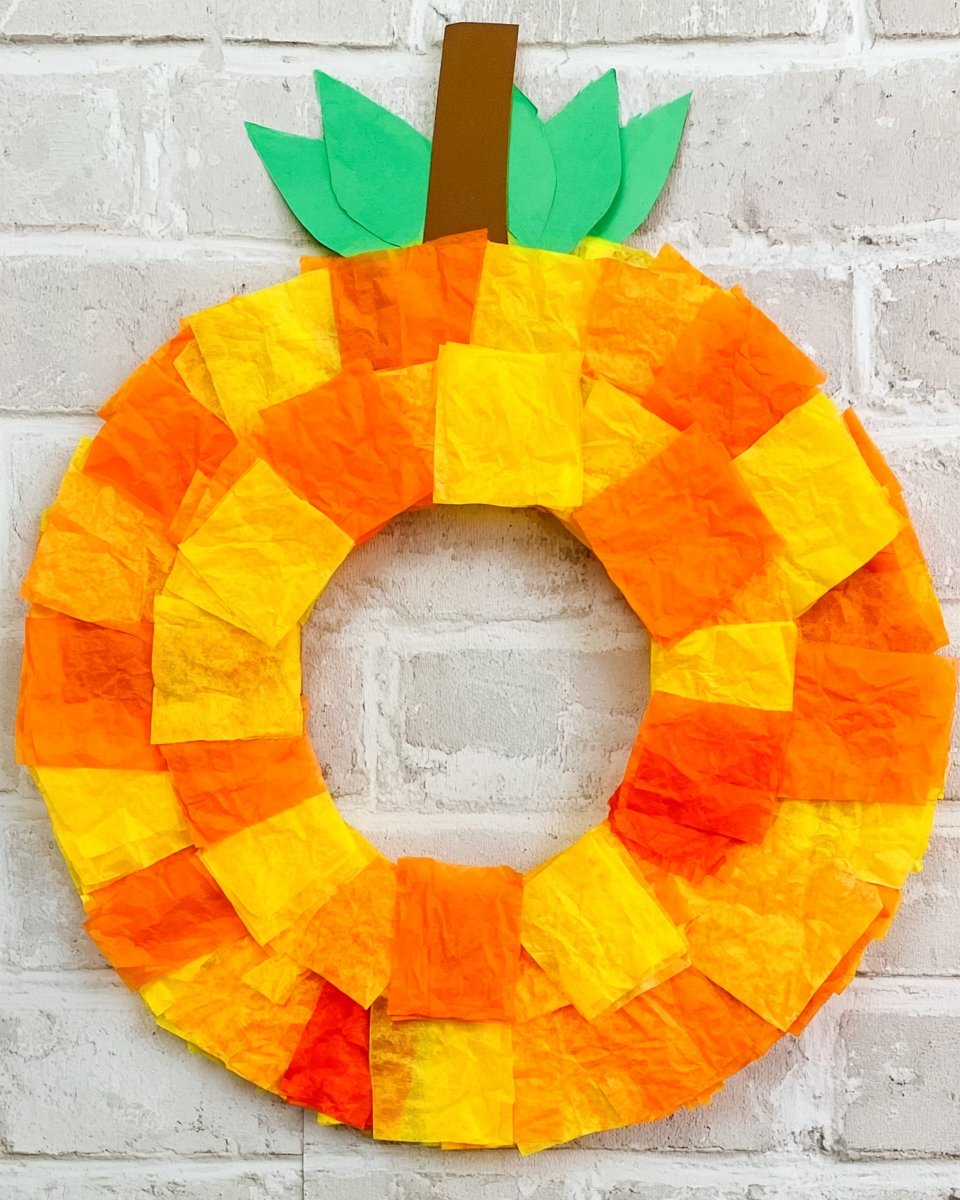
Pumpkin Wreath FAQ
1. How difficult is this craft for beginners?
This pumpkin wreath project is beginner-friendly, making it easy for those with little to no crafting experience to complete successfully.
2. What materials do I need for this project?
You will need paper plates, tissue paper in yellows and oranges, white glue, green and brown marker pens, green ribbon, scissors, and sticky tape.
3. How long does it take to make the pumpkin wreath?
The entire process should take around 30-60 minutes, including drying time for the glue.
4. How should I store the finished wreath?
To preserve your pumpkin wreath, store it in a cool, dry place. You might want to wrap it in tissue paper or place it in a box to protect it from dust.
5. Can I customize the pumpkin wreath for different seasons?
Absolutely! You can easily adapt the colors and decorations to fit different holidays or seasons, such as using winter colors for Christmas.
CONCLUSION
The pumpkin wreath is a delightful and straightforward project that is ideal for seasonal decorating. It’s an easy craft idea that allows beginners to explore their creativity while making something beautiful for the home. With simple materials and easy steps, anyone can create their unique version.
Whether you are making it for your home or as a handmade gift, this project is both fun and practical. We encourage you to try making the pumpkin wreath and share your experiences or customization ideas with others. Happy crafting!
PrintPumpkin Wreath
Create a charming pumpkin wreath that adds warmth to your home decor this fall season. Perfect for beginners, this easy DIY project is budget-friendly and quick to make.
- Prep Time: 10 minutes
- Cook Time: 30 minutes
- Total Time: 40 minutes
- Yield: 1 wreath
- Category: DIY Crafts
- Method: Crafting
- Cuisine: N/A
- Diet: N/A
Ingredients
- Paper Plates
- Tissue Paper (in Yellows and Oranges)
- White Glue
- Green and Brown Marker Pens
- Green Ribbon
- Scissors
- Sticky Tape
Instructions
- Cut the middle out of the paper plate to form a ring.
- Tear the tissue paper into small squares.
- Apply glue around the rim of the paper plate.
- Attach the tissue paper squares to the glued rim.
- Create leaves and a stalk from the inner circle of the plate.
- Glue the leaves and stalk to the top of the wreath.
- Cut a length of ribbon and attach it to the back for hanging.
- Display your wreath on a door or wall.
Notes
Consider using vibrant tissue paper and uniform sizes for a polished look. Let each section dry fully before proceeding to the next step.
Nutrition
- Serving Size: 1 wreath
- Calories: 0
- Sugar: 0g
- Sodium: 0mg
- Fat: 0g
- Saturated Fat: 0g
- Unsaturated Fat: 0g
- Trans Fat: 0g
- Carbohydrates: 0g
- Fiber: 0g
- Protein: 0g
- Cholesterol: 0mg
Keywords: pumpkin wreath, DIY crafts, fall decorations, beginner DIY, budget-friendly crafts