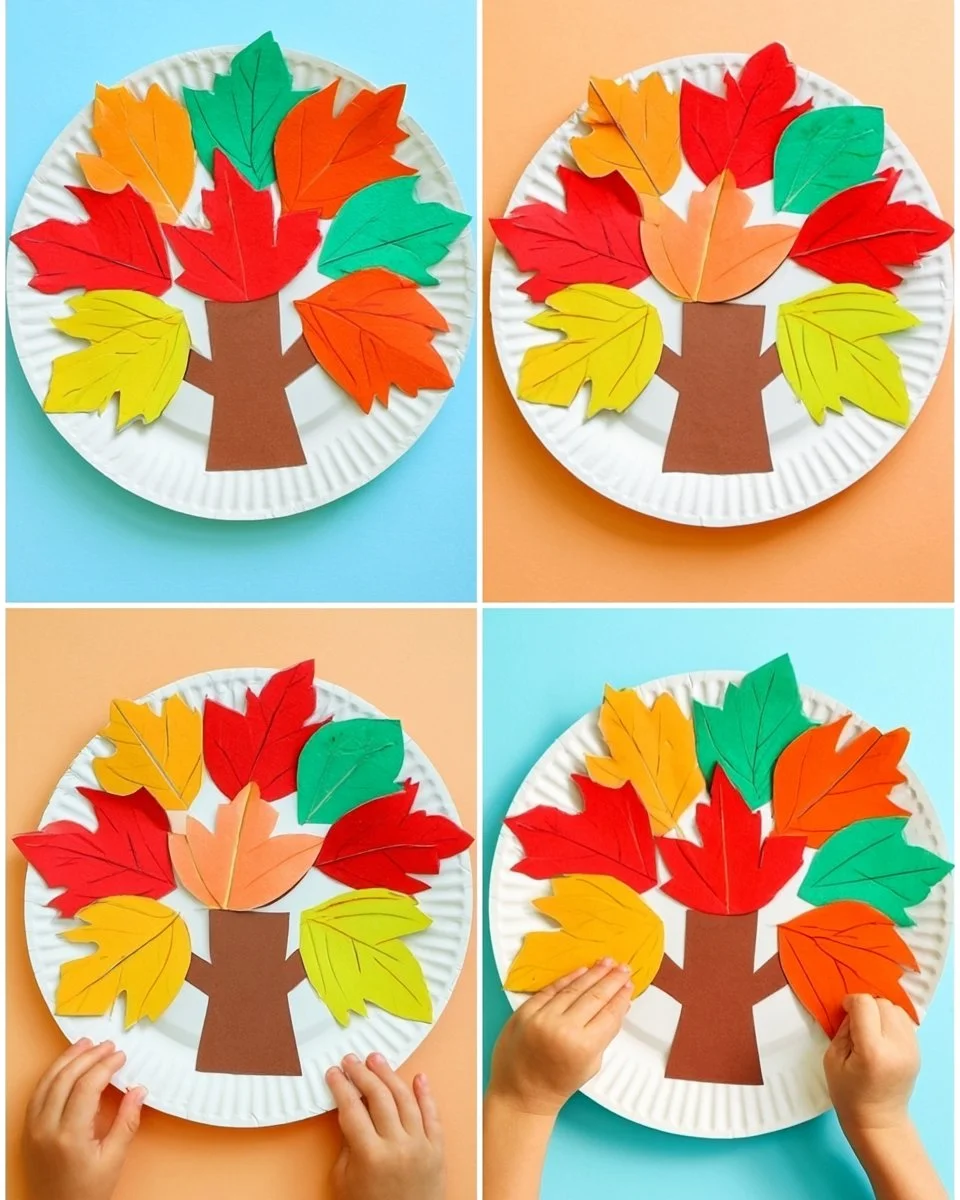
Creating a beautiful Paper Plate Autumn Tree craft is an easy DIY project that captures the essence of fall. This delightful craft idea is not only perfect for kids but also serves as a creative DIY home decor piece. With simple materials and straightforward instructions, anyone—from beginners to seasoned crafters—can enjoy this seasonal craft. Whether you’re looking for a fun indoor activity or a budget-friendly way to bring autumn vibes into your home, this paper plate craft is an excellent choice. Let’s get started!
WHY YOU WILL LOVE THIS Paper Plate Autumn Tree Craft
There are numerous reasons why you will enjoy making the Paper Plate Autumn Tree Craft:
-
Easy for Beginners: This craft is ideal for those who are new to crafting. The instructions are simple to follow, making it a fun project for all ages.
-
Uses Simple Materials: Most of the materials you need can be found around the house or at a local craft store, making it an accessible project for everyone.
-
Budget-Friendly: Since the materials are inexpensive, this craft won’t break the bank. It’s a great option for anyone wanting to create seasonal decor on a budget.
-
Quick to Make: The project can be completed in less than an hour, making it perfect for a spontaneous crafting session with friends or family.
-
Great for Home Decor: Once complete, this paper plate tree can add a festive touch to your home for the autumn season.
-
Easy to Customize: You can easily personalize your tree craft with different colors, textures, and sizes to make it uniquely yours.
PROJECT DETAILS
Skill Level
This project is beginner-friendly and perfect for crafters of all ages and skill levels.
Estimated Time
The Paper Plate Autumn Tree can be made in approximately 30-45 minutes, depending on your crafting speed and any customization you choose.
Approximate Cost
The total cost of materials is likely to be under $10, making this a budget-friendly DIY project.
Best For
This project is best for families, schools, or anyone looking to spruce up their home decor for the fall season.
Project Type
This is a simple craft that doubles as a seasonal decoration, suitable for various occasions, including autumn festivities and Halloween.
TOOLS AND EQUIPMENT NEEDED
Scissors
Scissors are essential for cutting paper plates and other materials to shape your autumn tree.
Glue
White school glue or a glue stick works best for sticking elements together. Ensure it’s suitable for paper-based crafts.
Paintbrush (Optional)
If you choose to paint your tree or add additional decorations, a paintbrush will help apply the paint evenly.
MATERIALS
Paper Plates
The base of your autumn tree will be made from paper plates. You can use one or multiple plates depending on how big you want your tree.
Brown and Green Construction Paper (or Cardstock)
This will be used to create the trunk and leaves of the tree. Brown paper will form the trunk, while green paper can be cut to provide extra leaf details.
Colored Tissue Paper
Brightly colored tissue paper (like red, orange, and yellow) will imitate autumn leaves. This material adds texture and vibrancy to your tree craft.
Googly Eyes (Optional)
Add a fun, whimsical touch to your tree by using googly eyes. These can give your tree a friendly character.
Markers or Crayons
These will allow you to add details, such as the trunk texture or decorative elements on the plates.

HOW TO MAKE Paper Plate Autumn Tree Craft
Step 1: Prepare Your Materials
Gather all your materials, including paper plates, construction paper, colored tissue paper, scissors, glue, and craft supplies.
Step 2: Create the Tree Trunk
Take the brown construction paper and cut out a rectangle approximately 1-2 inches wide and 6-8 inches high, depending on how tall you want your trunk to be. Use glue to attach the trunk to the center of the paper plate.
Step 3: Make the Tree Canopy
Cut the green construction paper into leaf shapes. You can make them large or small, depending on your preference. Glue these shapes around the top of the tree trunk.
Step 4: Add Colorful Leaves
Next, tear or cut colored tissue paper into small pieces. Crumple the pieces gently to create a 3D effect. Glue these pieces onto the tree’s canopy, filling in the space to resemble colorful autumn leaves.
Step 5: (Optional) Add Googly Eyes
If you want your tree to have a face, glue googly eyes onto the trunk. This small detail adds a playful character to your autumn tree.
Step 6: Draw Details
Use markers or crayons to draw bark on the trunk or to add personal touches to your trees, like smiley faces or decorations.
Step 7: Allow to Dry
Once all the glue has been applied, allow your craft to dry completely. This ensures that everything holds together nicely.
TIPS AND TRICKS
-
Choosing Materials: If you’re short on construction paper, consider using old wrapping paper or cardboard as substitutes for the trunk and leaves.
-
Cutting and Assembling: When cutting paper shapes, it’s best to use sharp scissors to ensure clean edges.
-
Avoiding Common Mistakes: Make sure your glue is applied evenly to avoid any messy spots.
-
Customization: Don’t be afraid to experiment with different materials! Glitter or sequins can be added for extra embellishment.
-
Making the Craft Last Longer: For a more durable craft, consider using upcycled materials or sturdier paper rather than standard tissue paper.
-
Working Safely: Always use scissors carefully, and supervise younger crafters to ensure they are safe while working.
VARIATIONS AND CUSTOMIZATION IDEAS
-
Different Colors: Use various hues of tissue paper or even fabric scraps to produce a unique autumn tree.
-
Different Sizes: Create mini trees for table decorations or large trees to fill up wall space.
-
Seasonal Versions: Modify the craft for other seasons, transforming the colors and shapes to symbolize spring blooms, summer foliage, or winter scenes.
-
Personalized Versions: Have children write their names on the trunk or add family photos as leaves.
-
Mixed Media: Incorporate items like dried leaves or pinecones to give a more textured appearance.
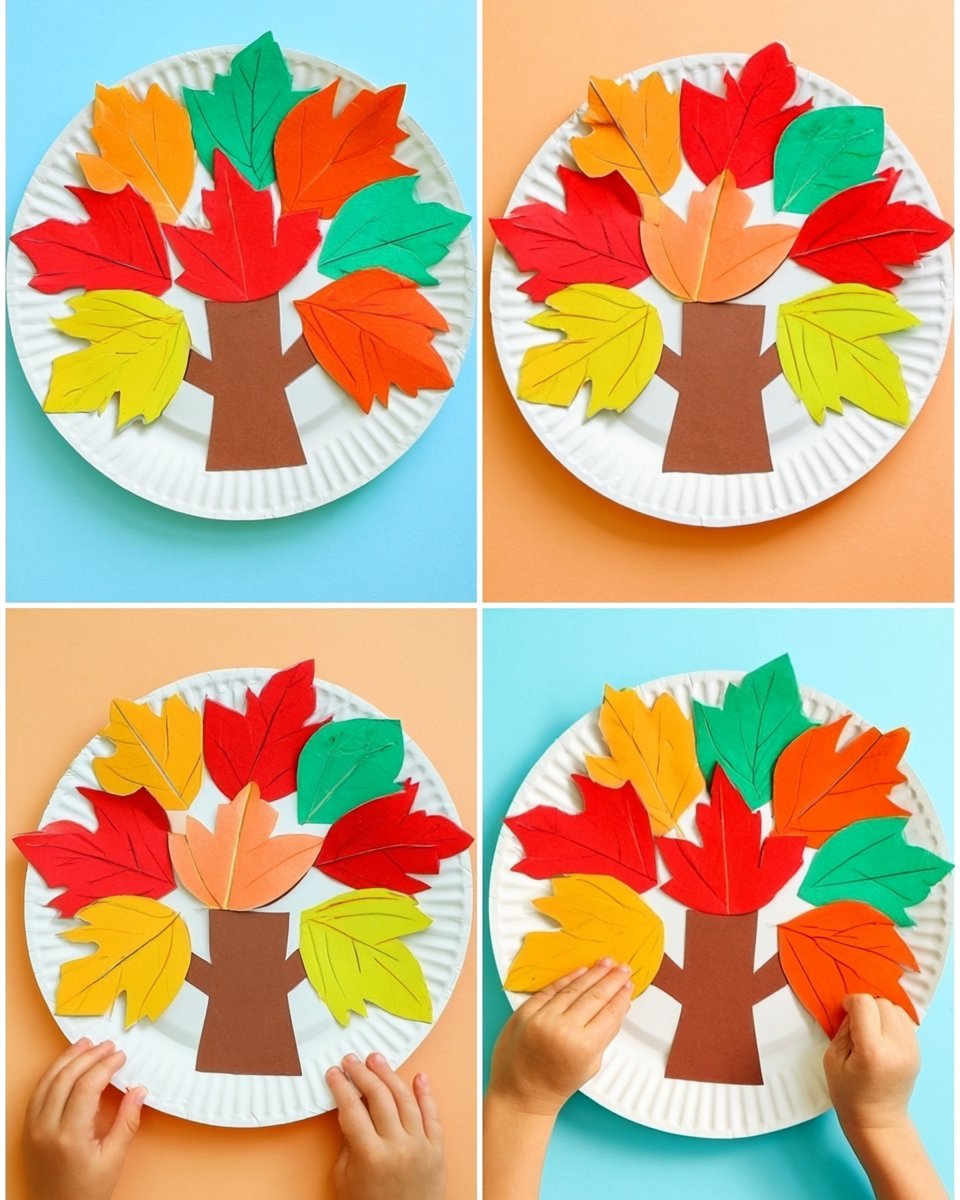
Paper Plate Autumn Tree Craft FAQ
Q: Is this craft suitable for younger kids?
A: Yes! This is a beginner-friendly craft suitable for all ages, especially with adult supervision for cutting and gluing.
Q: How long does this project take to complete?
A: The craft can be finished in approximately 30-45 minutes, making it a quick and enjoyable activity.
Q: What materials do I need to make this craft?
A: You will need paper plates, construction paper, colored tissue paper, glue, scissors, and optional items like googly eyes and markers.
Q: How should I store my finished craft?
A: Keep completed crafts in a dry, cool place to avoid damage. They can be displayed on a shelf or hung up using string.
Q: Can I customize the size of the tree?
A: Absolutely! You can create different sizes of trees by using larger or smaller plates and adjusting the trunk and leaf sizes accordingly.
CONCLUSION
The Paper Plate Autumn Tree Craft is an easy DIY project that invites creativity and fun into anyone’s home. With simple materials and straightforward steps, this beginner-friendly craft is perfect for families, schools, or anyone looking to add a seasonal touch to their decor. Enjoy personalizing your autumn tree with unique colors and textures, and don’t forget to share your experience and customization ideas with fellow crafters. Embrace the spirit of fall with this delightful, budget-friendly DIY project!
PrintPaper Plate Autumn Tree Craft
Create a beautiful Paper Plate Autumn Tree craft that captures the essence of fall, perfect for kids and as home decor.
- Prep Time: 15 minutes
- Cook Time: 30 minutes
- Total Time: 45 minutes
- Yield: 1 craft
- Category: Craft
- Method: DIY
- Cuisine: N/A
- Diet: N/A
Ingredients
- Paper Plates
- Brown Construction Paper
- Green Construction Paper
- Colored Tissue Paper (Red, Orange, Yellow)
- Googly Eyes (Optional)
- Markers or Crayons
- Glue
- Scissors
Instructions
- Prepare Your Materials
- Create the Tree Trunk
- Make the Tree Canopy
- Add Colorful Leaves
- Add Googly Eyes (Optional)
- Draw Details
- Allow to Dry
Notes
Consider using old wrapping paper or cardboard as substitutes for trunk and leaves if short on construction paper.
Nutrition
- Serving Size: 1 craft
- Calories: 0
- Sugar: 0g
- Sodium: 0mg
- Fat: 0g
- Saturated Fat: 0g
- Unsaturated Fat: 0g
- Trans Fat: 0g
- Carbohydrates: 0g
- Fiber: 0g
- Protein: 0g
- Cholesterol: 0mg
Keywords: fall crafts, autumn decor, DIY crafts, kids crafts, paper crafts