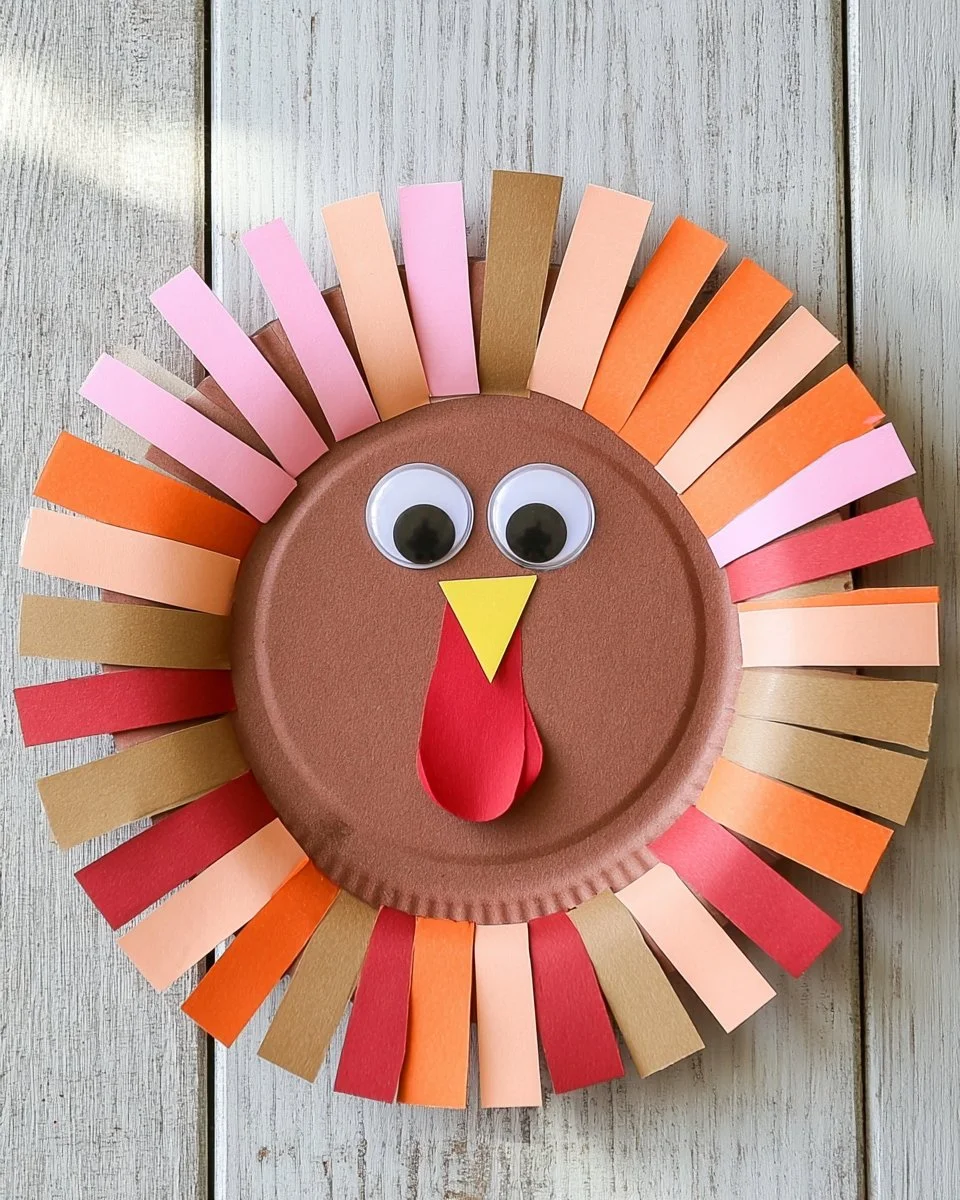
The Paper Plate Thanksgiving Turkey Wreath is a delightful and creative DIY craft that captures the spirit of Thanksgiving. It’s an easy craft that uses simple materials and is perfect for beginners and families looking to engage in seasonal crafts together. This DIY project not only adds a touch of handmade decor to your home but also makes a wonderful decoration for the holiday and a thoughtful homemade gift for loved ones. Let’s explore this fun craft that is both budget-friendly and promotes creativity!
WHY YOU WILL LOVE THIS Paper Plate Thanksgiving Turkey Wreath
You’ll enjoy making the Paper Plate Thanksgiving Turkey Wreath for several reasons:
- Easy for beginners: This craft simplifies traditional wreath-making, making it accessible for people just starting out in DIY.
- Uses simple materials: Most of the materials can be found around the house or at local craft stores, minimizing hassle and cost.
- Budget-friendly: Creating this wreath doesn’t require expensive supplies, making it a great option for those on a budget.
- Quick to make: This project can be completed in under an hour, providing a satisfying crafting experience without consuming an entire afternoon.
- Great for home decor: The finished wreath can be proudly displayed in your home, adding a festive touch to your entryway or dining room.
- Great for gifts: This wreath makes a charming handmade gift for friends or family during the Thanksgiving season.
- Easy to customize: You can tailor the colors and embellishments to match your personal style or home decor.
PROJECT DETAILS
Skill Level
Beginner-friendly. This craft requires no complex techniques, making it suitable for crafters of all ages.
Estimated Time
Approximately 30-60 minutes. The time may vary depending on your crafting speed and the level of customization you choose.
Approximate Cost
Around $10 or less if you use materials readily available at home. The wreath can be made using inexpensive supplies available at craft stores.
Best For
This project is ideal for families, classrooms, and anyone looking to make seasonal decorations or gifts.
Project Type
A simple, creative DIY project suitable for home decor or holiday celebrations.
TOOLS AND EQUIPMENT NEEDED
Scissors
Essential for cutting the paper plates into the desired shapes to create the turkey.
Hot Glue Gun
Used to attach different parts of the wreath together securely.
Paintbrush
If you choose to paint any parts of the turkey, a paintbrush will help apply color evenly.
MATERIALS
Paper Plates
The base of your wreath is made from paper plates. Each plate can be cut and decorated to form the turkey and the wreath.
Construction Paper
Using different colors of construction paper will allow you to create vibrant feathers and facial features for your turkey.
Googly Eyes
These fun embellishments will bring your turkey to life and add a whimsical touch.
Brown Paint or Brown Construction Paper
This is used for the body of the turkey, giving it a realistic look.
Marker or Pen
To outline and draw details, such as the turkey’s beak and wattle.
Ribbon or String
Used for hanging the wreath or decorating the wreath further for an added touch.
Optional Decorations
Feel free to include additional decorations such as leaves, acorns, or other seasonal accents to enhance your wreath.

HOW TO MAKE Paper Plate Thanksgiving Turkey Wreath
Step 1: Prepare the Base
Start by taking two paper plates. Lay one plate flat to serve as the base of the wreath. Take the second plate and cut it in half. These halves will form the turkey’s body.
Step 2: Shape the Turkey
Use one half of the cut plate for the body of the turkey. For the second half, cut it into a small oval shape to create the head. Paint the body and head with brown paint or cover them with brown construction paper for a smooth finish.
Step 3: Create the Feather Base
Take additional paper plates and cut them into feather shapes. Feel free to make them different sizes and colors using construction paper. Colors could include red, orange, yellow, and green, representing the beautiful hues of autumn.
Step 4: Attach Feathers to the Base
Once you have a colorful collection of feathers, start gluing them around the edge of the flat paper plate. Overlap the feathers for fullness and add dimension to the wreath.
Step 5: Assemble the Turkey
Glue the painted turkey body and head onto the center of the wreath. Make sure the head is slightly tilted for a playful appearance.
Step 6: Add the Eyes and Details
Glue on the googly eyes to bring your turkey’s face to life. Then, use a marker to add a beak and wattle. You can also add additional decorations like leaves or embellishments to fill empty spaces.
Step 7: Create a Hanging Mechanism
Take a piece of ribbon or string and cut it to your desired length. Glue one end securely on the back of the wreath to create a loop for hanging.
Step 8: Display Your Wreath
Choose a spot in your home to hang your beautifully crafted Paper Plate Thanksgiving Turkey Wreath. It can be displayed on your front door or over a fireplace, adding charm to your seasonal decor.
TIPS AND TRICKS
- Choosing materials: Use sturdy paper plates to ensure your wreath holds together well. If you like a different texture, consider using sturdy cardboard instead.
- Cutting: Take your time when cutting out shapes to ensure they are uniform and neat, enhancing the overall appearance of your wreath.
- Gluing: A hot glue gun may be hot, so handle it carefully. Allow glue to cool slightly before applying it to prevent burns.
- Finishing touches: Don’t skip the eyes! They add character to your turkey. If you don’t have googly eyes, you can draw some on using a pen.
- Storage: Once the season is over, store your wreath in a cool, dry place. This will help maintain its shape and color for next year.
- Clean: If any glue spills or paint gets on surfaces, clean it up quickly with water and cloth to avoid staining.
VARIATIONS AND CUSTOMIZATION IDEAS
- Different colors: Experiment with the colors of feathers or turkey elements. Pastels can give a softer look, while bold colors make it pop.
- Different materials: Instead of feathers, consider using fabric scraps or paper towels cut into feather shapes for a unique texture.
- Seasonal versions: Change the theme based on other holidays, like a Christmas wreath using red and green colors with a Santa twist.
- Different sizes: Create a mini wreath for a table centerpiece or larger versions for doors.
- Personalized versions: Add names to your wreath to make it more personal for family members or guests.
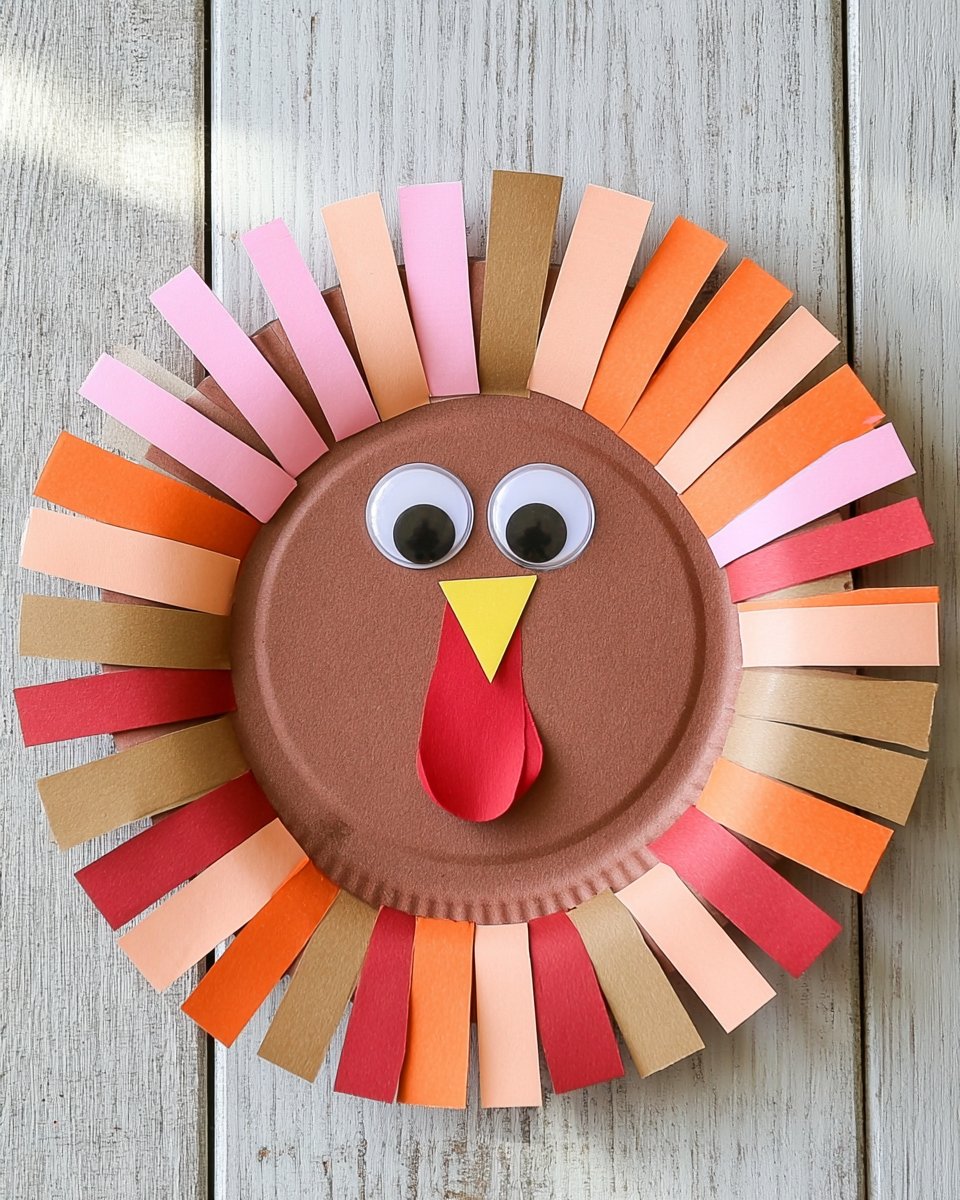
Paper Plate Thanksgiving Turkey Wreath FAQ
How difficult is this craft?
This craft is beginner-friendly and easy for crafters of all ages. It involves simple cutting and gluing techniques, making it perfect for families or classrooms.
What materials do I need to make the wreath?
You need paper plates, construction paper, googly eyes, brown paint, glue, scissors, a paintbrush, and optional decorations. Most of these materials are budget-friendly and often found around the house.
How long does it take to complete the wreath?
Typically, it takes about 30 to 60 minutes to complete the wreath, depending on your creative pace.
Can I store the wreath for next year?
Yes! Store your wreath in a cool, dry place to keep it intact for future seasons. Just be gentle with it to preserve its shape.
Is it safe for kids to make this project?
While this craft is generally safe for children, adult supervision is recommended when using scissors and hot glue guns.
CONCLUSION
Creating a Paper Plate Thanksgiving Turkey Wreath is a fun and easy craft project perfect for anyone looking to add a touch of seasonal decor to their home. It’s a budget-friendly DIY that combines creativity with simplicity, making it an ideal activity for families or beginners exploring DIY projects. Whether you hang it as a festive decoration or gift it to a loved one, this wreath celebrates the spirit of Thanksgiving beautifully. Try this easy craft and share your experience or customization ideas with friends and family!
PrintPaper Plate Thanksgiving Turkey Wreath
Create a delightful Paper Plate Thanksgiving Turkey Wreath using simple materials. This easy DIY craft is perfect for families and adds a festive touch to your home decor.
- Prep Time: 15 minutes
- Cook Time: 0 minutes
- Total Time: 30 minutes
- Yield: 1 wreath
- Category: Craft
- Method: DIY
- Cuisine: N/A
- Diet: N/A
Ingredients
- Paper Plates
- Construction Paper
- Googly Eyes
- Brown Paint or Brown Construction Paper
- Marker or Pen
- Ribbon or String
- Optional Decorations (e.g., leaves, acorns)
Instructions
- Prepare the Base: Start by taking two paper plates. Lay one flat to serve as the base of the wreath. Cut the second in half for the turkey body.
- Shape the Turkey: Use one half for the body and the other half for the head. Paint them or cover with construction paper.
- Create the Feather Base: Cut additional paper plates into feather shapes, using various colors of construction paper.
- Attach Feathers: Glue them around the edge of the flat paper plate.
- Assemble the Turkey: Glue the painted turkey body and head onto the center of the wreath.
- Add the Eyes: Glue on googly eyes and draw a beak and wattle using a marker.
- Create a Hanging Mechanism: Cut a piece of ribbon or string for hanging.
- Display Your Wreath: Choose a spot to hang your wreath and enjoy your handmade decor!
Notes
Use sturdy materials for better durability. Handle hot glue carefully and allow it to cool before applying.
Nutrition
- Serving Size: 1 wreath
- Calories: 0
- Sugar: 0g
- Sodium: 0mg
- Fat: 0g
- Saturated Fat: 0g
- Unsaturated Fat: 0g
- Trans Fat: 0g
- Carbohydrates: 0g
- Fiber: 0g
- Protein: 0g
- Cholesterol: 0mg
Keywords: Thanksgiving craft, DIY wreath, seasonal decor, family activities, holiday crafts