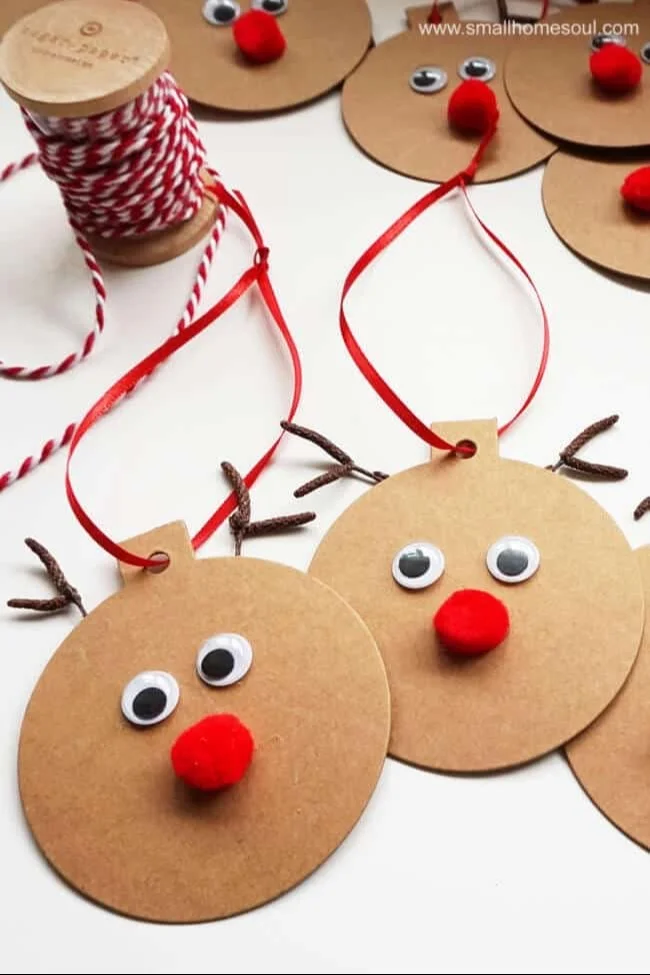
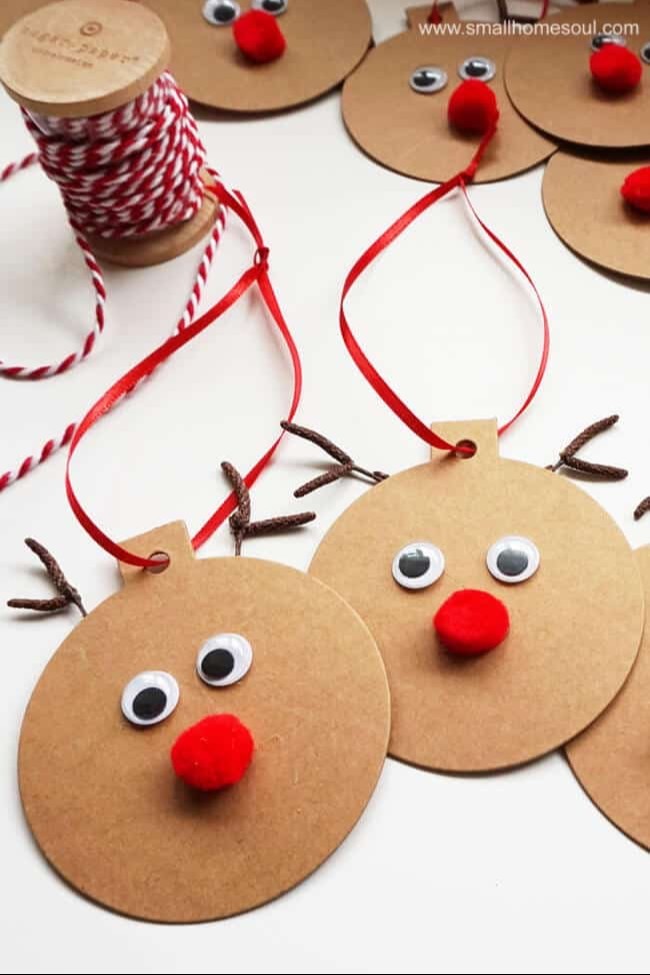
Are you looking for a fun and creative DIY craft idea for the holiday season? Look no further than these adorable Rudolph Gift Tags! This easy craft project is perfect for anyone—whether you’re a seasoned crafter or just starting out. With a few simple materials, you can create beautiful and personalized gift tags that add a special touch to your presents. Plus, it’s a budget-friendly way to make your holiday gifts stand out. In this article, we’ll guide you step-by-step through making your own Rudolph Gift Tags, ideal for holiday gifts and homemade decor.
WHY YOU WILL LOVE THIS Rudolph Gift Tags
Making Rudolph Gift Tags is not only enjoyable, but it also offers several rewarding benefits:
- Easy for Beginners: This craft is simple enough for crafters of all levels, making it an excellent choice, even for those new to DIY projects.
- Uses Simple Materials: You don’t need many complicated items or special equipment to make these cute tags.
- Budget-Friendly: Most materials can be found at home or at a low cost, making this project easy on the wallet.
- Quick to Make: You can whip these tags up in less than an hour, perfect for a last-minute holiday crafting session.
- Great for Gifts: These unique tags personalize your presents, making them feel extra special.
- Easy to Customize: You can easily change colors, sizes, or patterns to match your holiday theme.
PROJECT DETAILS
Here’s a quick summary of what you can expect from this DIY project:
Skill Level
Beginner-friendly. This project requires basic crafting skills and can easily be done by anyone, including kids under supervision.
Estimated Time
About 30-60 minutes. The time depends on how many tags you choose to create and how much detail you add.
Approximate Cost
Low. You may already have some of the materials at home, especially during the holidays when you might have extra supplies.
Best For
Perfect for gift-giving during the holiday season, family gatherings, and festive parties.
Project Type
A simple craft that makes great homemade decor and personalized gifts.
TOOLS AND EQUIPMENT NEEDED
Here’s what you’ll need to create your Rudolph Gift Tags:
Scissors
Scissors are essential for cutting out your tags and other materials. Make sure they are sharp for clean cuts.
Glue
You’ll use glue to assemble the various parts of your tags. A glue stick works well for paper, but liquid glue or a hot glue gun also works.
Hole Punch
A hole punch is useful for creating a clean hole for threading ribbon or twine through your tags.
Pen or Marker
You’ll need a pen or marker to write the recipient’s name or a special holiday message on each tag.
MATERIALS
Gather these materials before getting started with your craft:
Cardstock or Thick Paper
Cardstock or thick paper serves as the base of your gift tags. Choose a brown or tan color for a realistic reindeer look.
Red Paper or Felt
This will be used for Rudolph’s nose. A bright red color adds a festive touch to your tags.
Black Paper or Felt
Black paper or felt will be used for the antlers, eyes, and any other details you want to add.
Ribbon or Twine
This is used to attach the tags to your gifts. Choose colors that complement your theme.
HOW TO MAKE Rudolph Gift Tags
Follow these steps to create your Rudolph Gift Tags:
Step 1: Cut Out Tag Shapes
Using scissors, cut cardstock or thick paper into rectangular shapes. A size of about 3 inches by 5 inches is practical, but you can go larger or smaller depending on your preference.
Step 2: Prepare Rudolph’s Face
Cut out the following shapes from the cardstock or thick paper:
- A large oval for the head (about 2 inches wide)
- Two circles for the eyes (about 0.5 inches each)
- One small circle for the nose (1 inch for Rudolph’s red nose)
- Two antler shapes from black paper or felt
Step 3: Assemble Rudolph’s Features
Once you have all the pieces cut out, start gluing the elements together.
- Glue the head shape to the top of the tag.
- Position the eyes and glue them in place.
- Attach the red nose below the eyes.
- Add antlers to the top of the head.
Step 4: Add Personalization
Using a pen or marker, write the recipient’s name on the tag. You might want to include a thoughtful message or a festive greeting.
Step 5: Punch a Hole
Using a hole punch, create a hole in the upper corner of each tag to thread the ribbon or twine through.
Step 6: Tie the Ribbon
Cut a piece of ribbon or twine (about 10 inches in length) and thread it through the hole. Tie it in a bow or knot to secure the tag for attaching to gifts.

TIPS AND TRICKS
Here are some helpful tips to enhance your crafting experience:
- Choosing Materials: Use heavy cardstock for durability. Flimsy paper may not hold up while being handled.
- Cutting with Precision: Take your time cutting out shapes to ensure a neat and professional-looking tag.
- Avoiding Common Mistakes: Double-check that your tag is visually appealing and symmetrical. If you make a mistake, you can always trim or cover it.
- Make It Easier: Consider using templates or printable designs to eliminate the need to draw and cut shapes by hand. This can save time and ensure uniformity.
- Get a Better Finish: After gluing pieces, use a flat surface to press down your tag until the glue sets to avoid any pieces lifting.
- Saving Money: Recycle old holiday cards or paper for a sustainable and budget-friendly option.
- Storage: Keep completed tags flat in a small box to prevent bending or damage.
- Safety: Supervise children while using scissors or hot glue guns to ensure a safe crafting environment.
VARIATIONS AND CUSTOMIZATION IDEAS
Let your imagination run wild with these customization options:
- Different Colors: Use a variety of colors for the nose, eyes, antlers, and backgrounds to match your gift wrap.
- Different Sizes: Create mini tags for smaller gifts or larger ones for bigger presents.
- Seasonal Versions: Adjust the design to create tags for holidays like Easter, Halloween, or birthdays.
- Different Patterns: Use patterned or textured paper for the tags to give them a unique look.
- Personalized Versions: Include a personal touch by adding stickers or stamps with the recipient’s initials.
- Finishing Touches: Consider adding glitter or small embellishments for a festive sparkle.
Rudolph Gift Tags FAQ
Q1: Is this an easy craft for beginners?
Yes, making Rudolph Gift Tags is a beginner-friendly craft that requires basic skills and minimal materials.
Q2: What types of materials do I need?
You’ll need cardstock, red and black paper or felt, glue, scissors, a hole punch, and a pen or marker.
Q3: How long does it take to make the tags?
It generally takes around 30-60 minutes, depending on how many tags you wish to create.
Q4: Can I store the tags for next year?
Yes! Keep them flat in a box to maintain their shape for future use.
Q5: How durable are these tags?
If made with thick cardstock and properly stored, these tags can last through several seasons of gift giving.
CONCLUSION
Rudolph Gift Tags are a great easy DIY project that not only adds a personal touch to your holiday gifts but also allows you to express your creativity. This simple craft is perfect for beginners, budget-friendly, and can be customized in countless ways. So gather your materials, follow the steps, and create some delightful tags that will make your holiday season even more special! We hope you give this craft a try and share your finished projects or customization ideas with your friends and family!
PrintRudolph Gift Tags
Create adorable and personalized Rudolph Gift Tags for the holiday season with this easy DIY project.
- Prep Time: 10 minutes
- Cook Time: 30 minutes
- Total Time: 40 minutes
- Yield: 10 tags
- Category: Craft
- Method: Crafting
- Cuisine: N/A
- Diet: N/A
Ingredients
- Cardstock or Thick Paper
- Red Paper or Felt
- Black Paper or Felt
- Glue
- Scissors
- Hole Punch
- Pen or Marker
- Ribbon or Twine
Instructions
- Cut Out Tag Shapes
- Prepare Rudolph’s Face
- Assemble Rudolph’s Features
- Add Personalization
- Punch a Hole
- Tie the Ribbon
Notes
Use heavy cardstock for durability and supervise children while crafting.
Nutrition
- Serving Size: 1 tag
- Calories: 0
- Sugar: 0g
- Sodium: 0mg
- Fat: 0g
- Saturated Fat: 0g
- Unsaturated Fat: 0g
- Trans Fat: 0g
- Carbohydrates: 0g
- Fiber: 0g
- Protein: 0g
- Cholesterol: 0mg
Keywords: craft, DIY, holiday, gift tags, Rudolph, Christmas