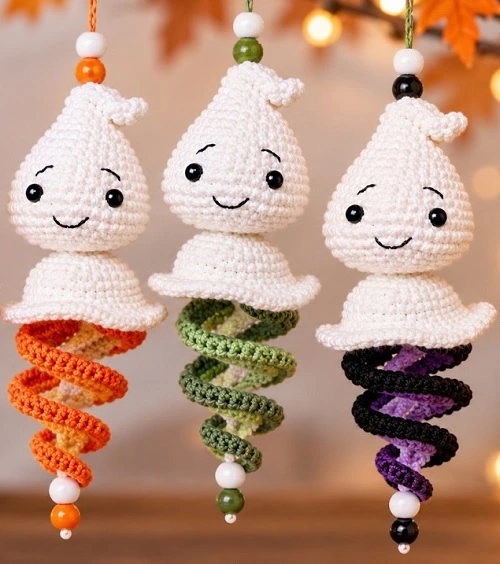
A little white ghost, a purple spiral, and a sweet embroidered smile make such a lovely combination for Halloween. This crochet ghost wind spinner is spooky-cute rather than scary, with a soft amigurumi head above a twisting, colorful tail.
The project has two main parts: the wind spinner and the ghost. First, you crochet the spiral in white and three shades of purple. Then you make the ghost’s head and flared skirt, add its face, and sew the pieces together. A hanging loop and a few optional beads finish the decoration.
You can also make the ghost on its own. Its curled little tip, round face, and ruffled skirt give it plenty of personality without the spinner. If you love small Halloween crochet projects, this gives you two ways to use the same design.
The instructions below use US crochet terms, with stitch counts included so you can check your progress as you go.
What You’ll Learn
- Increasing rows and changing stitch heights create the wind spinner’s tapered spiral.
- Place the ghost’s safety eyes before decreasing and stuffing the head.
- The ghost’s flared skirt continues directly from the head’s final eight stitches.
- Finish the ghost alone or attach the spinner beneath its open skirt.
Materials for Your Crochet Ghost Wind Spinner
Gather everything before you begin so you can move comfortably from crocheting to stuffing, embroidery, and assembly.
- Fine yarn in white and three shades of purple: light, medium, and dark
- A 2 mm crochet hook
- Two 6 mm safety eyes
- Fiberfill
- Scissors
- A yarn needle
- Thin black yarn for the embroidered face
- Fishing line or a similar suitable thread for hanging
- Beads for decoration, optional
The purple shades create a lovely progression from a pale inner section to a darker outer edge. You can choose other colors, too. Keep the ghost white if you would like the same classic Halloween look, then use your favorite shades for the spiral.
Crochet abbreviations
- ch: chain
- st: stitch
- sc: single crochet
- hdc: half double crochet
- dc: double crochet
- tr: treble crochet
- inc or scinc: two single crochet stitches in the same stitch
- hdcinc: two half double crochet stitches in the same stitch
- dcinc: two double crochet stitches in the same stitch
- trinc: two treble crochet stitches in the same stitch
- dec: single crochet decrease
- sl st: slip stitch
When a sequence is followed by a repeat number, work the whole sequence that many times. For example, “repeat (sc, inc) three times” means one single crochet followed by an increase, repeated three times. Numbers in parentheses at the end of a row or round give the finished stitch count.
If you need a reference for US stitch names, the Craft Yarn Council’s crochet abbreviation guide is useful to keep nearby.
1. Crochet the Wind Spinner
The spinner begins with a short white chain. Increasing along that chain adds enough fabric for the strip to curl, while the taller stitches create the wider end of the spiral. Each new purple layer makes the shape more pronounced.
This is not a strip that should stay flat. The curling is part of the design, and it becomes especially clear once the colored rows are complete.
White foundation and first row
With white yarn, chain 31. Turn and begin in the second chain from the hook.
Row 1: Work a single crochet increase into each of the 30 chains. You will have 60 stitches. Cut the yarn at the end of the row.
The white strip already starts to twist at this stage. Return to the beginning of the row to join the lightest purple yarn, rather than starting the next color at the end you have just finished.
Light purple row
Row 2: Join the lightest purple at the beginning of the white row, then work:
- Chain 3 and make one treble crochet into the same stitch.
- Work a treble crochet increase into each of the next 6 stitches.
- Work a double crochet increase into each of the next 14 stitches.
- Work a half double crochet increase into each of the next 20 stitches.
- Work a single crochet increase into each of the next 19 stitches.
The completed row has 120 stitches, with the starting chain forming part of the tall beginning section. The stitch heights gradually decrease along the strip, from treble crochet down to single crochet.
Medium purple row
Return to the beginning again and join the medium purple yarn.
Row 3: Work the following sequence:
- Chain 3 and make one treble crochet into the same stitch.
- Work a treble crochet increase into each of the next 13 stitches.
- Work a double crochet increase into each of the next 30 stitches.
- Work a half double crochet increase into each of the next 40 stitches.
- Work a single crochet increase into each of the next 36 stitches.
You now have 240 stitches. Although the row is longer, the method is the same: two stitches into each stitch below, with the stitch height changing at the listed points.
Dark purple edging
Join the darkest purple yarn in the final stitch of the medium purple row. Chain 1, then work one reverse single crochet into every stitch across. The stitch count remains 240.
Reverse single crochet gives the spiral a defined outer edge. Unlike the previous rows, this edging does not add increases. It finishes the shape you have already created and outlines it in the darkest shade.

Gently arrange the completed strip into its spiral shape. You should be able to see the white center and the purple layers following the curve. Set the spinner aside while you make its little ghost topper.
2. Crochet the Ghost’s Head
The ghost begins at its narrow upper tip, not at the widest part of the head. Several small rounds create the long tip first. The increases then widen the shape into the rounded face.
With white yarn, make a magic ring. Continue in a spiral after closing the ring.
Make the tip and widen the head
- Round 1: Work 6 sc into the magic ring. (6)
- Round 2: Repeat (sc, inc) 3 times. (9)
- Rounds 3 to 7: Sc in every stitch for 5 rounds. (9 each round)
- Round 8: Increase 3 times, then work 6 sc. (12)
- Round 9: Sc in every stitch. (12)
- Round 10: Work 9 sc, then increase 3 times. (15)
- Round 11: Work 6 sc, increase 3 times, then work 6 sc. (18)
- Round 12: Repeat (2 sc, inc) 6 times. (24)
- Round 13: Repeat (3 sc, inc) 6 times. (30)
- Rounds 14 and 15: Sc in every stitch for 2 rounds. (30 each round)
- Round 16: Repeat (2 sc, inc, 2 sc) 6 times. (36)
- Rounds 17 and 18: Sc in every stitch for 2 rounds. (36 each round)
- Round 19: Work 2 sc, increase 3 times, work 5 sc, increase 3 times, then work 23 sc. (42)
- Rounds 20 to 22: Sc in every stitch for 3 rounds. (42 each round)
Take care with the rounds that place several increases together. Those instructions are different from an evenly repeated increase round, so follow their order rather than distributing the increases around the head.
Insert the safety eyes
Before decreasing, insert the two 6 mm safety eyes between rounds 19 and 20, five stitches apart. Check their position from the front, then secure the backs inside the head.
This is a lovely moment in the project. The narrow white shape suddenly starts to look like a little character! The eyebrows and smile come later, after the crocheting is complete.
Decrease and stuff the head
- Round 23: Work 2 sc, decrease 3 times, work 5 sc, decrease 3 times, then work 23 sc. (36)
- Round 24: Repeat (2 sc, dec, 2 sc) 6 times. (30)
- Round 25: Repeat (3 sc, dec) 6 times. (24)
- Round 26: Repeat (sc, dec) 8 times. (16)
- Round 27: Decrease 8 times. (8)
Add fiberfill after round 24, while the opening is still large enough to access comfortably. Continue the remaining decrease rounds, keeping the stuffing inside the head.
The eight stitches left after round 27 become the starting point for the skirt. Continue with white yarn for the next section.
3. Crochet the Ghost’s Flared Skirt
The skirt grows outward from the small opening beneath the head. Its increasing rounds form a bell shape, and the final half double crochet increases make the gently ruffled hem.
Restart the round numbering for this section:
- Round 1: Repeat (sc, inc) 4 times. (12)
- Round 2: Repeat (sc, inc) 6 times. (18)
- Round 3: Repeat (sc, inc, sc) 6 times. (24)
- Round 4: Repeat (3 sc, inc) 6 times. (30)
- Round 5: Sc in every stitch. (30)
- Round 6: Repeat (2 sc, inc, 2 sc) 6 times. (36)
- Rounds 7 and 8: Sc in every stitch for 2 rounds. (36 each round)
- Round 9: Repeat (5 sc, inc) 6 times. (42)
- Rounds 10 and 11: Sc in every stitch for 2 rounds. (42 each round)
- Round 12: Work a half double crochet increase into every stitch. (84)
Notice that the skirt does not increase on every round. The plain single crochet rounds give it some length between the widening sections. Then the last round doubles the stitch count from 42 to 84, creating that soft, wavy edge.
The skirt stays open underneath. This gives the ghost its floating shape and provides the space where the top of the spinner will be attached.
4. Embroider the Face and Shape the Upper Tip
Use thin black yarn and a yarn needle to embroider the ghost’s face. Add two small eyebrows above the safety eyes and a curved smile below them.
The face is simple, but it makes a big difference. Short eyebrow stitches and a small smile keep the expression gentle and sweet. There is no need for a complicated embroidered design to give this little ghost character.
After the face is complete, use white yarn to sew and shape the long upper tip. Bend it into the curled position and secure it with small stitches. This changes the straight tip into the soft curl of the finished ghost.
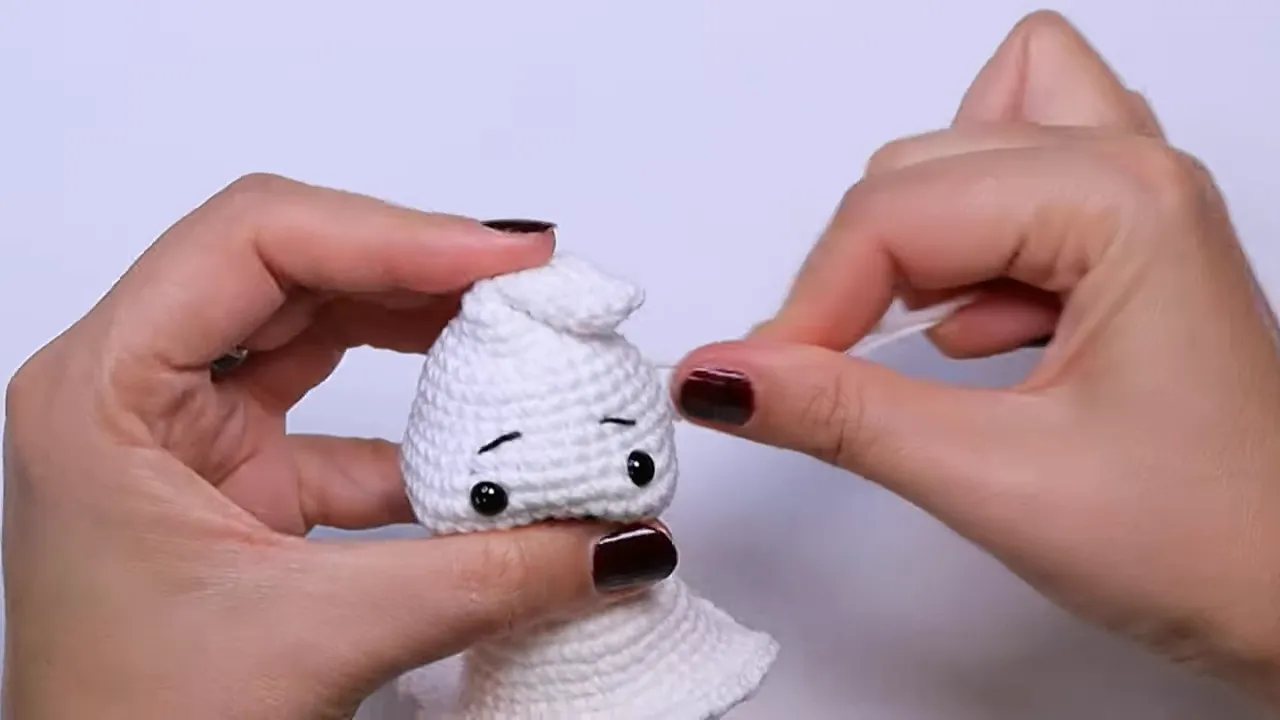
If you are making only the amigurumi ghost, you can stop here. Finish the yarn ends and arrange the skirt. The spinner is an optional addition, not a requirement for the ghost itself.
5. Assemble the Ghost Wind Spinner
Bring the ghost and the purple spinner together. Sew the upper part of the spinner to the inside of the ghost, beneath the skirt.
The connection sits inside the open skirt so the purple spiral appears to flow out from under the white ghost. Keep the spiral hanging below the head rather than caught up inside the skirt.
For the finishing details:
- Attach the spinner: Secure its upper end inside the ghost with your yarn needle.
- Add bottom beads, if desired: String a few beads onto the bottom of the spinner.
- Make the hanging loop: Use fishing line or another suitable hanging material for the ghost.
- Decorate the loop, if desired: Add a few beads above the ghost to coordinate with the lower end.
The beads are optional. They provide a pretty finishing touch, but the white ghost and purple spiral already make a complete decoration without them.
For a separate written-pattern option, the Halloween Wind Spinner Collection is available.
A Little Handmade Halloween Magic
Your crochet ghost wind spinner is ready for a window, a place in your home, or a Halloween display. The purple spiral adds movement beneath the smiling ghost, while the white skirt gives the two parts a lovely transition.
Keep the soft purple palette, choose your own spinner colors, or make just the little ghost. However you finish it, the charm is in those simple details: a curled tip, a tiny smile, and a gently ruffled hem. Happy crocheting!
This tutorial is Made with using Ghost Wind Spinner Crochet | Easy Halloween Crochet Tutorial