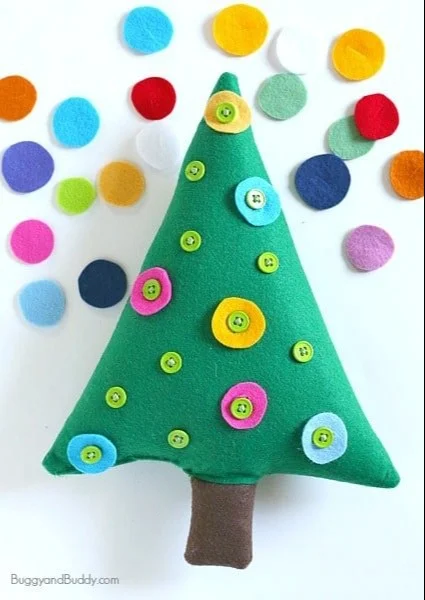
If you’re looking for a fun and easy DIY project to add some holiday cheer to your home, the Button Christmas Tree is the perfect choice. This simple craft not only allows you to express your creativity, but it also makes for a delightful homemade decor piece that’s great for gifting or seasonal decorations. With basic materials and easy steps, this beginner-friendly craft is ideal for both adults and kids alike, making it an inclusive holiday activity. This article will guide you through this crafty adventure, ensuring you have a fantastic time creating your own unique Button Christmas Tree.
WHY YOU WILL LOVE THIS Button Christmas Tree
Making a Button Christmas Tree is enjoyable for many reasons:
- Easy for beginners: This craft is straightforward, which makes it great for those just starting out in the crafting world.
- Uses simple materials: You don’t need specialized tools or hard-to-find items; everything you need is likely already at home.
- Budget-friendly: Using felt and buttons, this project is easy on the wallet while still allowing for creativity.
- Quick to make: Depending on your skill level, this easy DIY project can be completed in just a couple of hours.
- Great for home decor: Once finished, your tree can be displayed on shelves, tables, or in holiday centerpieces for all to admire.
- Great for gifts: This handmade gift idea allows you to share your creativity with friends and family, making their holidays a bit brighter.
- Easy to customize: You can choose different colors and styles, making your Button Christmas Tree truly unique.
PROJECT DETAILS
Skill Level
Beginner-friendly. This project is suitable for those with little to no crafting experience.
Estimated Time
Approximately 1-2 hours.
Approximate Cost
Around $10-$15, depending on the materials you have at home.
Best For
Personal use or as a thoughtful handmade gift.
Project Type
Holiday craft, DIY home decor, simple craft.
TOOLS AND EQUIPMENT NEEDED
Scissors
Use good-quality scissors for cutting shapes from felt. A sharp pair will ensure clean edges.
Needle
A standard sewing needle will work for hand sewing your Christmas tree.
Thread
Choose a color that matches your felt or buttons to keep your stitches discreet.
Pins
Use pins to hold the felt pieces together while sewing, ensuring they don’t shift.
Sewing Machine (optional)
If you prefer a quicker method, a sewing machine can also be used to stitch the felt together.
MATERIALS
Green Felt
This will form the main body of your Christmas tree. Choose a vibrant green to mimic a real tree.
Brown Felt
Brown felt will be used to create the trunk of the tree. It adds a nice contrast and keeps the look complete.
Scraps of Various Colored Felt
Use these to create decorative buttons or ornaments for your tree.
Buttons
Choose different shapes and colors to give your tree a playful and decorative touch.
Embroidery Floss
Embroidery floss can be used for decorative stitching, adding more detail to your project.
Stuffing (like Poly-fil)
This will give your tree a three-dimensional look. Poly-fil or any soft fabric padding will do.

HOW TO MAKE Button Christmas Tree
Creating your Button Christmas Tree involves a few simple steps. Follow these instructions closely, and you’ll have a beautiful decoration in no time!
Step 1: Prepare Your Felt
Cut out two identical Christmas tree shapes from the green felt. This will be the front and back of your tree.
Step 2: Decorate the Front
Sew buttons onto one of the green felt trees. You can arrange them in a pattern or randomly for a whimsical look.
Step 3: Cut the Trunk
Cut two brown rectangles for the trunk. These can be of your desired size; a small trunk provides a cute base for your tree.
Step 4: Pin & Sew the Trees
-
If sewing by hand: Pin the two green felt trees together with the front sides facing out. Use a whip stitch or a blanket stitch to sew around the edges, leaving a small opening at the bottom for turning and stuffing.
-
If using a sewing machine: Pin the pieces together with the front sides facing inward. Sew around the edges using a 1/4 inch seam allowance, leaving an opening at the bottom.
Step 5: Turn & Stuff the Tree
Turn your tree right side out through the opening. Stuff your tree with the Poly-fil until it reaches your desired fullness, then sew the opening shut.
Step 6: Attach the Trunk
Sew the brown trunk onto the base of your felt tree. Make sure it’s secure, as this will keep your tree standing.
Step 7: Create Ornaments
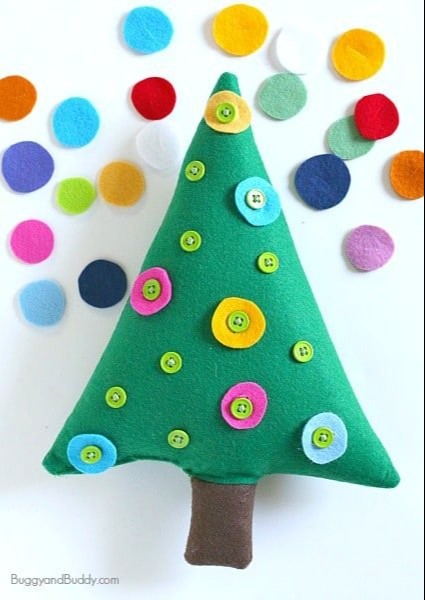
From the scraps of colored felt, cut out small circles. Snip a small hole in the center of each circle and then button them onto your tree for added decoration.
TIPS AND TRICKS
- Choose Materials Wisely: Opt for a variety of colorful buttons, as they bring life to your decoration. Mix sizes and colors for an interesting look.
- Cut Carefully: When cutting your felt shapes, take your time to ensure smooth and even edges to achieve a professional finish.
- Pin Securely: Don’t skip pinning your felt pieces, especially if you’re hand sewing. This prevents any slipping while you work.
- Mind the Stuffing: Avoid overstuffing your tree as it might lose its shape. A light filling will suffice while still giving it some dimension.
- Store Properly: If you want to keep your tree for next year, store it in a dry, cool place to prevent the felt from getting damaged.
VARIATIONS AND CUSTOMIZATION IDEAS
- Different Colors: Experiment with other felt colors for your tree. Think snowy white, festive red, or cheerful blue.
- Larger Trees: Scale up your design by making bigger felt trees for a more dramatic display.
- Seasonal Versions: Create different themed versions for various holidays using relevant colors and decorations.
- Patterns: Instead of a solid green, use patterned or printed felt for a unique texture.
- Personalized Trees: Write names with embroidery floss on the tree, turning them into place settings for holiday gatherings.
- Layered Look: Craft multiple layers of felt cutouts, stacking them to create a more complex tree design.
Button Christmas Tree FAQ
How difficult is this project?
This project is beginner-friendly and straightforward. If you can cut and sew, you can make this craft!
What materials do I need?
Essential materials include green felt, brown felt for the trunk, buttons for decoration, and stuffing. Basic tools include scissors and a sewing needle.
How should I store my Button Christmas Tree?
Keep your finished tree in a cool, dry place away from direct sunlight to ensure the colors stay bright. Avoid folding it to prevent creasing.
How long does it take to complete this craft?
You can expect to spend about 1-2 hours to complete your Button Christmas Tree, depending on your sewing skill level.
Can I customize the colors and decorations?
Absolutely! You can change colors, sizes, and patterns to fit your home decor or personal preferences.
CONCLUSION
Creating a Button Christmas Tree is an enjoyable and rewarding experience, especially considering how easy this DIY project is. It’s an excellent way to express your creativity while also making delightful handmade gifts or decorations for your home. With simple materials and straightforward steps, this beginner-friendly craft can bring festive joy to any space. So gather your supplies, invite some friends or family, and start crafting your very own unique Button Christmas Tree! Don’t forget to share your experience and any customization ideas you come up with along the way!
PrintButton Christmas Tree
A fun and easy DIY project to create a delightful Button Christmas Tree, perfect for holiday decor or gifting.
- Prep Time: 30 minutes
- Cook Time: 60 minutes
- Total Time: 90 minutes
- Yield: 1 Christmas Tree
- Category: Craft
- Method: DIY
- Cuisine: Holiday
- Diet: N/A
Ingredients
- Green Felt
- Brown Felt
- Scraps of Various Colored Felt
- Buttons
- Embroidery Floss
- Stuffing (like Poly-fil)
Instructions
- Prepare Your Felt: Cut out two identical Christmas tree shapes from the green felt.
- Decorate the Front: Sew buttons onto one of the green felt trees.
- Cut the Trunk: Cut two brown rectangles for the trunk.
- Pin & Sew the Trees: Pin the two green felt trees together and sew around the edges.
- Turn & Stuff the Tree: Turn your tree right side out and stuff it with the Poly-fil.
- Attach the Trunk: Sew the brown trunk onto the base of your felt tree.
- Create Ornaments: Cut out small circles from the scraps of colored felt and button them onto your tree.
Notes
Choose a variety of colorful buttons and avoid overstuffing the tree for the best appearance.
Nutrition
- Serving Size: 1 tree
- Calories: N/A
- Sugar: N/A
- Sodium: N/A
- Fat: N/A
- Saturated Fat: N/A
- Unsaturated Fat: N/A
- Trans Fat: N/A
- Carbohydrates: N/A
- Fiber: N/A
- Protein: N/A
- Cholesterol: N/A
Keywords: Christmas, DIY, Holiday decor, Craft, Button Tree