INTRODUCTION
Christmas is a magical time filled with warmth, family gatherings, and delicious treats. One drink that captures the spirit of the season is the Christmas Glowing Snowberry Cocoa. This special hot chocolate is more than just a drink; it’s a delightful experience. The combination of rich and creamy flavors, along with its beautiful colors and sparkling finish, makes it a holiday favorite for both children and adults. The cocoa not only warms your body but also brings joy to your heart as you sip it while gazing at twinkling Christmas lights.
WHY YOU WILL LOVE THIS RECIPE
This Christmas Glowing Snowberry Cocoa stands out for many reasons. First, it has a rich and creamy texture that is comforting during cold weather. The blend of white chocolate and vanilla creates a taste that is both sweet and indulgent. The vibrant colors of pink and blue will amaze your friends and family, making it perfect for holiday parties or cozy nights at home.
Moreover, the edible shimmer dust adds a fun sparkle that mimics the glistening snow outside. Each cup is not just a drink; it’s a treat for the eyes and the taste buds. Whether you are enjoying it by the fireplace or at a festive gathering, this cocoa will surely bring smiles and warmth to everyone.
HOW TO MAKE Christmas Glowing Snowberry Cocoa
Making Christmas Glowing Snowberry Cocoa is simple and enjoyable. Gather your ingredients, and let’s create a magical drink that will brighten your holiday spirit!
EQUIPMENT NEEDED
To make this delicious cocoa, you will need the following equipment:
- A medium saucepan
- Whisk
- Measuring cups and spoons
- Two clear glasses or cups for serving
- A spoon (for pouring)
Ingredients You’ll Need
- 2 cups whole milk
- 1/2 cup heavy cream
- 1/4 cup white chocolate chips
- 2 tbsp sugar
- 1 tsp vanilla extract
- Pink food coloring
- Blue food coloring
- Whipped cream
- Edible shimmer dust (pearl, silver, or iridescent)
- Mini marshmallows (optional)
STEP-BY-STEP INSTRUCTIONS
- In a saucepan over medium heat, warm the milk, heavy cream, and sugar until hot but not boiling.
Start by pouring the milk and cream into the saucepan. Add the sugar and place it on the stove. Stir gently until the mixture is warm but be careful not to let it boil. - Add the white chocolate chips and whisk until melted and smooth.
Add the white chocolate chips to the warm mixture. Use your whisk to stir until the chips melt completely, and the mixture becomes smooth and creamy. - Stir in the vanilla extract.
Turn off the heat and add the vanilla extract. Stir well to mix in the vanilla flavor, making the cocoa even more delicious. - Divide the cocoa into two bowls: Tint one bowl light pink and the other bowl light blue.
Carefully pour half of the cocoa into one bowl. In the first bowl, add a few drops of pink food coloring and stir until you achieve your desired shade. In the second bowl, add blue food coloring and stir to get a soft blue color. - To create the ombre effect, pour the pink cocoa into a clear glass first.
Take a clear glass and slowly pour in the pink cocoa, filling it halfway. - Slowly pour the blue cocoa on top over the back of a spoon so the colors blend softly into a glowing gradient.
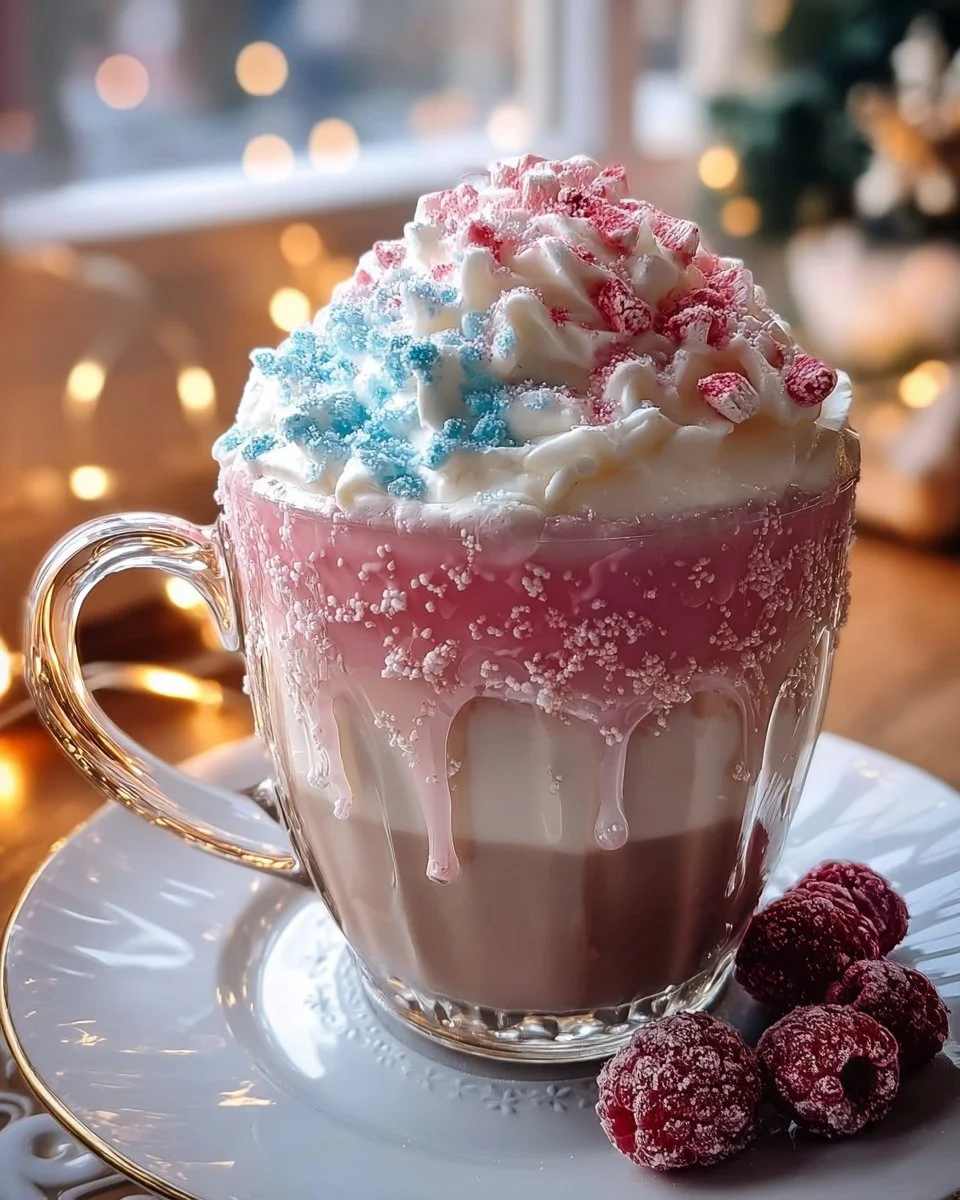
Hold a spoon over the pink cocoa and pour the blue mixture gently over the back of it. This technique helps preserve the beautiful layered effect. - Add a swirl of whipped cream on top for the vanilla snow effect.
Take a generous amount of whipped cream and place it on top of the blue cocoa. This swirl mimics fluffy snow resting peacefully on top of a mountain. - Sprinkle edible shimmer dust for a sparkling icy glow.
Finish with a light sprinkling of shimmer dust over the whipped cream. This will give it that magical sparkle and a festive touch. - Add mini marshmallows if desired.
For extra fun, you can add a few mini marshmallows on top of the whipped cream. They add sweetness and a lovely texture.
![image_1]
HOW TO SERVE Christmas Glowing Snowberry Cocoa
Serve the Christmas Glowing Snowberry Cocoa while it is still warm. You can offer it in festive cups or clear glasses to show off the beautiful colors. This drink is best enjoyed fresh, topped with whipped cream and shimmer dust. You can also serve it alongside cookies or holiday treats for a delightful snack pairing. It’s perfect for holiday parties, cozy evenings, or as a special treat for family and friends.
STORAGE & FREEZING: Christmas Glowing Snowberry Cocoa
If you happen to have leftover cocoa, you can store it in the refrigerator for up to two days. Ensure you transfer it to an airtight container to keep it fresh. When you want to enjoy it again, simply reheat the cocoa gently on the stove or in the microwave. Stir well before serving.
However, freezing is not recommended for this cocoa as the cream and milk may separate and affect the texture once thawed.
SERVING SUGGESTIONS
This cocoa pairs well with many sweet treats. Here are some delicious suggestions:
- Sugar cookies decorated with icing
- Peppermint bark
- Gingerbread cookies or houses
- Chocolate cupcakes
- Pecan pie or other holiday desserts
You can also offer toppings like crushed candy canes or chocolate shavings to let your guests customize their drinks.
VARIATIONS
Feel free to get creative with this cocoa recipe. Here are a few variations you can try:
- Minty Snowberry Cocoa: Add a few drops of peppermint extract for a minty flavor.
- Spicy Cocoa: Mix in a pinch of cinnamon or nutmeg for a cozy spice.
- Dairy-Free Option: Substitute with almond milk or coconut milk and plant-based whipped cream for those with dairy intolerances.
- Chocolate Variation: Swap out the white chocolate for dark chocolate chips for a richer flavor.
FAQs
- Can I make this cocoa ahead of time?
Yes, you can prepare the cocoa ahead and store it in the refrigerator. Just reheat when you’re ready to enjoy it. - What if I don’t have shimmer dust?
If you don’t have shimmer dust, you can skip it or use edible glitter for a similar effect. - Is this recipe kid-friendly?
Absolutely! This cocoa is perfect for kids, especially with its fun colors and marshmallows. - How can I make it less sweet?
You can reduce the amount of sugar or use sugar substitutes if desired.
![image_2]
MAKE-AHEAD TIPS FOR Christmas Glowing Snowberry Cocoa
If you want to prepare for a special gathering, you can follow these tips:
- Pre-measure your ingredients: Have your milk, cream, chocolate chips, and other ingredients measured and set aside. This saves time on the day you plan to serve.
- Prepare the cocoa base: You can make the cocoa mixture (without the coloring) in advance and store it in the fridge. On the day of serving, reheat it and add the color before serving.
- Set up a hot cocoa station: If you’re hosting a party, create a hot cocoa station with all the toppings and colors ready to go. This way, guests can personalize their drinks, making it interactive and fun.
Creating the Christmas Glowing Snowberry Cocoa is a wonderful way to spread holiday cheer. With its delightful flavor, stunning appearance, and the joy it brings to each sip, this cocoa is sure to become a new holiday tradition. Enjoy this festive drink with your loved ones and celebrate the magic of the season!
PrintChristmas Glowing Snowberry Cocoa

A delightful hot chocolate experience featuring white chocolate, vibrant colors, and edible shimmer dust, perfect for the holiday season.
- Prep Time: 10 minutes
- Cook Time: 15 minutes
- Total Time: 25 minutes
- Yield: 2 servings 1x
- Category: Beverage
- Method: Stovetop
- Cuisine: American
- Diet: Vegetarian
Ingredients
- 2 cups whole milk
- 1/2 cup heavy cream
- 1/4 cup white chocolate chips
- 2 tbsp sugar
- 1 tsp vanilla extract
- Pink food coloring
- Blue food coloring
- Whipped cream
- Edible shimmer dust (pearl, silver, or iridescent)
- Mini marshmallows (optional)
Instructions
- In a saucepan over medium heat, warm the milk, heavy cream, and sugar until hot but not boiling.
- Add the white chocolate chips and whisk until melted and smooth.
- Stir in the vanilla extract.
- Divide the cocoa into two bowls: tint one bowl light pink and the other bowl light blue.
- To create the ombre effect, pour the pink cocoa into a clear glass first.
- Slowly pour the blue cocoa on top over the back of a spoon.
- Add a swirl of whipped cream on top for the vanilla snow effect.
- Sprinkle edible shimmer dust for a sparkling icy glow.
- Add mini marshmallows if desired.
Notes
This cocoa is best served warm and topped with whipped cream and shimmer dust. Perfect for holiday gatherings!
Nutrition
- Serving Size: 1 serving
- Calories: 350
- Sugar: 30g
- Sodium: 80mg
- Fat: 20g
- Saturated Fat: 12g
- Unsaturated Fat: 6g
- Trans Fat: 0g
- Carbohydrates: 40g
- Fiber: 0g
- Protein: 8g
- Cholesterol: 40mg
Keywords: hot chocolate, cocoa, Christmas drink, festive drink, holiday recipes