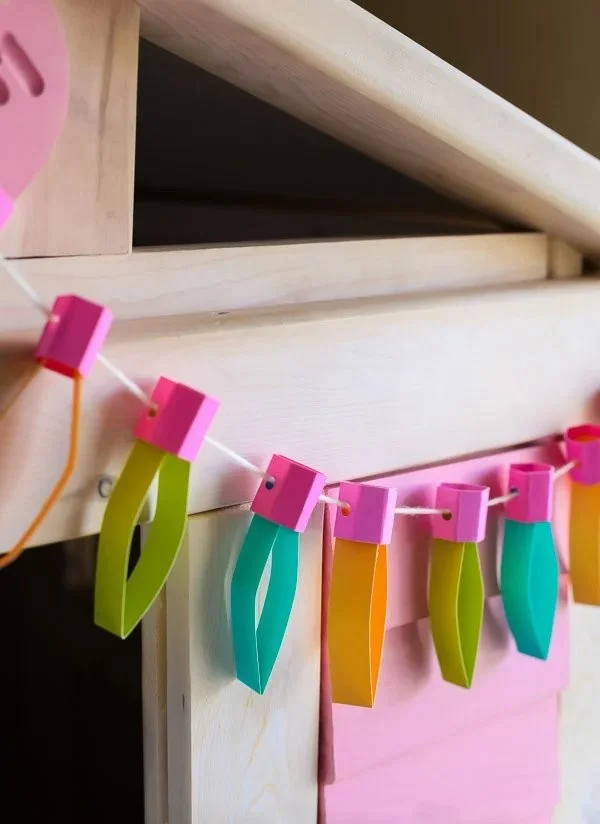
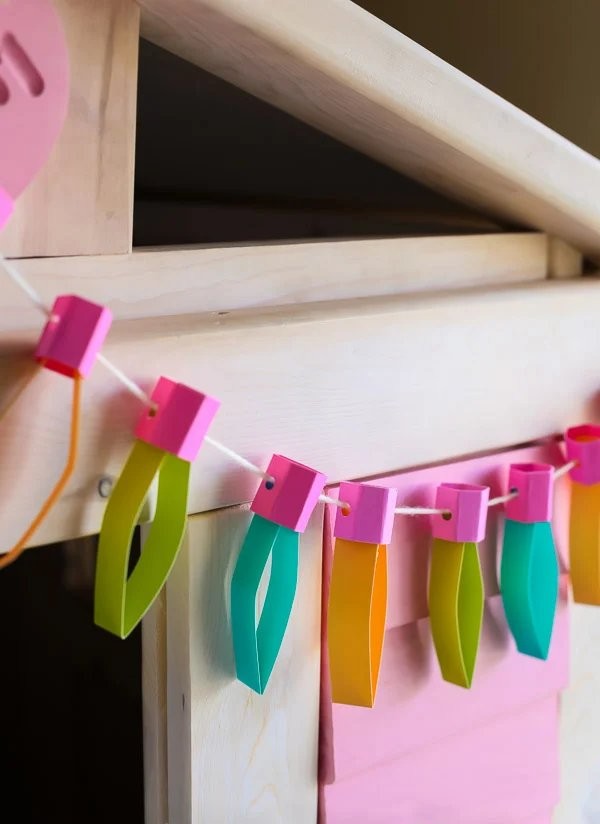
This Christmas Lights – Easy Paper Craft for Kids project is a perfect way to engage kids in a fun and creative activity during the holiday season. Not only is this craft an easy DIY project, but it also allows kids to express their artistic talents by making beautiful decorations that can brighten up the home. The process is simple, requiring minimal materials, and offers the opportunity for personalization, making it a delightful activity for families.
WHY YOU WILL LOVE THIS Christmas Lights – Easy Paper Craft for Kids
Creating these paper Christmas lights is a blast for everyone involved. Here are some reasons why you’ll enjoy this craft:
- Easy for Beginners: No crafting experience is needed, making it a great start for novices.
- Uses Simple Materials: You can find all the materials around the house, keeping it easy and accessible.
- Budget-Friendly: A low-cost craft that won’t strain your wallet.
- Quick to Make: Perfect for a fun afternoon of crafting that doesn’t take too long.
- Great for Home Decor: These colorful lights can add a wonderful festive touch to your home.
- Easy to Customize: Kids can use their favorite colors and styles to make unique decorations.
PROJECT DETAILS
Skill Level
Beginner: This project is designed with beginners in mind, making it straightforward for kids and parents alike.
Estimated Time
30 minutes to 1 hour: This quick craft can typically be completed within an hour, depending on individual pace and level of detail.
Approximate Cost
$5 to $10: The cost of materials is very low, especially if you already have supplies at home.
Best For
Kids aged 5 and up: This craft is perfect for young children but can be fun for anyone wanting to join in.
Project Type
DIY Holiday Craft: A fun paper crafting project centered around the festive holiday season.
TOOLS AND EQUIPMENT NEEDED
Scissors
Used for cutting out the paper shapes needed for the lights.
Glue Stick
This is used to adhere different paper sections together securely.
Pen or Marker
A writing instrument for outlining or adding details to the lights.
MATERIALS
Colored Paper
This is your primary material used to create the different shapes of the Christmas lights. You can use any colors that match your holiday theme.
String or Twine
This will serve as the “wire” for the lights. It holds them all together.
Decorative Stickers or Glitter (optional)
These can be added to decorate the lights, giving them a fun and festive touch.
Tape (optional)
In case glue isn’t secure enough for some parts, tape can be used as an alternative.

HOW TO MAKE Christmas Lights – Easy Paper Craft for Kids
Step 1: Gather Your Materials
Begin by collecting all the materials you will need for this project. Make sure you have colored paper, scissors, glue sticks, string or twine, and optional decorative items.
Step 2: Cut Out Light Shapes
Using the colored paper, cut out light bulb shapes. You can make these as big or small as you like. Typical shapes to consider are teardrop or oval shapes, but feel free to get creative!
Step 3: Decorate the Shapes
Use pens or markers to add designs on each light cut-out. You can draw lines, dots, or patterns. Feel free to use stickers or sprinkle some glitter for extra sparkle.
Step 4: Prepare String/Twine
Cut a long piece of string or twine to your desired length. This will be the base where your lights will "hang".
Step 5: Attach the Lights
Take each decorated light shape and glue them to the string or twine. Place them evenly apart to give a nice visual appeal. You can also create loops at the tops of the shapes for a more realistic look.
Step 6: Let It Dry
After gluing everything, let your craft dry completely. This should only take about 10-15 minutes.
Step 7: Display Your Lights
Once dried, you can hang your completed paper Christmas lights around your home. They look lovely on walls, door frames, or where you want to create a festive atmosphere.
TIPS AND TRICKS
- Choosing Materials: Use sturdy colored paper to ensure your lights hold their shape, especially if they’ll be hung.
- Cutting: Take your time when cutting the shapes to ensure they are even and neat.
- Gluing: Apply glue sparingly so that it doesn’t ooze out from the edges when pressed down.
- Avoiding Common Mistakes: Be careful not to overstretch the string; it can weaken the paper lights.
- Custom Finishes: Consider using metallic paper or adding reflective stickers for a more dynamic effect.
- Budget-Friendly: Consider using scrap paper from other projects to keep costs low.
- Safety First: Always supervise young children with scissors and glue to ensure a safe crafting experience.
VARIATIONS AND CUSTOMIZATION IDEAS
- Different Sizes: Experiment with light shapes of varying sizes for a more vibrant display.
- Seasonal Versions: Switch up the colors for different holidays, such as pastels for Easter or black/orange for Halloween.
- Personalized Versions: Encourage kids to write their names or favorite holiday phrases on their light shapes.
- Luminous Touch: For a glow effect, place a string of battery-operated fairy lights behind each paper cut-out.
- Themed Colors: Create specific themes like winter wonderland with blues and whites, or a traditional red and green palette.
- Pattern Play: Use patterned paper for a unique look, such as stripes or polka dots.
Christmas Lights – Easy Paper Craft for Kids FAQ
What is the difficulty level of this project?
This project is considered easy and beginner-friendly. It is perfect for kids and beginners, requiring basic cutting and gluing skills.
What materials do I need for this craft?
You will need colored paper, scissors, a glue stick, string or twine, and optional decorative items like stickers or glitter.
How long does it take to complete?
The estimated time to complete is around 30 minutes to 1 hour, depending on how detailed you wish to be.
How should I store my finished craft?
Once completed, you can hang the lights or store them in a flat box. Ensure they are kept away from moisture to maintain their shape.
Are there any safety tips I should know?
Always supervise children while they are using scissors and glue. It’s essential to keep these materials out of reach when not in use.
CONCLUSION
Creating these Christmas Lights – Easy Paper Craft for Kids is a delightful way to engage young ones during the holiday season. This project is not only easy and fun but also budget-friendly and allows for plenty of creativity. With just a few simple materials and some guidance, kids can create beautiful decorations to brighten up their homes. Give this easy DIY project a try and share your experiences or customization ideas with us! Enjoy crafting!
PrintChristmas Lights – Easy Paper Craft for Kids
A fun and creative paper craft for kids to make beautiful Christmas light decorations.
- Prep Time: 30 minutes
- Cook Time: 0 minutes
- Total Time: 30 minutes
- Yield: 1 decoration
- Category: Craft
- Method: DIY
- Cuisine: Holiday
- Diet: N/A
Ingredients
- Colored Paper
- Scissors
- Glue Stick
- String or Twine
- Decorative Stickers or Glitter (optional)
- Tape (optional)
Instructions
- Gather Your Materials
- Cut Out Light Shapes
- Decorate the Shapes
- Prepare String/Twine
- Attach the Lights
- Let It Dry
- Display Your Lights
Notes
Supervise children while using scissors and glue. Consider using scrap paper to keep costs low.
Nutrition
- Serving Size: 1 decoration
- Calories: 0
- Sugar: 0g
- Sodium: 0mg
- Fat: 0g
- Saturated Fat: 0g
- Unsaturated Fat: 0g
- Trans Fat: 0g
- Carbohydrates: 0g
- Fiber: 0g
- Protein: 0g
- Cholesterol: 0mg
Keywords: Christmas craft, kids craft, easy paper craft, holiday decorations