Looking for a fun Christmas crochet project that is a little different from the usual ornaments and amigurumi? This crochet snowman wind spinner combines an adorable snowman face, a classic top hat, holly leaves, a cozy scarf, and a long spiral body that creates a playful hanging decoration.
The finished design works beautifully as winter décor for a porch, window, craft room, Christmas tree area, or anywhere you want to add a handmade holiday touch. The length of the spiral can also be customized, making it easy to create a shorter ornament or a longer statement decoration.
This pattern uses US crochet terminology and combines basic amigurumi techniques with increases, decreases, double crochet, reverse single crochet, and a simple bobble stitch. The snowman’s head measures approximately 5.5 cm in diameter, while the wind spinner length can be adjusted to suit your project.
Crochet Snowman Wind Spinner Pattern Overview

Skill level: Confident beginner to intermediate
Terminology: US crochet terms
Main yarn weight: Sport weight
Recommended hook: 2.75 mm
Finished head size: Approximately 5.5 cm diameter
Wind spinner length: Customizable
Construction: Head worked in spiral rounds, hat in joined rounds, spinner worked in rows
This Christmas crochet pattern is made from several smaller components that are assembled at the end: the snowman head, carrot nose, top hat, holly leaves and berries, scarf, and spiral wind spinner.
Materials and Tools
For this crochet snowman wind spinner, you will need:
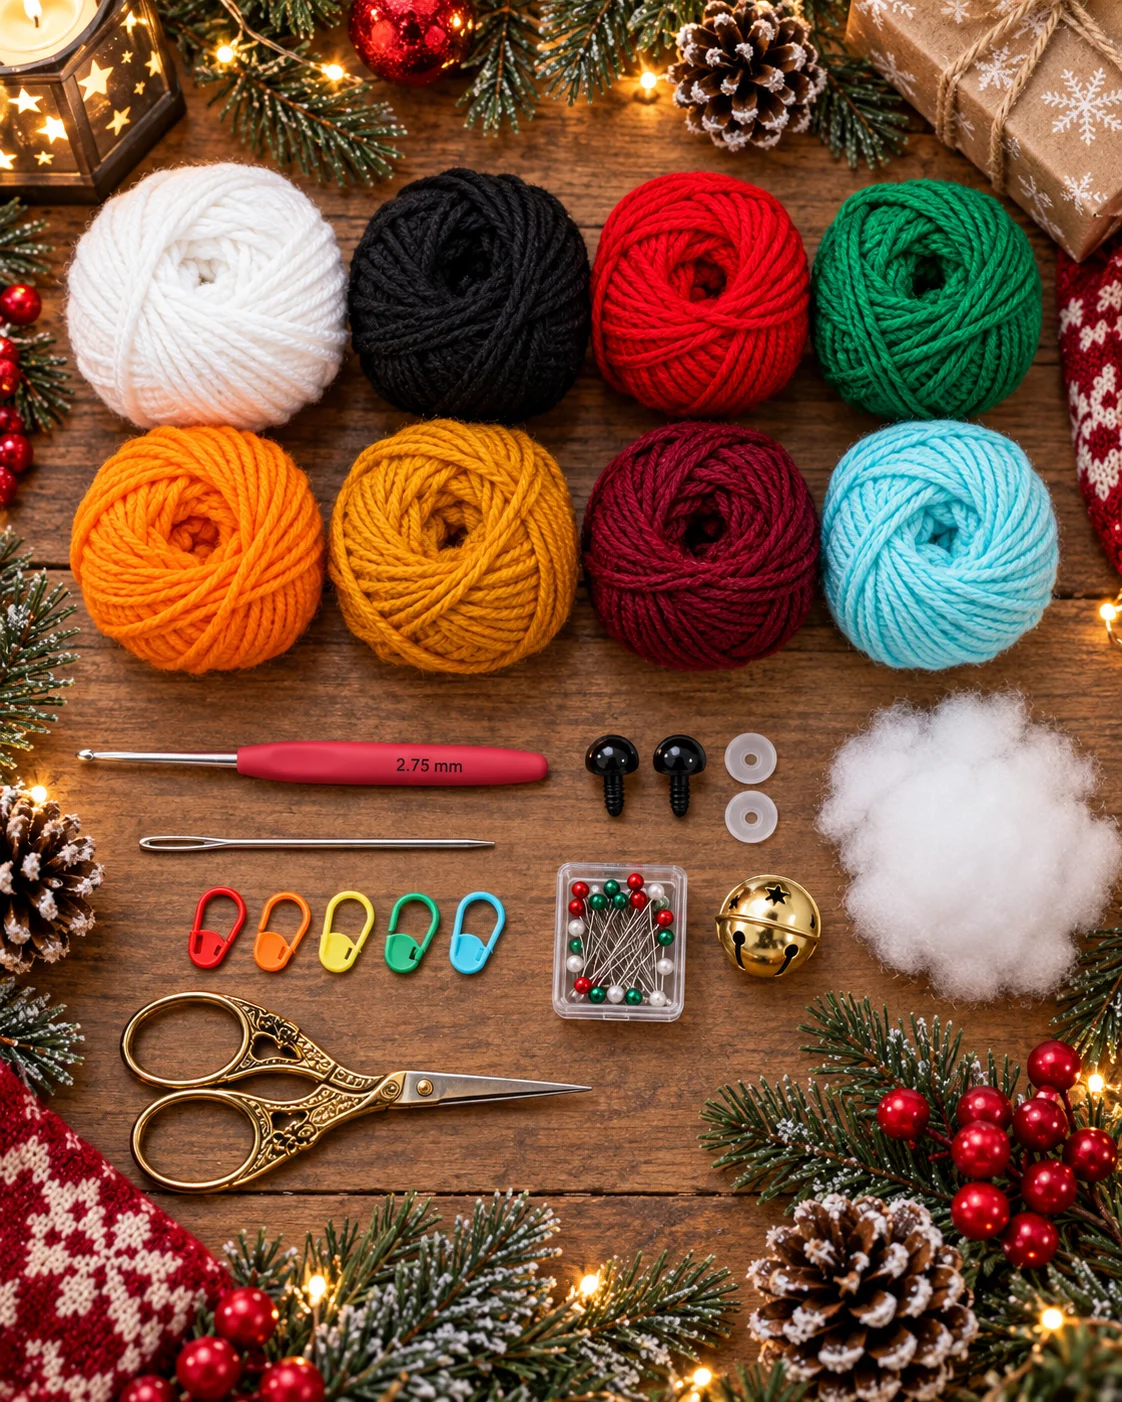
- Yarn: 5-ply milk cotton yarn, approximately 80% cotton and 20% acrylic, around 125 g/220 m
- Yarn thickness: Approximately 2 mm / sport weight
- Crochet hook: 2.75 mm
- Safety eyes: 7 mm
- Fiberfill stuffing
- Tapestry needle
- Stitch markers
- Scissors
- Sewing pins
- Hot glue
- Small jingle bell, optional
You can use different yarn weights if you want to change the finished size. A thinner yarn and smaller hook will create a smaller snowman, while thicker yarn and a larger hook will produce a larger decoration.
Approximate Yarn Requirements
The original tutorial estimates:
- Snowman head: approximately 10 g
- Hat: approximately 10 g
- Wind spinner: approximately 25 g
These amounts are only estimates because actual yarn usage will depend on your tension, yarn choice, and desired spinner length.
Crochet Abbreviations – US Terms
Throughout the pattern, the following abbreviations are used:
| Abbreviation | Meaning |
|---|---|
| Rnd / Rnds | Round / rounds |
| st / sts | Stitch / stitches |
| ch | Chain |
| slst | Slip stitch |
| sc | Single crochet |
| hdc | Half double crochet |
| dc | Double crochet |
| tr | Treble crochet |
| inc | Single crochet increase – work 2 sc in the same stitch |
| dec | Single crochet decrease – work 2 sc together |
| hdc inc | Work 2 hdc in the same stitch |
| dc inc | Work 2 dc in the same stitch |
| ch-3 picot | Ch 3, slst in the third chain from hook |
| BLO | Back loops only |
| FLO | Front loops only |
| reverse sc | Reverse single crochet / crab stitch |
The pattern also uses a 5-dc bobble stitch, worked by building five partial double crochets in the same stitch before drawing the yarn through all remaining loops and securing the bobble with a chain.
Important Pattern Notes
This crochet snowman pattern is worked using the traditional Yarn Over (YO) technique.
When working joined rounds, slip stitch into the first actual stitch of the round rather than the starting chain.
For foundation chains, work into the back loops unless the instructions specifically tell you to work into the back bumps.
Why This Pattern Uses Staggered Increases
Traditional increases placed directly above one another can create visible corners and make a crochet circle look more like a hexagon.
To create a smoother circle, some increase rounds are staggered.
For example:
Standard:
(2 sc, 1 inc) × 6
Staggered:
(1 sc, 1 inc, 1 sc) × 6
The same technique is used later with decreases to help maintain a rounder shape.
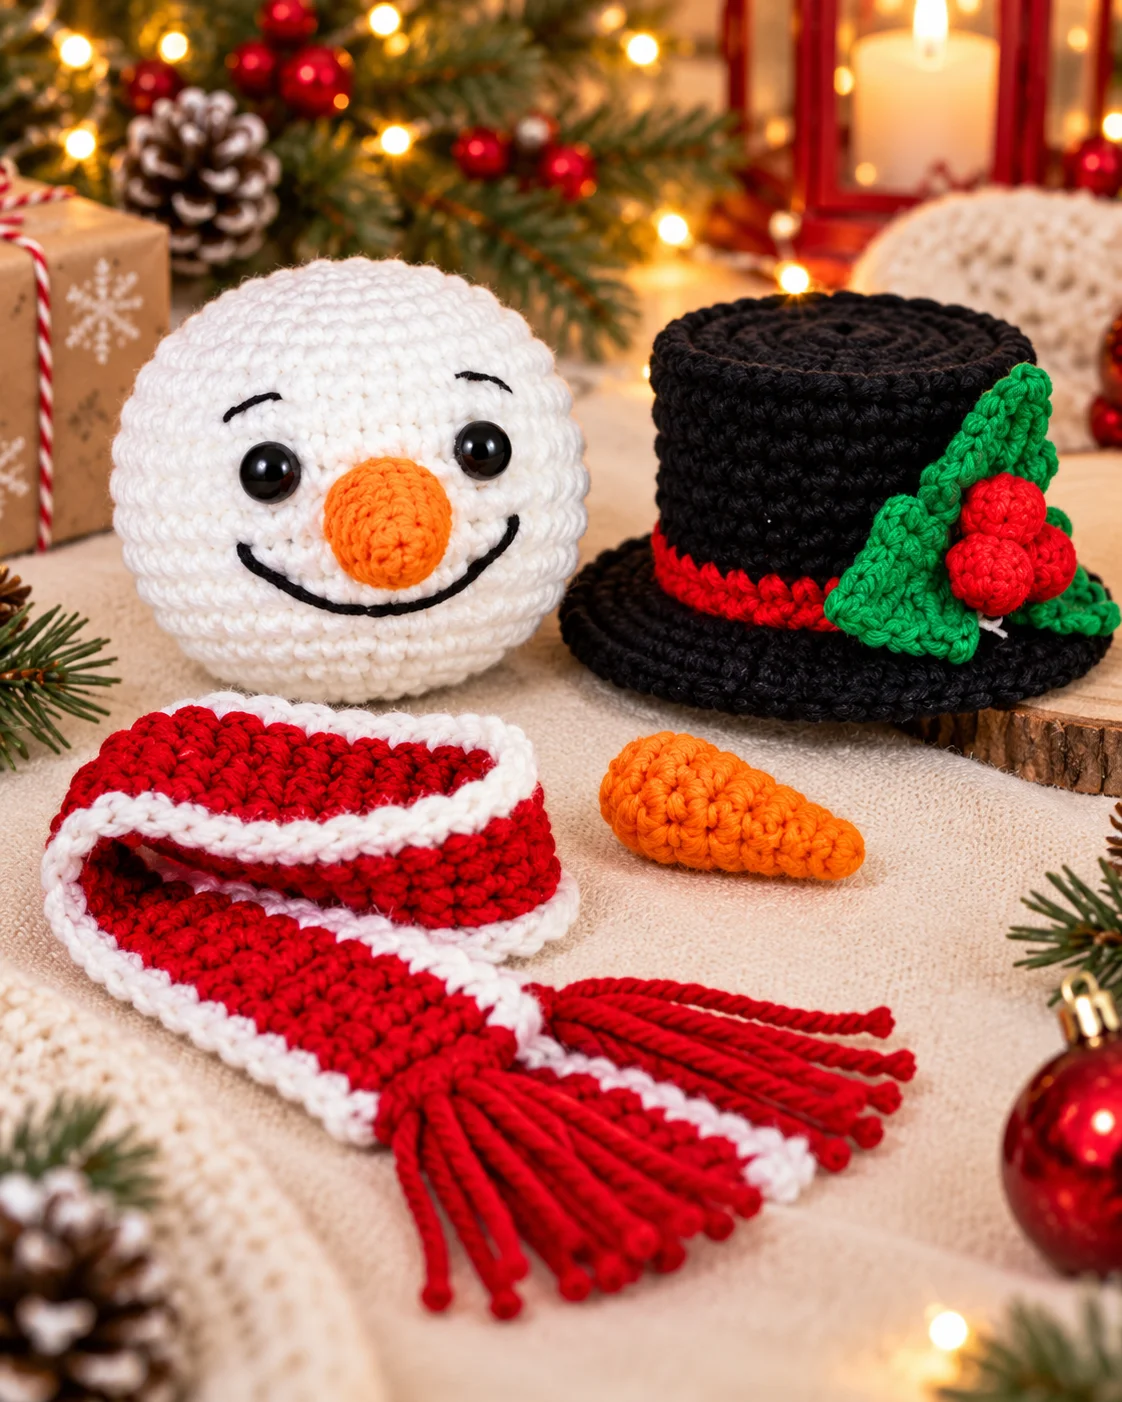
Snowman Head
Use white yarn.
Work continuously in spiral rounds.
Rnd 1: 6 sc in magic ring [6]
Rnd 2: 6 inc [12]
Rnd 3: (1 sc, 1 inc) × 6 [18]
Rnd 4: (1 sc, 1 inc, 1 sc) × 6 [24]
Rnd 5: (3 sc, 1 inc) × 6 [30]
Rnd 6: (2 sc, 1 inc, 2 sc) × 6 [36]
Rnds 7–14: 36 sc [36]
Rnd 15: (2 sc, 1 dec, 2 sc) × 6 [30]
Rnd 16: (3 sc, 1 dec) × 6 [24]
Rnd 17: (1 sc, 1 dec, 1 sc) × 6 [18]
Stuff the head firmly with fiberfill.
Rnd 18: (1 sc, 1 dec) × 6 [12]
Rnd 19: 6 dec [6]
Cut the yarn, sew the remaining opening closed, and weave in the ends.
Crochet Snowman Nose
Use orange yarn and work in spiral rounds.
Rnd 1: 4 sc in magic ring [4]
Rnd 2: (1 sc, 1 inc) × 2 [6]
Rnd 3: (2 sc, 1 inc) × 2 [8]
Rnd 4: (3 sc, 1 inc) × 2 [10]
Slip stitch into the next stitch and fasten off.
Stuff the carrot nose lightly before attaching it to the snowman’s face.
Crochet Snowman Top Hat
Start with black yarn.
The hat is worked in joined rounds. The starting chain does not count as a stitch.
Rnd 1: 6 sc in magic ring, slst to join [6]
Rnd 2: Ch 1, 6 inc, slst to join [12]
Rnd 3: Ch 1, (1 sc, 1 inc) × 6, slst to join [18]
Rnd 4: Ch 1, (1 sc, 1 inc, 1 sc) × 6, slst to join [24]
Rnd 5: Ch 1, (3 sc, 1 inc) × 6, slst to join [30]
Rnd 6 – BLO: Ch 1, 30 sc, slst to join [30]
Rnds 7–11: Ch 1, 30 sc, slst to join [30]
Change to red yarn.
Rnds 12–13: Ch 1, 30 sc, slst to join [30]
Change back to black yarn.
Rnd 14 – FLO: Ch 2, (2 dc, 1 dc inc) × 10, slst to join [40]
Rnd 15: Ch 2, (3 dc, 1 dc inc) × 10, slst to join [50]
Fasten off and weave in the ends.
Crochet Holly Leaves
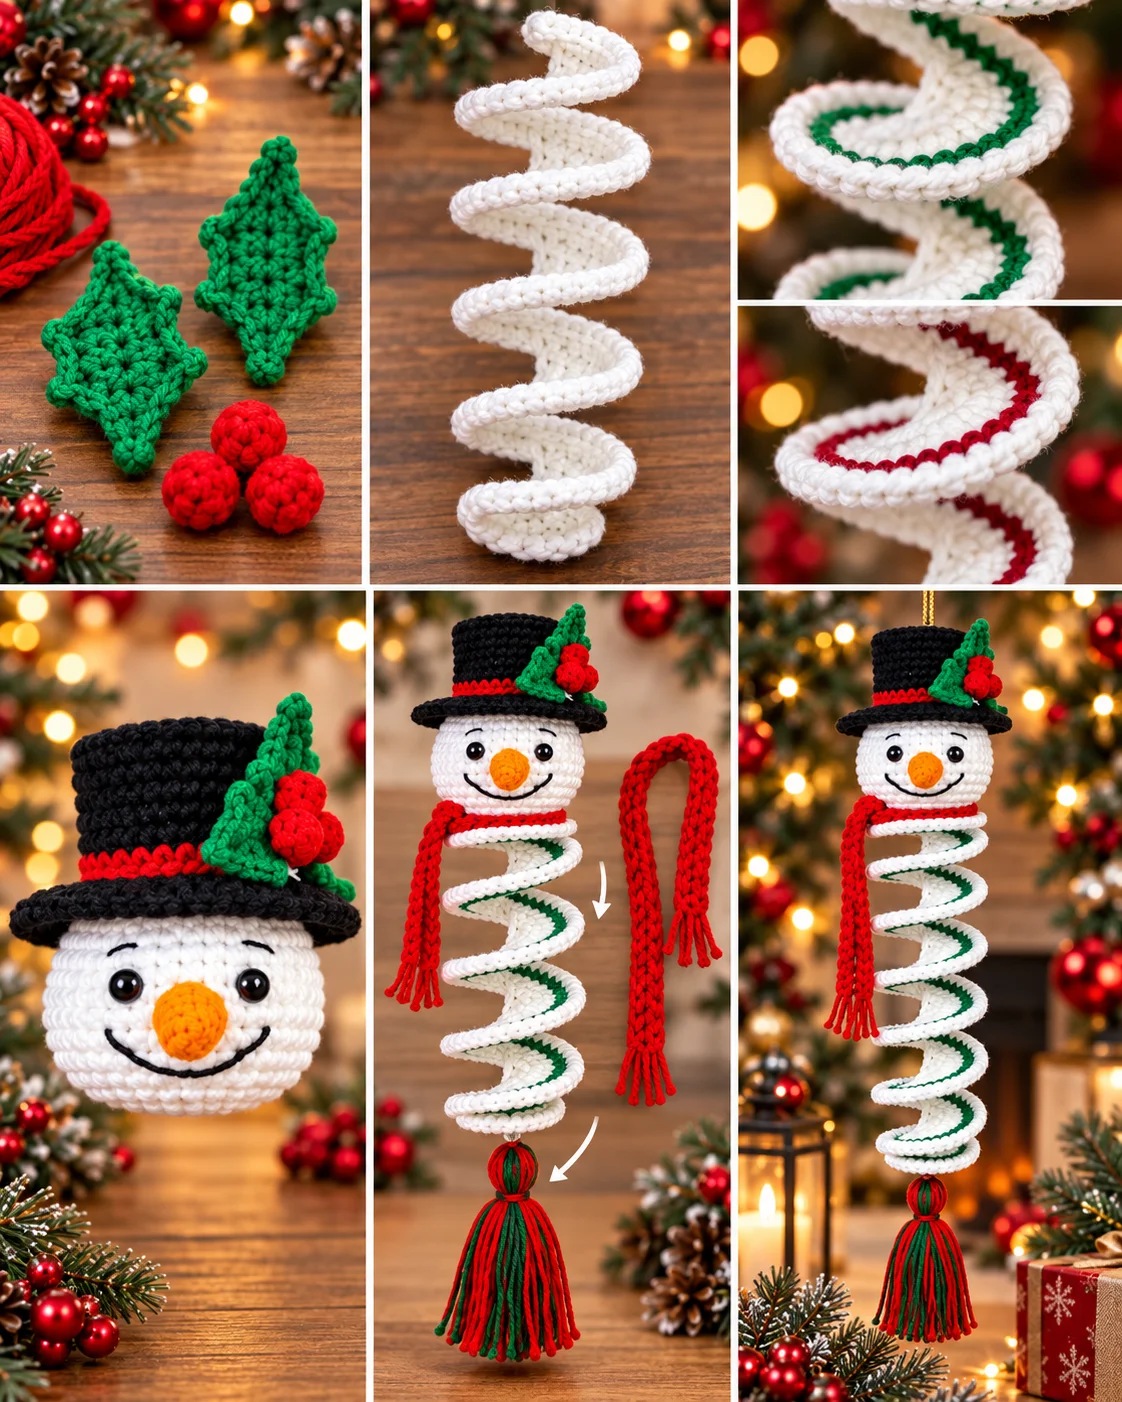
Use green yarn.
The holly decoration is created from three small branches worked from one magic ring.
Base
Inside the magic ring, work:
(Ch 5, starting in the second chain from the hook work 4 sc, slst into magic ring) × 3
You should now have three branches.
Each branch provides nine stitch positions: four along one side, one at the tip, and four along the opposite side.
Leaf 1
Slip stitch into the first stitch of the first branch.
Work:
1 sc
In the next stitch:
(1 sc, ch-3 picot, 1 sc)
Work:
1 sc
At the tip:
(1 sc, ch-3 picot, 1 sc)
Continue along the opposite side:
1 sc
In the next stitch:
(1 sc, ch-3 picot, 1 sc)
Finish with:
1 sc, slst
Repeat exactly the same instructions for Leaf 2 and Leaf 3.
Fasten off and weave in the ends.
Crochet Holly Berries
Make 3 berries using red yarn.
Ch 3.
Work one 5-dc bobble stitch into the first chain.
Fasten off while leaving a yarn tail.
Tie the two yarn tails securely together so the bobble becomes a plump, rounded berry.
Repeat until you have three berries.
Crochet Wind Spinner
The spiral body is the feature that gives this Christmas decoration its distinctive look.
Use white yarn and work in rows.
The starting chain does not count as a stitch.
The original pattern uses 62 chains and produces a spinner approximately 20 cm long, but you can add more chains for a longer spinner or reduce the chain count for a shorter one.
Foundation Chain
Ch 62.
Start in the third chain from the hook.
Row 1 – White
Work:
60 hdc inc [120]
Fasten off and weave in the ends.
Row 2 – White
Join white yarn into the first stitch of Row 1.
Ch 2, 120 dc inc [240]
Fasten off and weave in the ends.
Row 3 – Green
Join green yarn into the first stitch of Row 2.
Ch 1, (1 sc, 1 inc) × 120 [360]
Fasten off and weave in ends.
Row 4 – Red
Join red yarn into the last stitch of Row 3.
Ch 1, reverse sc across [360]
Fasten off and weave in ends.
The increase-heavy rows naturally cause the crochet fabric to curl into the long spiral shape.
Crochet Snowman Scarf
There are two scarf options included in the tutorial.
Scarf Option 1
Use red yarn.
Work in rows.
Ch 72.
Starting in the third chain from the hook:
70 hdc [70]
Fasten off and weave in ends.
Scarf Option 2
Hold one strand of red yarn and one strand of green yarn together.
Use a 4.0 mm crochet hook.
Ch 60.
Fasten off.
How to Assemble the Crochet Snowman Wind
Spinner
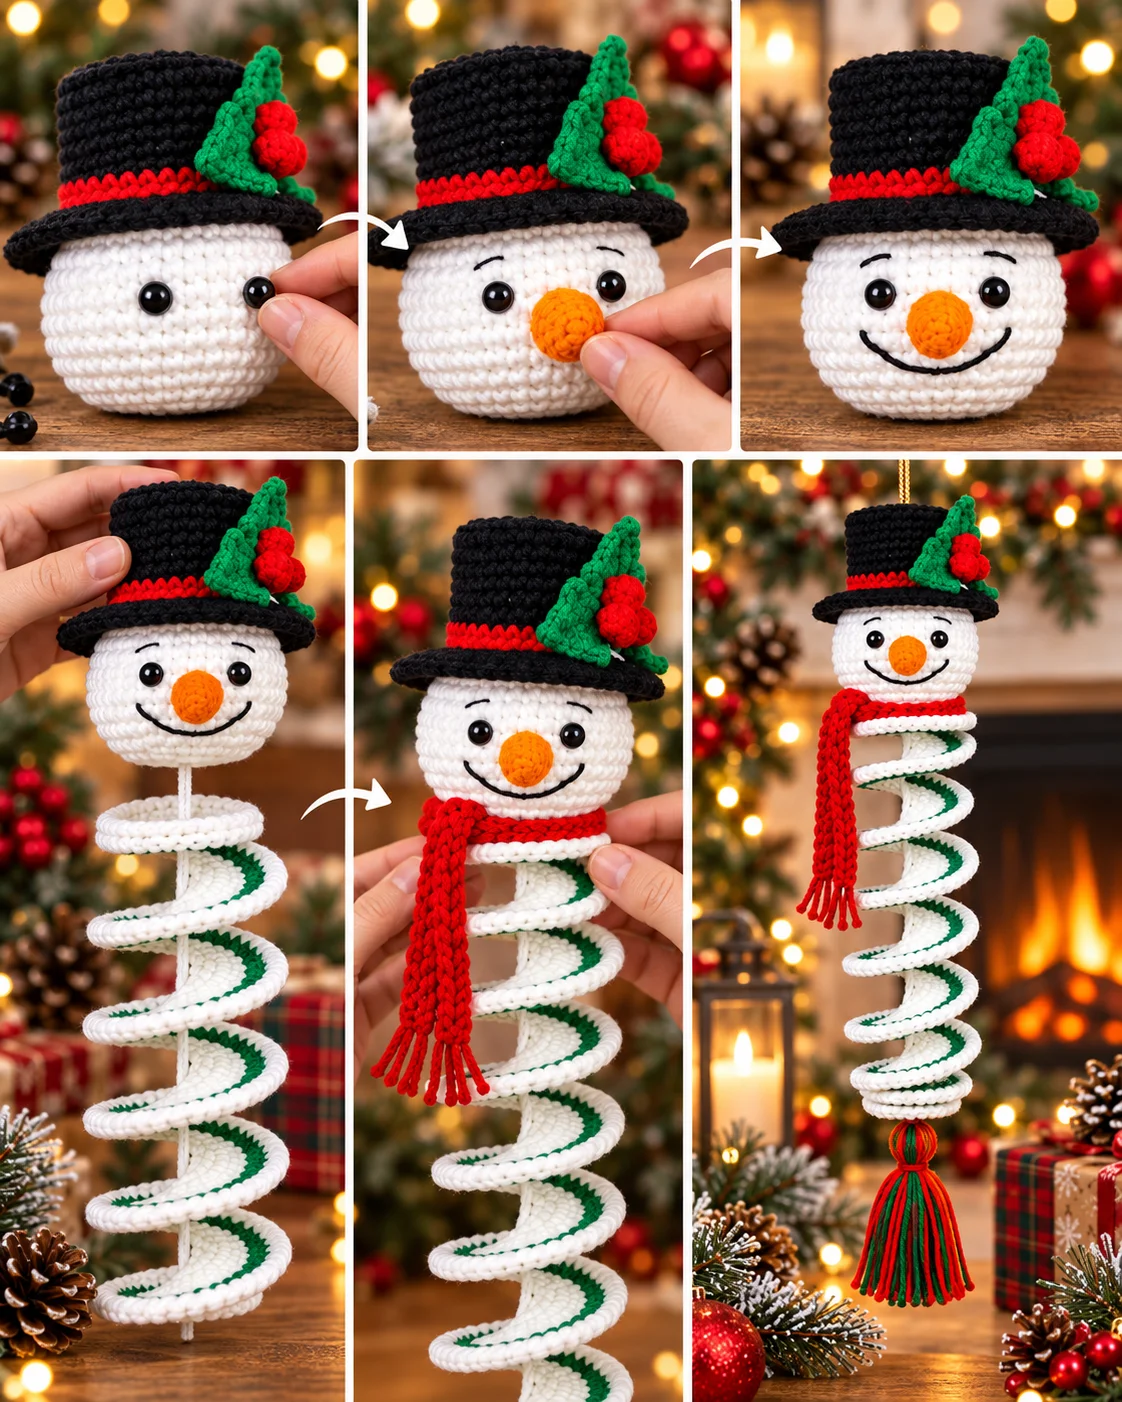
Once all the crochet pieces are complete, you can assemble your snowman.
Add the Eyes
Place the 7 mm eyes between Rounds 10 and 11, with approximately five stitches between them.
Attach the Nose
Position the carrot nose beginning around Round 11, centered between the eyes.
Secure it to the head.
Embroider the Mouth
Separate the black yarn and use two strands to embroider the snowman’s smile around Rounds 13 and 14.
Add the Eyebrows
Use a single strand of black yarn to embroider small eyebrows around Round 9.
Attach the Snowman Hat
Sew a hanging string to the top of the snowman’s head.
Thread the string through the center of the crochet hat and position the hat securely on the head.
The tutorial recommends securing the hat firmly with hot glue.
A longer, thinner hanging string can help the finished ornament move and spin more easily.
Attach the Head to the Wind Spinner
Use sewing pins to temporarily position the snowman’s head on top of the spiral.
Check the alignment carefully.
The wind spinner should sit directly beneath the center of the head so that the finished decoration does not hang unevenly.
Once everything is properly aligned, secure the head firmly in place.
Finishing Touches
Glue the three red crochet berries into the center of the holly leaves.
Attach the completed holly cluster to the snowman’s hat.
Wrap the crochet scarf around the snowman’s neck.
Finally, make a yarn tassel and sew it to the bottom of the wind spinner.
You can also replace the tassel with a small jingle bell if you prefer.
Christmas Snowman Color Ideas
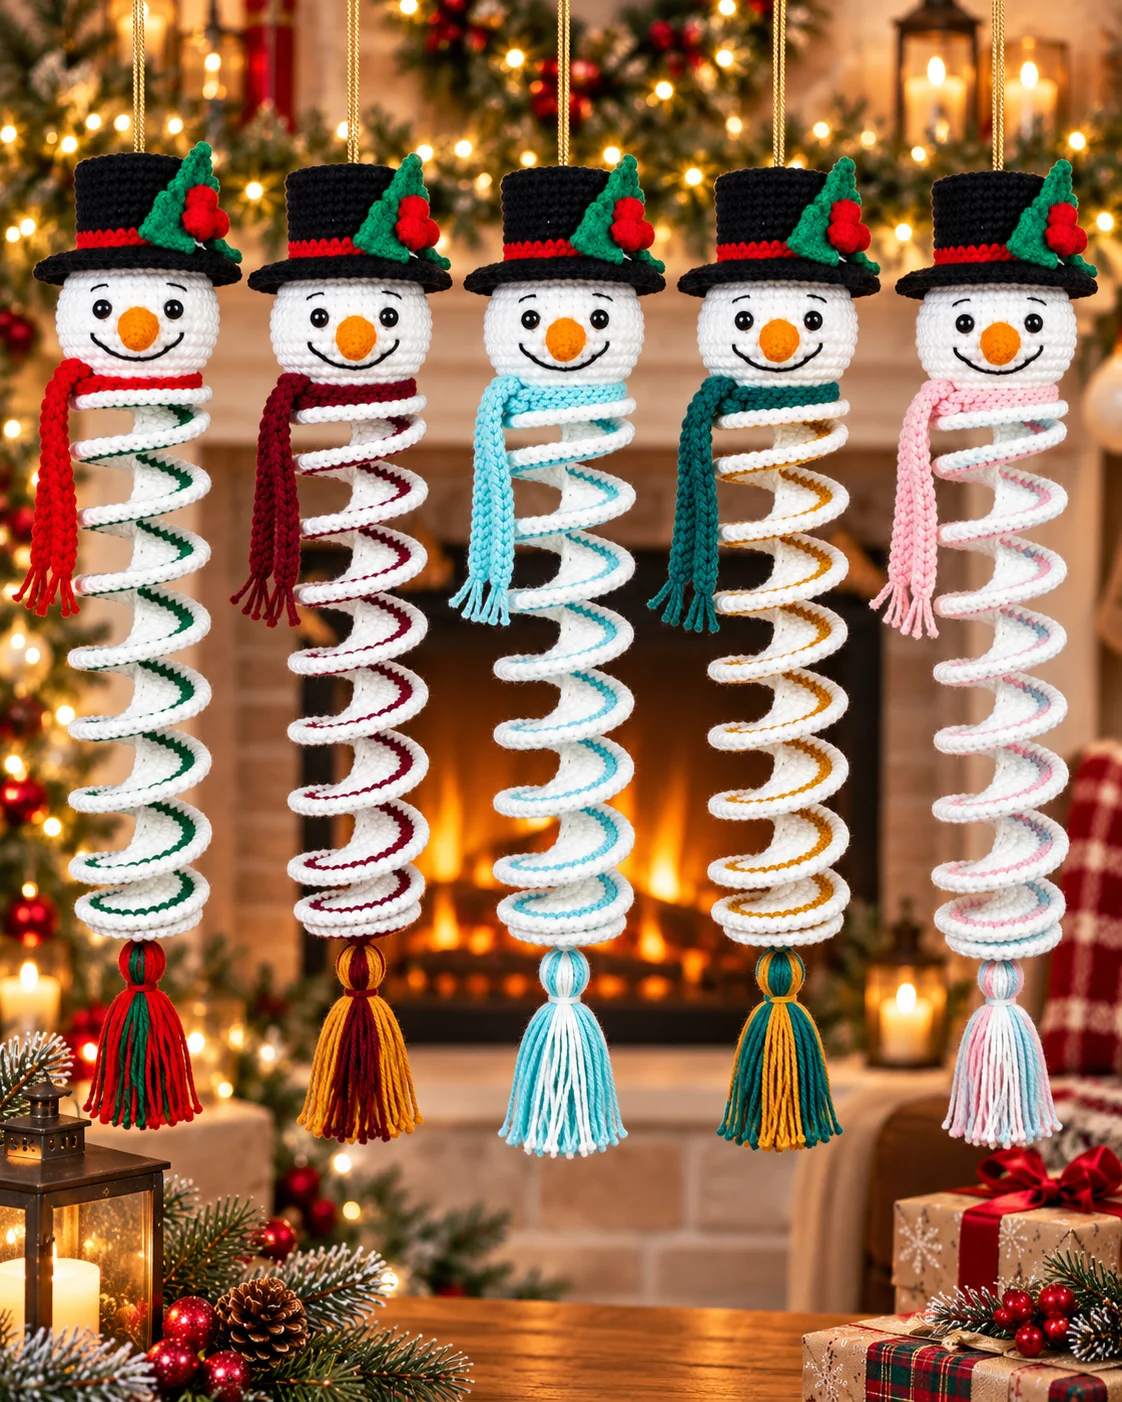
One of the nicest things about this crochet snowman wind spinner pattern is how easy it is to customize.
Keep the white spiral and experiment with different accent colors for the hat band, spiral edging, scarf, and tassel.
The tutorial shows several combinations, including classic Christmas red and green, pale winter blue, turquoise, burgundy, mustard, and other contrasting combinations.
For a traditional Christmas look, try:
White + Red + Green
For a frosty winter version:
White + Ice Blue
For something warmer:
White + Burgundy + Mustard
Or simply coordinate the colors with your existing Christmas decorations.
Tips for Making Your Snowman Wind Spinner
Maintain fairly consistent tension when crocheting the spiral so the curves form evenly.
Stuff the snowman’s head firmly enough to hold its round shape, but avoid overstuffing to the point that the stitches become visibly stretched.
When attaching the head, spend a little extra time checking that it sits exactly in the center of the spiral. Proper alignment is especially important for a hanging decoration.
You can also customize the overall size by changing the yarn weight, hook size, or starting chain length.
Crochet Snowman Wind Spinner FAQ
Can beginners make this snowman wind spinner?
The project uses familiar stitches such as single crochet, half double crochet, double crochet, increases, decreases, and slip stitches, along with a few techniques such as reverse single crochet and bobbles. A confident beginner who is comfortable reading crochet abbreviations should be able to follow it.
How long is the crochet wind spinner?
Using the original 62-chain foundation, the tutorial describes the wind spinner as approximately 20 cm long. You can change the length by adjusting the starting chain.
What size crochet hook should I use?
The main pattern uses a 2.75 mm hook. The second scarf option uses a 4.0 mm hook with two yarn strands held together.
Can I make a larger snowman?
Yes. The tutorial specifically notes that changing yarn thickness and hook size will change the finished dimensions.
Can I make the spinner longer?
Yes. Add more chains to the foundation chain. For a shorter decoration, use fewer chains.
Final Thoughts
This crochet snowman wind spinner pattern is a charming way to combine amigurumi-style crochet with festive hanging décor. The smiling snowman, tiny top hat, holly embellishment, scarf, and dramatic spiral body make it an eye-catching Christmas project without requiring a huge amount of yarn.
Once you understand the construction, it is also easy to personalize. Make one in traditional red and green, create a snowy blue version, or choose colors that match your own holiday decorations.
Whether you hang it near your Christmas tree, use it as seasonal window décor, or make one as a handmade holiday gift, this cheerful snowman is a fun addition to your winter crochet collection.
Happy crocheting!