This strawberry pouch is a bigger remake of my original strawberry pouch, with enough room for AirPods or other small TWS earbuds. It works as a tiny pouch, a bag charm, and a sweet handmade gift all at once.
You can make a classic fresh strawberry, or add a little chocolate drizzle for a chocolate-covered strawberry look. The construction is simple: crochet the pouch body, make the leafy top, add a chain strap, then decorate it with embroidered seeds and optional drizzle.
What You’ll Learn
- Build a roomy strawberry pouch with half double crochet increases and decreases.
- Create a 60-chain strap that turns the pouch into a practical bag charm.
- Crochet a six-point leafy cap using simple stitches and tiny picot points.
- Finish the pouch with embroidered seeds and optional loose chocolate drizzle.
Materials and Tools
For this project, prepare:
- 5-ply milk cotton yarn in red, light pink or white, green, and white
- Brown yarn for the optional chocolate drizzle
- A 3.5 mm crochet hook
- A tapestry needle
- Scissors
- A stitch marker
- A small amount of glue, optional

Abbreviations:
- ch: chain
- sl st: slip stitch
- sc: single crochet
- hdc: half double crochet
- dc: double crochet
- inc: increase, meaning two stitches in the same stitch
- dec: decrease
Crochet the Strawberry Pouch Body
Start with a slip knot, or use a magic ring if that is more comfortable. Chain 2.
Rounds 1 to 6: Build the Strawberry Shape
- Round 1: Work 6 hdc into the first chain. Join with a sl st to the first hdc, then ch 1.
- Round 2: Repeat 1 hdc, 1 hdc inc three times. You will have 9 hdc. Join and ch 1.
- Round 3: Make an hdc inc in every stitch around. You will have 18 hdc. Join and ch 1.
- Round 4: Repeat 5 hdc, 1 hdc inc three times. You will have 21 hdc. Join and ch 1.
- Round 5: Repeat 2 hdc, 1 hdc inc seven times. You will have 28 hdc. Join and ch 1.
- Round 6: Repeat 6 hdc, 1 hdc inc four times. You will have 32 hdc. Join and ch 1.
The first six rounds create the rounded lower section of the strawberry. Keep your stitches even, especially around the increases, so the pouch stays smooth and roomy.
Rounds 7 to 9: Crochet Straight Around
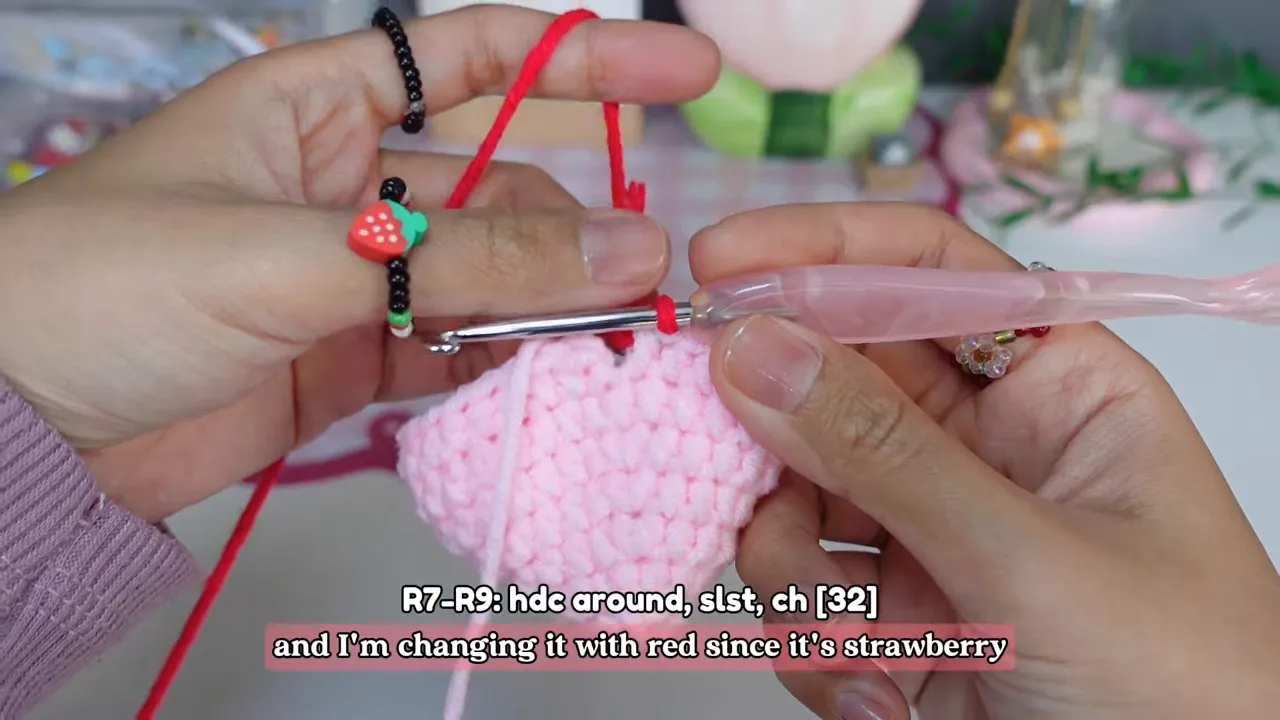
For rounds 7 through 9, work 1 hdc in every stitch around. Join each round with a sl st, then ch 1. Each round should remain at 32 hdc.
For the two-tone strawberry shown here, change yarn color at the end of round 8 and complete round 9 in red. To change color cleanly, begin the final stitch as usual, then pull the new color through for the final yarn-over and pull-through.
Rounds 10 and 11: Shape the Opening
- Round 10: Repeat 6 hdc, 1 hdc dec four times. You will have 28 hdc. Join with a sl st and ch 1.
- Round 11: Repeat 5 hdc, 1 hdc dec four times. You will have 24 hdc. Join with a sl st.
For the hdc decrease, yarn over and insert your hook into the next stitch. Pull up a loop, yarn over and pull through one loop, then insert the hook into the following stitch and pull up another loop. Yarn over and pull through all four loops on the hook. If you have another preferred hdc decrease method, that works too.
Make the Strap
Without fastening off, chain 60 for the strap, or adjust the chain length to suit the bag or item where you want to hang the pouch. Cut the yarn, leaving a long tail for sewing, but do not fasten off yet. Place a stitch marker through the working loop so it does not unravel.
Crochet the Green Leaf Top
Now make the leafy strawberry cap in green yarn. Begin with a slip knot or magic ring, then chain 2.
Leaf Base Rounds
- Round 1: Work 8 sc into the first chain. Join with a sl st, then ch 1.
- Round 2: Repeat 1 hdc, 1 hdc inc four times. You will have 12 hdc. Join and ch 1.
- Round 3: Repeat 1 hdc, 1 hdc inc six times. You will have 18 hdc. Join and ch 1.
- Round 4: Repeat 2 hdc, 1 hdc inc six times. You will have 24 hdc. Join and ch 1.
Round 5: Make Six Pointed Leaves
Each leaf uses four base stitches. Repeat the following leaf pattern six times around:
- Work 1 sc and 1 hdc into the same stitch.
- Work 1 dc in the next stitch.
- Chain 2, then sl st into the first chain to make a tiny picot point.
- Work another dc in the same stitch.
- In the next stitch, work 1 hdc and 1 sc.
- Sl st into the next stitch.
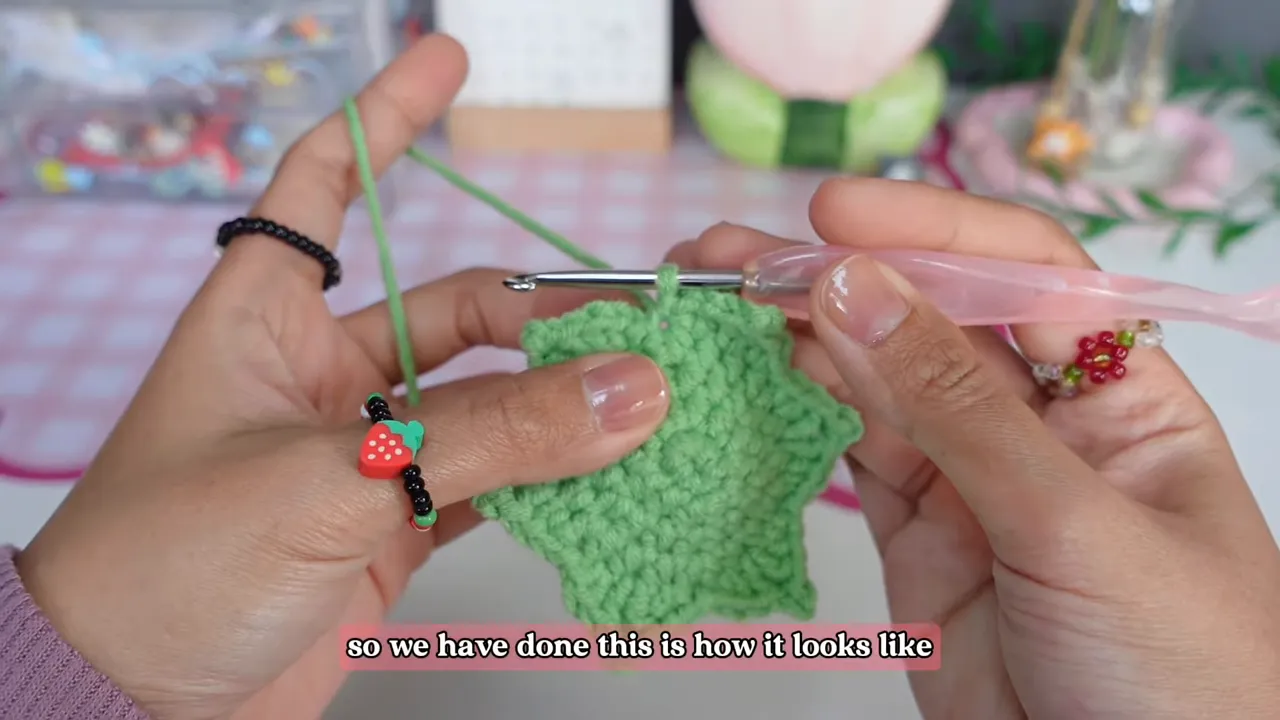
After the sixth leaf, sl st into the first leaf. Chain 1, cut the yarn, and fasten off.
Assemble the Strawberry Bag Charm
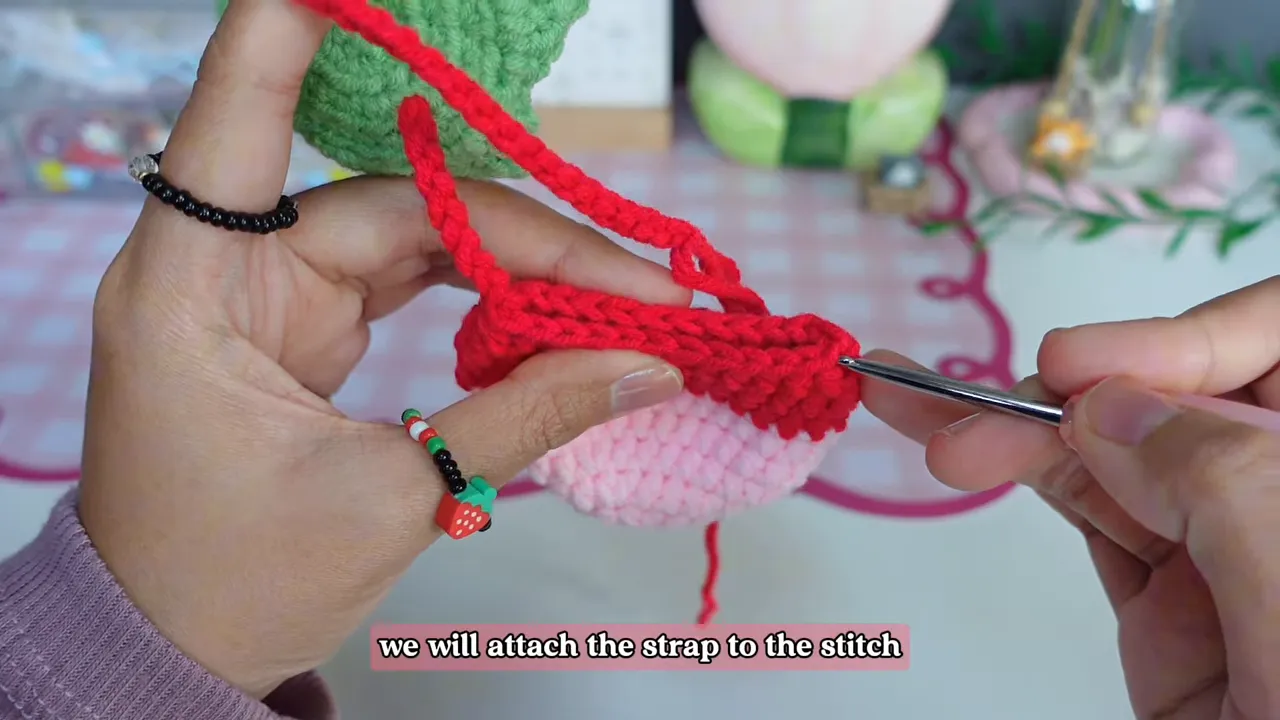
Remove the stitch marker from the pouch strap. Hold the leaf cap and pouch together, then use the long yarn tail and tapestry needle to attach one end of the strap to the leaf cap between rounds 3 and 4.
Fold the pouch in half to find the opposite side. Attach the other end of the strap directly across from where you started, so the pouch hangs evenly. Chain 2, cut the yarn, and fasten off securely.
Embroider the Strawberry Seeds
Use white yarn and a tapestry needle to embroider small seeds across the red portion of the strawberry. Scatter them naturally rather than placing them in perfectly straight rows. A few short white stitches are enough to make the strawberry texture pop.
When you are happy with the seed placement, secure both yarn ends inside the pouch with a knot, weave them in, and trim the excess.
Add Optional Chocolate Drizzle
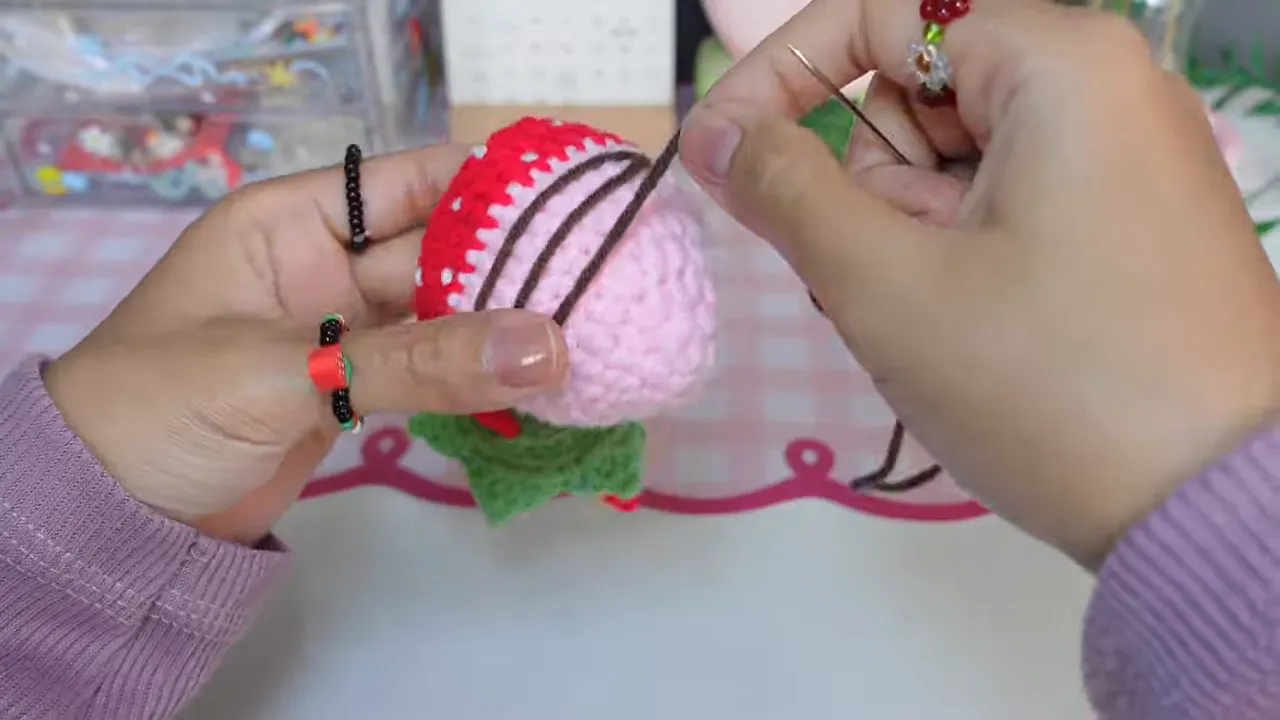
The chocolate drizzle is completely optional, but it gives the pouch a very cute chocolate-covered strawberry style. Choose the front of the pouch first, then use brown yarn to embroider a loose zigzag drizzle across the lower half.
Do not pull the brown yarn too tightly. The stitches should sit on the surface rather than pinch the pouch. Leave the inside strands a little loose while you work, then secure and trim the ends once the drizzle reaches the bottom.
If you want extra security, apply a very small amount of glue to hold the decorative yarn ends in place. Do the same inside the pouch if needed, then let everything dry fully before using it.
Your Strawberry Pouch Is Finished
That is it, your crochet strawberry pouch is ready for AirPods, earbuds, coins, tiny keepsakes, or any little essentials. Clip it onto a bag, use it as a charm, or make a few in different strawberry flavors.
For a fresh strawberry look, keep the design simple with white seeds. For a dessert-inspired version, add chocolate drizzle in brown or white yarn. The same base shape makes every variation feel like part of a matching pouch collection.
Pattern Guide from: Crochet Strawberry Pouch and Bag Charm 🍓 | Cute & Easy Crochet Pouch Tutorial 🍓 | DIY Airpods Pouch