
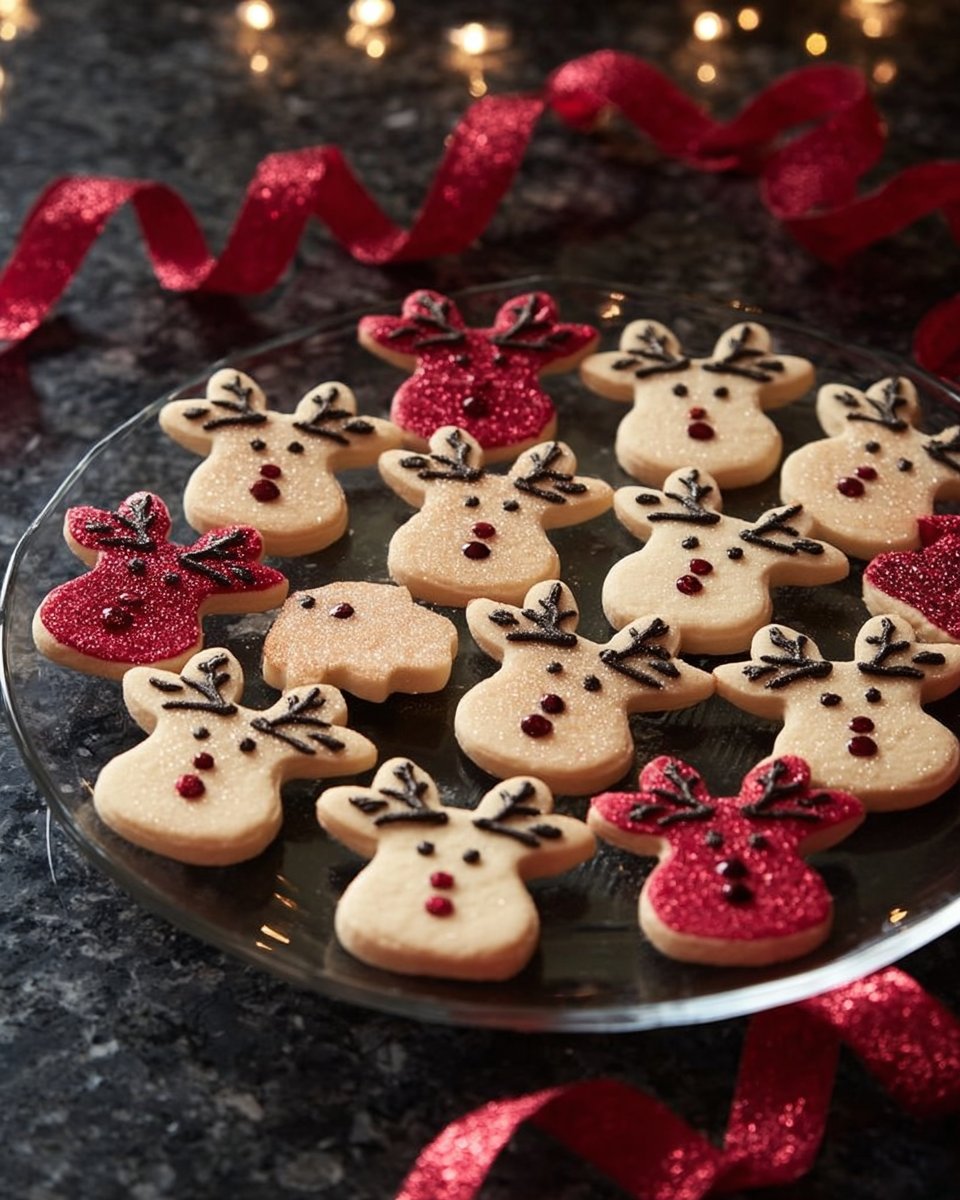
Easy Reindeer Sugar Cookies are a fun and simple treat for the holidays. These cookies look like little reindeer faces. They are soft, sweet, and made from a simple sugar cookie dough. You can make them with kids. You can make them for a party, for gifts, or to share with friends.
This guide will show you how to make the cookies from start to finish. It will also give tips on how to shape, bake, decorate, store, and freeze the cookies. You will learn safe ways to melt chocolate and to use candies. If you like a warm drink with cookies, try this easy stovetop brown sugar cinnamon oatmeal from the site for a simple breakfast or snack that pairs well with cookies: easy stovetop brown sugar cinnamon oatmeal. The link is a good match for a cozy day when you bake cookies.
I will use very simple words. I will write in plain sentences. The steps are clear and easy to follow. You do not need to be a pro baker to make these cookies. You need simple tools and easy ingredients. Most of these ingredients you may already have in your kitchen.
These cookies use melted chocolate for the eyes and antlers. They use red candies for the nose. The dough is an easy sugar cookie dough that you roll and cut. The cookie shape is a round face. The decorations make a reindeer look.
This guide is long so you can read only the parts you need. If you are new to baking, read all parts. If you bake a lot, you can skip to the parts you want. I will also give ways to change the recipe. You can use different candies. You can make the cookies bigger or smaller. You can change the chocolate type.
Read the steps before you start. Prepare your tools and your baking area. This will make baking smooth and fun. The cookies bake fast, so be ready to watch them in the oven. Small details can make a big difference in the final look.
WHY YOU WILL LOVE THIS RECIPE
You will love these Easy Reindeer Sugar Cookies for many simple reasons.
- They are easy to make. The dough is quick to mix. The steps are simple. You do not need hard skills.
- They use few ingredients. You will not need strange items. Most are in a basic pantry.
- They are fun to decorate. Kids and adults can join. The reindeer face is easy to draw with chocolate.
- They look great. The cookies make a warm, happy holiday scene on a plate.
- They are soft and tasty. The cookies bake with a soft, tender crumb.
- They work for many uses. Use them at holiday parties, school events, or to give as gifts.
If you like old school dessert vibes, these cookies bring that same warm feeling. They pair well with other classic sweets like a brown sugar peach cobbler. You can find a simple take on that here: mouthwatering old school easy brown sugar peach cobbler. That dessert can make a cozy plate with these cookies for a big family moment.
The recipe is forgiving. You can shift some steps or add small changes and still get a good result. If you use a piping bag or a small zip-top bag for melted chocolate, you get fine lines for antlers and eyes. If you use melting wafers, they melt smooth and set fast.
You will love how kids react. They will smile when they see a reindeer nose. They will want to help press the candy nose. These cookies become part of a holiday memory. They make a table look bright and festive.
The design is simple. Two antler lines and two dots for eyes make the face. A red candy in the middle makes the nose. You can make many cookies in a short time.
This recipe makes cookies that are mild in sweetness. They are not too rich. You can enjoy one or two without feeling over full. The texture is soft. The edges get a light golden edge if you bake just right.
You will like that you can make the dough ahead of time and freeze it. This makes holiday baking easy. You can bake fresh cookies on the day you need them. You can also freeze the baked cookies for later.
Many people add their own touch with shapes and toppings. Some add sprinkles on the ears, or edible glitter on the nose. The base recipe stays the same and handles many fun changes.
HOW TO MAKE Easy Reindeer Sugar Cookies
This part explains the full method, step by step, with simple notes. Follow the order below for best results.
Before you start, read the full recipe once. Gather your ingredients and tools. Preheat the oven when you are ready to bake. Keep an eye on the oven, as cookies bake fast.
This section has tips to make each step flow. It also notes points where you can change small details. If you want to try a different cookie shape or a different dough, you can see ideas in this cookie-style recipe note: brimstone cookies. That page shows other cookie ideas and shapes you may find useful.
Step-by-step tips:
- Use room temperature butter. Soft butter mixes easier and gives a smooth dough.
- Beat the butter and sugar well. You want a light and fluffy mix. This helps the cookie lift a bit and feel soft.
- Mix the dry ingredients well. This spreads the baking powder and salt evenly.
- Do not overmix after adding the flour. Mix just until a dough forms.
- Roll the dough on a floured surface. Use flour on the rolling pin to stop the dough from sticking.
- Cut cookies to about 3-inch rounds as the directions say. You can make smaller cookies, but bake time will change.
- Bake until the edges are barely golden. Do not over bake. The cookies will be soft as they cool.
- Melt the chocolate in short bursts in the microwave and stir. Or use a double boiler if you prefer. Melted chocolate must be smooth before piping.
- Pipe antlers and eyes with a small bag or a zip-top bag with a tiny snip.
- Press the red candy on a small dot of melted chocolate so it sticks.
- Let the chocolate set before stacking the cookies.
I will now show the exact steps as given so you can follow the exact order in the oven and at the counter.
EQUIPMENT NEEDED
You do not need many tools to make these cookies. Here are the basic items you will need. Each item is common in most kitchens.
- Large mixing bowl. You can use a stand mixer bowl or a large hand bowl.
- Electric mixer or stand mixer. You can use a hand mixer if you do not have a stand mixer.
- Measuring cups and spoons. Use level measures for dry ingredients.
- Whisk. For mixing the dry ingredients together.
- Rolling pin. For rolling the dough to 1/4-inch thickness.
- 3-inch round cookie cutter. If you do not have a 3-inch cutter, use a glass rim.
- Baking sheet. Use a flat metal sheet for best heat.
- Parchment paper. This prevents sticking and helps even bake.
- Small microwave-safe bowl. For melting chocolate.
- Zip-top bag or piping bag with a small tip. Use a bag to pipe the antlers and eyes.
- Small spatula or bench scraper. For moving cookies to the sheet.
- Cooling rack. For cooling the cookies after baking.
- Spoon or small knife. For small chocolate dots.
- Airtight container. For storage.
You can use a silicone baking mat instead of parchment paper. That also works well. If you have a dough scraper, use it to lift dough. If you do not have a rolling pin, press the dough with the bottom of a flat glass.
Ingredients You’ll Need :
- 1 cup (227g) Unsalted butter, softened
- 1 cup (200g) Granulated white sugar
- 1 large Egg
- 1 1/2 tsp Vanilla extract
- 3 cups (375g) All-purpose flour
- 2 tsp Baking powder
- 1/2 tsp Salt
- 1/2 cup Semi-sweet chocolate chips (or dark chocolate melting wafers)
- 1 pack Red M&Ms or Red Hots candies (for the noses)
These ingredients make a simple dough and the decorations for the face. You can use dark chocolate melting wafers if you want a firmer set and a deep chocolate look. You can use milk chocolate chips but they may melt faster if it is warm where you live.
If you cannot find Red Hots or red M&Ms, you can use small red jelly beans or small red fondant balls. Use anything small, round, and red that will stick to melted chocolate.
You can also add a bit of food coloring to the dough if you want colored cookies, but the classic look is plain cookie with chocolate and red nose.
Keep the butter at room temperature so it mixes smooth. A very cold butter will not mix well and a too soft or melted butter will change the texture.
Measure flour by spooning it into the cup and leveling off. Do not pack flour into the cup. Too much flour makes the dough dry.
STEP-BY-STEP INSTRUCTIONS :
- In a large bowl, beat the softened butter and sugar until light and fluffy (about 3 minutes). Add the egg and vanilla; mix until fully combined.
- Whisk the flour, baking powder, and salt together. Gradually add to the wet mixture on low speed. Mix just until the dough forms a ball.
- Preheat oven to 350°F (175°C). Roll the dough to 1/4-inch thickness. Cut into 3-inch round circles.
- Place cookies on a parchment-lined baking sheet. Bake for 8–10 minutes. The edges should be barely golden. Let them cool completely on the pan.
- Place the chocolate chips in a microwave-safe bowl. Heat in 30-second intervals, stirring in between, until smooth. Pour the melted chocolate into a small zip-top bag and snip a tiny corner off (or use a piping bag with a #2 tip).
- Pipe two antlers coming out from the top of the cookie (a straight line with two smaller ‘V’ branches).
- Pipe two small dots for eyes just below the antlers.
- Pipe a small dot of melted chocolate in the center of the face to act as ‘glue.’ Immediately press a Red M&M onto it.
- Let the chocolate harden for 15 minutes before serving or stacking.

After you finish these steps, your cookies will look like small reindeer faces. The antlers give a fun, simple look. The red nose makes them cute and festive.
Tips for each step:
- Step 1: Beat the butter and sugar long enough to add air. This makes the cookies tender. Use a paddle attachment for a stand mixer if you have one. Scrape the bowl once or twice.
- Step 2: Add the dry mixture in small parts. This helps mix without overworking the dough. Stop when you see a ball.
- Step 3: Chill the dough for 10 minutes if it gets soft from mixing. A slightly cold dough is easier to roll.
- Step 4: Space cookies about 2 inches apart on the sheet.
- Step 5: Stir the chocolate well. If it is too thick, add a small bit of neutral oil to smooth.
- Step 6-8: Practice piping on a spare piece of parchment before piping on cookies. This helps steady your hand.
This list follows the original recipe steps exactly and adds small tips so you can bake with good results.
HOW TO SERVE Easy Reindeer Sugar Cookies
These cookies are perfect for holiday snack tables. They also make great gifts in boxes or bags. Here are many simple serving ideas in plain words.
- Serve on a white plate with a festive napkin. The red noses will stand out.
- Put them on a tiered tray for a party. Mix sizes if you make small and large versions.
- Wrap stacks of three or four in clear cellophane and tie with a ribbon for gifts.
- Serve with hot cocoa or warm milk. The cookies go well with a warm drink.
- Place them on a cookie exchange table with labels so guests know the flavor.
- Use them as a dessert after a simple meal. They are light and sweet.
- Pair with fruit and cheese on a snack board for a mixed plate.
If you need a warm drink to pair, try a light coffee or a cinnamon-flavored cappuccino. A brown sugar cinnamon cloud cappuccino is a good match for these cookies. It has warm spice notes that pair with the cookie’s sweet flavor. You can read a simple recipe here: brown sugar cinnamon cloud cappuccino.
Serve the cookies at room temperature. If the chocolate is firm, they will hold up well. If it is warm and the chocolate softens, keep them in a cool spot.
For a party:
- Make the cookies a day ahead and store them in a cool place.
- If you plan to decorate at the party, set up a small decorating station with melted chocolate and candies.
- Provide napkins and small plates.
For gift boxes:
- Place a sheet of parchment paper in the box.
- Lay cookies flat in one layer or stack with parchment sheets between layers.
- Close the box and tie with ribbon.
For kids:
- Let kids press the red candy nose on the chocolate dot.
- Let kids try piping the antlers on spare cookies first.
- Keep hands clean and dry when handling the candies.
These simple ways will make your presentation look neat. The cookies are fun and bright, and they will bring smiles.
STORAGE & FREEZING : Easy Reindeer Sugar Cookies
Storing and freezing will keep your cookies fresh. Use these tips to keep taste and texture.
Short term storage (2–3 days):
- Let the cookies cool fully and the chocolate set.
- Put cookies in an airtight container.
- Place a sheet of parchment between layers to stop sticking.
- Store at room temperature in a cool, dry place. Avoid direct heat and sunlight.
Long term storage (up to 1 week):
- Follow short term steps.
- Keep in a cool place or in the fridge. If you use the fridge, bring cookies to room temp before serving for the best texture.
Freezing cookie dough:
- Make the dough and form into a disk.
- Wrap the dough disk in plastic wrap and place in a freezer bag.
- Label with date and recipe name.
- Freeze up to 3 months.
- To use, thaw in the fridge overnight. Roll and cut as usual.
Freezing cut cookies (unbaked):
- Cut the dough into rounds and place on a tray.
- Freeze until firm.
- Transfer to a freezer bag. Label with date.
- Bake from frozen, add 1–2 extra minutes to baking time.
Freezing baked cookies:
- Cool cookies fully and let the chocolate set.
- Place cookies in a single layer on a tray and freeze until firm.
- Move to a freezer-safe container with parchment between layers.
- Freeze up to 3 months.
- To thaw, bring to room temperature while still on the tray. This reduces sweat and condensation.
Thawing and serving:
- Thaw in the fridge or at room temperature.
- If the chocolate sweats during thaw, blot gently with a paper towel.
Notes on chocolate:
- If you freeze cookies with candies and chocolate, the chocolate may change texture slightly. Use melting wafers if you want a firmer set after freezing.
If you send cookies as gifts by mail, pack with parchment and paper padding. Freeze before shipping to help them stay firm longer in transit.
SERVING SUGGESTIONS
These cookies can be part of many simple plates. Here are many plain, easy ideas that use common items.
Breakfast or brunch:
- Set cookies with coffee, milk, or tea.
- Offer small fruit like grapes or sliced apples.
Snack plate:
- Add nuts, dried fruit, and small crackers.
- Add a small bowl of caramel or chocolate dip.
Party tray:
- Put cookies on a large tray with clusters of candies.
- Add small labels or tags.
Dessert plate:
- Serve 2 cookies with a scoop of simple vanilla ice cream.
- Drizzle a small warm chocolate sauce on the plate for a fancy touch.
Drinks pairing:
- Milk is classic with cookies.
- Hot cocoa is a cozy pair.
- A simple latte or cappuccino goes well too. For a sweet spice match, try a brown sugar cinnamon cloud cappuccino: brown sugar cinnamon cloud cappuccino.
Gifts:
- Place 4-6 cookies in a small box with tissue paper.
- Tie with a simple ribbon.
Kids’ activity:
- Make plain circles and let kids decorate with icing and candies.
- Set up a small table with options for eyes, noses, and antlers.
Holiday party:
- Make a big batch and place on a large plate.
- Add small paper labels like “Reindeer Cookies” for a festive touch.
These simple ideas will make your cookies fit many events. They are a flexible treat that go well with many drinks and snacks.
VARIATIONS
You can change parts of this recipe to make new looks and flavors. Here are many simple ideas.
Chocolate antlers and white eyes:
- Use white melting wafers for the eyes instead of chocolate.
- Pipe antlers with dark chocolate for a strong contrast.
Different nose candies:
- Use red jelly beans.
- Use small red fondant balls.
- Use icing or a small red candy button.
Add spices to the dough:
- Add 1/2 tsp cinnamon for a warm flavor.
- Add 1/4 tsp ground ginger for a mild spice.
- Add 1/8 tsp nutmeg for depth.
Use almond extract:
- Replace 1/2 tsp of vanilla with 1/2 tsp almond extract for a nutty note.
- Keep the rest the same.
Change the cookie shape:
- Make small cookies and use mini candies for tiny reindeer faces.
- Make a heart shape for a holiday twist.
Add sprinkles:
- Add a few sprinkles around the face using a thin layer of melted chocolate as glue.
- Use festive sprinkles to match the season.
Use colored sugar:
- Before baking, press a small amount of colored sugar on top for a fun edge.
- Keep it simple and not too much to avoid burning in the oven.
Make them gluten free:
- Use a 1:1 gluten-free flour blend.
- Follow the same steps and check the dough texture.
- You may need a bit more flour or a touch of xanthan gum for structure.
Use different chocolate flavors:
- Use milk chocolate for a sweeter look.
- Use dark chocolate for sharper contrast and richer taste.
- Use white chocolate and add a little cocoa powder to darken the antlers if you want.
Serve with a matching drink:
- Try a brown sugar lavender shaken espresso for a grown-up twist. The light floral note pairs well if you like a soft coffee taste: brown sugar lavender shaken espresso.
Make a gingerbread style:
- Add spices and a bit more baking powder.
- Use a deeper brown sugar and less granulated sugar.
Add candy eyes:
- Instead of piping eyes, use small candy eyes placed with a dot of melted chocolate.
Make mini party bites:
- Make small 1.5-inch circles. Use mini chocolate chips and mini red candies. Bake for less time.
These ideas are simple ways to change the cookie. All keep the basic method and keep the cookie easy to make.
FAQs
Q: Can I make the dough ahead of time? A: Yes. You can make the dough and wrap it in plastic. Keep it in the fridge for up to 2 days. You can also freeze the dough for up to 3 months.
Q: Can I use butter substitutes? A: You can use salted butter. Reduce added salt by half if you use salted butter. Do not use margarine. It changes the texture.
Q: Can I bake the cookies larger or smaller? A: Yes. Use the same thickness. Smaller cookies need less time. Check at 6–8 minutes for small sizes. Larger ones may need 10–12 minutes.
Q: How do I melt chocolate without a microwave? A: Use a double boiler. Heat water in a pot and put a bowl on top. Keep the bowl from touching water. Stir chocolate until melted.
Q: What is the best way to get smooth melted chocolate? A: Chop chips if they are large. Heat in short bursts in the microwave and stir often. If chocolate is thick, add a small spoon of neutral oil (like vegetable or coconut) to smooth.
Q: Can I use other candies for the nose? A: Yes. Small round candies work best. Try red jelly beans, red candies, or fondant dots.
Q: Why did my cookies spread too much? A: If butter was too warm or dough was overworked, cookies can spread. Chill the dough for 10–15 minutes before cutting if this is a problem.
Q: Why are my cookies dry? A: You may have added too much flour. Measure flour by spooning into the cup and leveling off. Do not pack flour into the cup.
Q: Can I tint the cookie dough? A: Yes. Add a drop or two of gel food coloring. Do not add liquid food coloring. Gel works best.
Q: How long do the baked cookies stay fresh? A: Stored in an airtight container, they stay fresh for up to 5 days at room temperature. In the fridge, they will last about one week.
Q: Can I stack the cookies after decorating? A: Wait until the chocolate sets fully. Place layers of parchment between stacks if you must stack.
Q: Can I use cocoa powder in the dough? A: You can add up to 1/4 cup to make a cocoa dough. Reduce flour by the same amount to keep texture.
Q: Can I make these without eggs? A: You can use an egg replacer or a flax egg (1 tbsp ground flax + 3 tbsp water, let rest). Egg replacers may change texture slightly.
Q: How do I fix cracked cookies? A: Crack happens if the dough is too dry or rolled too thin. Add 1–2 tsp milk to the dough to help. Roll the dough slightly thicker.
Q: Can I use this dough for cut-out shapes other than reindeer? A: Yes. Use any cutter you like. Decorate with icing or chocolate for other designs.
Q: Why did my chocolate look streaky? A: Sometimes chocolate is not fully melted or is too cool. Rewarm gently and stir until smooth.
Q: Can I make a vegan version? A: Use vegan butter, a plant-based egg replacer, and vegan chocolate. The texture will be a bit different but still tasty.
Q: Can I make the antlers with piped icing instead of chocolate? A: Yes. Royal icing or a thick chocolate icing works. Use a small tip to pipe antlers.
Q: How do I make the red candy stay put? A: Press a small dab of melted chocolate on the cookie and press the candy into the dab immediately.
These FAQs answer many common points in clear, short words. If you have more questions, ask and I will help.
MAKE-AHEAD TIPS FOR Easy Reindeer Sugar Cookies
These tips will make your baking day easier. You can do many steps ahead to save time.
Make the dough ahead:
- Make the full dough and wrap in plastic.
- Chill in the fridge up to 48 hours.
- When ready, roll and cut and bake.
Freeze cut dough:
- Cut circles and place on a tray.
- Freeze until firm and store in a freezer bag for up to 3 months.
- Bake from frozen and add 1–2 minutes to bake time.
Bake cookies ahead:
- Bake and cool cookies and set the chocolate.
- Store in an airtight container with parchment between layers.
- Keep at room temp for 2–3 days or refrigerate up to one week.
Prep the melted chocolate:
- Melt the chocolate on bake day for best flow.
- If you must, melt and keep warm in a double boiler on low heat before decorating.
Pre-pack gift boxes:
- Keep a stack of small boxes and ribbons ready.
- Have parchment squares cut to line boxes.
Plan a decorating day:
- Bake plain circles and set them on sheets.
- Let guests or kids decorate with chocolate and candies.
Organize your table:
- Have bowls for candies, scoops for chocolate, and small plates for finished cookies.
- Keep napkins and wet wipes nearby for small hands.
Label packages:
- Use a marker and small tags to mark the cookie type and date.
Chill during warm months:
- If your house is warm, place baked cookies in the fridge to set the chocolate before packing.
Make batter notes:
- Write notes on your recipe card about any small changes you make. This helps repeat good versions.
These make-ahead tips help you save time and reduce stress. Do the big steps ahead and use the fun steps for the event day.
If you want more cookie ideas or other sweet recipes, visit simple, warm recipes across the site. For example, a brown sugar cinnamon cloud cappuccino or a shaken espresso can pair well with cookies in different ways. You can find many simple recipes to match your cookie day.
PrintEasy Reindeer Sugar Cookies

Fun and simple reindeer-shaped sugar cookies perfect for the holidays.
- Prep Time: 15 minutes
- Cook Time: 10 minutes
- Total Time: 25 minutes
- Yield: 24 cookies 1x
- Category: Dessert
- Method: Baking
- Cuisine: American
- Diet: Vegetarian
Ingredients
- 1 cup (227g) Unsalted butter, softened
- 1 cup (200g) Granulated white sugar
- 1 large Egg
- 1 1/2 tsp Vanilla extract
- 3 cups (375g) All-purpose flour
- 2 tsp Baking powder
- 1/2 tsp Salt
- 1/2 cup Semi-sweet chocolate chips (or dark chocolate melting wafers)
- 1 pack Red M&Ms or Red Hots candies (for the noses)
Instructions
- In a large bowl, beat the softened butter and sugar until light and fluffy (about 3 minutes). Add the egg and vanilla; mix until fully combined.
- Whisk the flour, baking powder, and salt together. Gradually add to the wet mixture on low speed. Mix just until the dough forms a ball.
- Preheat oven to 350°F (175°C). Roll the dough to 1/4-inch thickness. Cut into 3-inch round circles.
- Place cookies on a parchment-lined baking sheet. Bake for 8–10 minutes. The edges should be barely golden. Let them cool completely on the pan.
- Place the chocolate chips in a microwave-safe bowl. Heat in 30-second intervals, stirring in between, until smooth. Pour the melted chocolate into a small zip-top bag and snip a tiny corner off (or use a piping bag with a #2 tip).
- Pipe two antlers coming out from the top of the cookie. Pipe two small dots for eyes just below the antlers.
- Pipe a small dot of melted chocolate in the center of the face to act as ‘glue.’ Immediately press a Red M&M onto it.
- Let the chocolate harden for 15 minutes before serving or stacking.
Notes
These cookies are fun and easy to make, perfect for kids to decorate. You can use different candies for the nose and adjust the chocolate type.
Nutrition
- Serving Size: 1 cookie
- Calories: 150
- Sugar: 10g
- Sodium: 150mg
- Fat: 7g
- Saturated Fat: 4g
- Unsaturated Fat: 2g
- Trans Fat: 0g
- Carbohydrates: 20g
- Fiber: 0g
- Protein: 1g
- Cholesterol: 25mg
Keywords: cookies, holiday, reindeer, sugar cookies, festive treats