INTRODUCTION
Elderberry tart is a wonderful dessert that combines sweet and tart flavors. It has a unique taste that makes it a favorite among many. The tart is made from elderberry juice, which gives it a lovely color and a burst of flavor. The crust is nutty and holds the filling perfectly. This dessert is not only delicious but also packed with nutrients from the elderberries. It is a great choice for gatherings, special occasions, or just a treat for yourself.
WHY YOU WILL LOVE THIS RECIPE
There are many reasons to love this elderberry tart recipe. First, it is simple and easy to make. The ingredients are basic and can be found in most kitchens. Second, the taste is incredible. The combination of elderberry juice and lemon juice creates a perfect balance of sweet and sour. Third, it looks beautiful. You can top it with fresh fruits, making it a stunning centerpiece for your table. Lastly, it is a healthy dessert. Elderberries are known for their health benefits, making this treat not only tasty but also good for you.
HOW TO MAKE Elderberry Tart
Making an elderberry tart may seem tricky, but it is quite easy with the right steps. You will create a nutty crust and a rich filling that is both sweet and tangy. Follow these easy instructions to create your elderberry tart.
EQUIPMENT NEEDED
- Mixing bowl
- Mixer or food processor
- Saucepan
- Whisk
- Tart tin
- Parchment paper
- Strainer
Ingredients You’ll Need
- 2 cups almonds
- 1 cup pitted dates
- 3-4 tablespoons water (for soaking)
- Small pinch Himalayan salt
- 1 cup elderberry juice
- 0.5 cup lemon juice
- 4 egg yolks
- 2 eggs
- 1 cup raw sugar
- 9 tablespoons unsalted butter
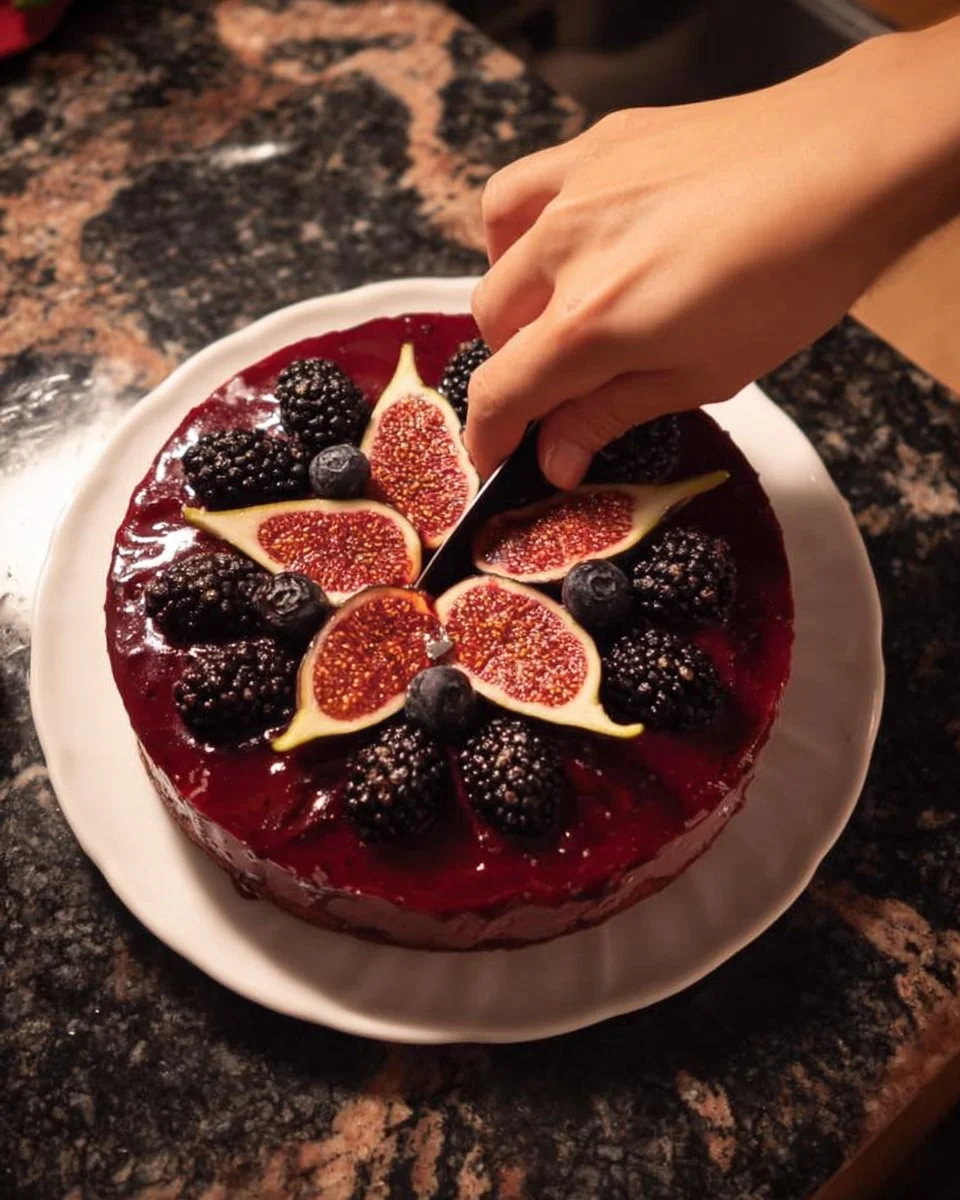
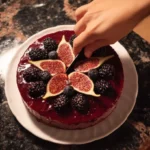
- Fresh fruits for decoration (e.g., blueberries, blackberries, black grapes, figs)
STEP-BY-STEP INSTRUCTIONS
-
Start by soaking the dates in 2 tablespoons of hot water. This will make them soft and easier to blend.
-
Place the almonds and a small pinch of Himalayan salt in a mixer. Blend the almonds until they are the size of breadcrumbs.
-
Add the soaked dates to the blended almonds. Add one tablespoon of water as well. Pulse the mixture until it forms a compact and sticky mixture.
-
Next, spread the almond and date mixture evenly in the bottom of a tart tin lined with parchment paper. This will be the crust of your tart.
-
In a separate saucepan, combine elderberries and 0.5 cup of water. Simmer this mixture on low heat for about 20 minutes. Stir and smash the berries while cooking to release more juice.
-
After simmering, strain the mixture through a strainer to extract 2 cups of elderberry juice. Discard the solid berries.
-
In another saucepan, mix the lemon juice and elderberry juice. Heat this over medium heat until it is warm.
-
In a mixing bowl, whisk the eggs and egg yolks until you get a foam-like texture. Gradually add the raw sugar while whisking.
-
Pour half of the warm juice mixture into the egg mixture slowly, whisking constantly to combine. This step is important to prevent the eggs from cooking.
-
Return the egg and juice mixture to the saucepan with the remaining juice. Stir the mixture constantly until it thickens. It should be similar in consistency to runny yogurt. If it does not thicken, you can add a little cornstarch to help.
-
Once thickened, remove the saucepan from the heat and add the melted butter. Mix it in well until combined.
-
Allow the filling to cool slightly before pouring it over the crust you made earlier.
-
Place the tart in the fridge and chill for at least 2 hours. This allows it to set properly.
-
Before serving, decorate your tart with fresh fruits like blueberries, blackberries, black grapes, or figs for a colorful finish.
***

***
HOW TO SERVE Elderberry Tart
When serving your elderberry tart, slice it into equal pieces. You can serve it chilled on its own or add a dollop of whipped cream on the side for extra creaminess. The fresh fruits on top add a nice touch and make it look appealing. It can also be served as a dessert after a hearty meal or as a sweet snack during the day.
STORAGE & FREEZING: Elderberry Tart
If you have leftover elderberry tart, you can store it in the fridge. Cover it well with plastic wrap or keep it in an airtight container. It will stay fresh for about 3 to 5 days. If you want to freeze the tart, make sure it is fully set and cool before wrapping it in plastic wrap and then foil. You can freeze it for up to 3 months. When you are ready to eat it, let it thaw in the fridge overnight before serving.
SERVING SUGGESTIONS
Elderberry tart pairs well with various accompaniments. You can serve it with vanilla ice cream or whipped cream for a richer flavor. Some people like to have it with a hot cup of tea or coffee. It also goes well for a picnic or a potluck, making it a versatile dessert for any occasion. You can even serve it as a brunch item for special gatherings.
VARIATIONS
There are many ways to enjoy elderberry tart. You can try different fruits for decoration, like strawberries or raspberries. If you prefer a different flavor, you can substitute the elderberry juice with other fruit juices like raspberry or blueberry. Additionally, if you’re looking for a vegan option, consider using flax eggs instead of the chicken eggs. Simply mix 1 tablespoon of ground flaxseed with 2.5 tablespoons of water for each egg replacement and let it sit until it thickens.
FAQs
-
Where do I find elderberry juice?
You can find elderberry juice in health food stores, larger grocery stores, or online. Make sure to choose a pure juice without added sugars for the best flavor. -
Can I use frozen elderberries?
Yes, frozen elderberries can work just as well as fresh ones. Just thaw them before cooking to make juice. -
Is elderberry tart gluten-free?
Yes, as long as you ensure that no gluten-containing ingredients are used, such as any additives in pre-made juices. The tart crust is made from almonds and dates, making it naturally gluten-free. -
Can I make the tart ahead of time?
Yes, you can make the elderberry tart a day before serving. Just make sure to store it in the fridge to keep it fresh.
*** 
***
MAKE-AHEAD TIPS FOR Elderberry Tart
To save time, you can prepare parts of the elderberry tart ahead of time. Start by making the crust the day before and store it in the fridge. You can also prepare the filling in advance, allowing it to cool completely before pouring it into the crust. Just make sure to chill the assembled tart for at least 2 hours before serving to let it set properly. This way, when it’s time to serve, you’ll have a delicious dessert ready to impress your guests without too much last-minute work.
PrintElderberry Tart
An easy and delicious elderberry tart with a nutty crust and a sweet-tart filling, perfect for gatherings or as a special treat.
- Prep Time: 15 minutes
- Cook Time: 40 minutes
- Total Time: 55 minutes
- Yield: 8 servings 1x
- Category: Dessert
- Method: Baking
- Cuisine: American
- Diet: Gluten-Free, Vegetarian
Ingredients
- 2 cups almonds
- 1 cup pitted dates
- 3–4 tablespoons water (for soaking)
- Small pinch Himalayan salt
- 1 cup elderberry juice
- 0.5 cup lemon juice
- 4 egg yolks
- 2 eggs
- 1 cup raw sugar
- 9 tablespoons unsalted butter
- Fresh fruits for decoration (e.g., blueberries, blackberries, black grapes, figs)
Instructions
- Soak the dates in 2 tablespoons of hot water until soft.
- Blend the almonds and Himalayan salt until breadcrumb-sized.
- Add soaked dates and one tablespoon of water; pulse until sticky.
- Spread the mixture in a tart tin lined with parchment paper to form the crust.
- Simmer elderberries with 0.5 cup water for 20 minutes, stirring and smashing.
- Strain to extract 2 cups of elderberry juice.
- Mix lemon and elderberry juices in a saucepan and warm.
- Whisk eggs and yolks until foamy; gradually add raw sugar.
- Slowly add half warm juice to eggs, whisking constantly.
- Return mixture to saucepan, stirring until thickened.
- Remove from heat and incorporate melted butter.
- Pour filling over the crust and chill in the fridge for at least 2 hours.
- Decorate with fresh fruits before serving.
Notes
Serve chilled with whipped cream or vanilla ice cream for a richer flavor. Can be stored in the fridge for 3-5 days or frozen for 3 months.
Nutrition
- Serving Size: 1 slice
- Calories: 300
- Sugar: 12g
- Sodium: 50mg
- Fat: 15g
- Saturated Fat: 4g
- Unsaturated Fat: 8g
- Trans Fat: 0g
- Carbohydrates: 38g
- Fiber: 6g
- Protein: 5g
- Cholesterol: 70mg
Keywords: elderberry tart, dessert, healthy dessert, gluten-free dessert, elderberry recipe