If you’ve ever tried making pie crust gluten free, you know it can be a challenge. But don’t worry—I’ve got you covered with my nearly fool-proof method for flaky, tender gluten free pie crust every single time.
As someone who loves baking for my family (and who happens to be gluten intolerant), I’ve tested countless versions of gluten free pie dough. After lots of trial and error, this is the one that finally works. Whether you’re baking a fruit pie, a savory quiche, or a holiday favorite, this crust will have everyone asking for seconds.
Let’s jump in!
Why You’ll Love This Recipe
Here are a few reasons why this gluten free pie crust will become your go-to:
- Flaky & tender – No more dense or crumbly gluten free crust.
- Nearly fool-proof – Simple method with reliable results.
- Vegan-friendly – Use shortening instead of butter.
- Make ahead friendly – Dough can be made ahead and frozen.
- Versatile – Works with sweet or savory fillings.
And if you love making from-scratch recipes like this, you might also enjoy my Slow Cooker BBQ Beef or Bang Bang Chicken Burgers for savory meal ideas.
Ingredients You Will Need
You only need a few pantry staples and some basic tools to make this gluten free pie crust:
Tools
- Rolling pin
- Parchment paper
- Food processor or pastry blender
- Metal pie pan (recommended for best results)
For the Slurry
- 1/3 cup Measure-For-Measure Gluten-Free Flour Blend (40 grams)
- 1/2 cup cold water
For the Pie Dough
- 2 cups Measure-For-Measure Gluten-Free Flour Blend (240 grams)
- 1 cup shortening (I prefer Spectrum non-hydrogenated shortening)
- 1 tablespoon sugar, honey, or agave
- 1 teaspoon kosher salt
- 1 tablespoon gluten-free flour (for the countertop)
Step-by-Step Instructions
1. Make the Slurry
- In a small bowl, combine the cold water and 1/3 cup gluten-free flour.
- Whisk or stir until well blended and evenly combined.
- Set aside while you prepare the dough.
2. Combine the Dry Ingredients
- In a food processor, combine 2 cups gluten-free flour, the shortening, sugar, and salt.
- Pulse briefly to combine. The mixture will still have clumps—this is normal!
- Alternatively, you can use a pastry blender to cut the shortening into the dry ingredients.
3. Add the Slurry
- Pour the prepared slurry over the pie dough mixture.
- Pulse to combine until the dough starts to come together. It will be quite sticky—don’t add extra flour!
4. Shape the Dough
- Sprinkle about 1 tablespoon of gluten-free flour onto your countertop.
- Scoop the dough onto the floured surface.
- Use your hands to gently shape the dough into a ball.
5. Divide the Dough
- Use a knife to divide the dough in half.
- Shape each half into a disc.
- If not baking right away, wrap each disc in plastic wrap and chill or freeze.
- To use later, thaw and bring to room temperature before rolling out.
6. Roll Out the Dough
- Place one disc between two large sheets of parchment paper.
- Roll out into a 9-10 inch circle, about the size of your pie pan.
- Remove the top sheet of parchment.
- Place your pie pan face down onto the rolled-out dough, then carefully flip the pan right side up.
7. Crimp the Edges
- Adjust the crust so it is evenly placed in the pan.
- Gently patch any cracks with your fingers.
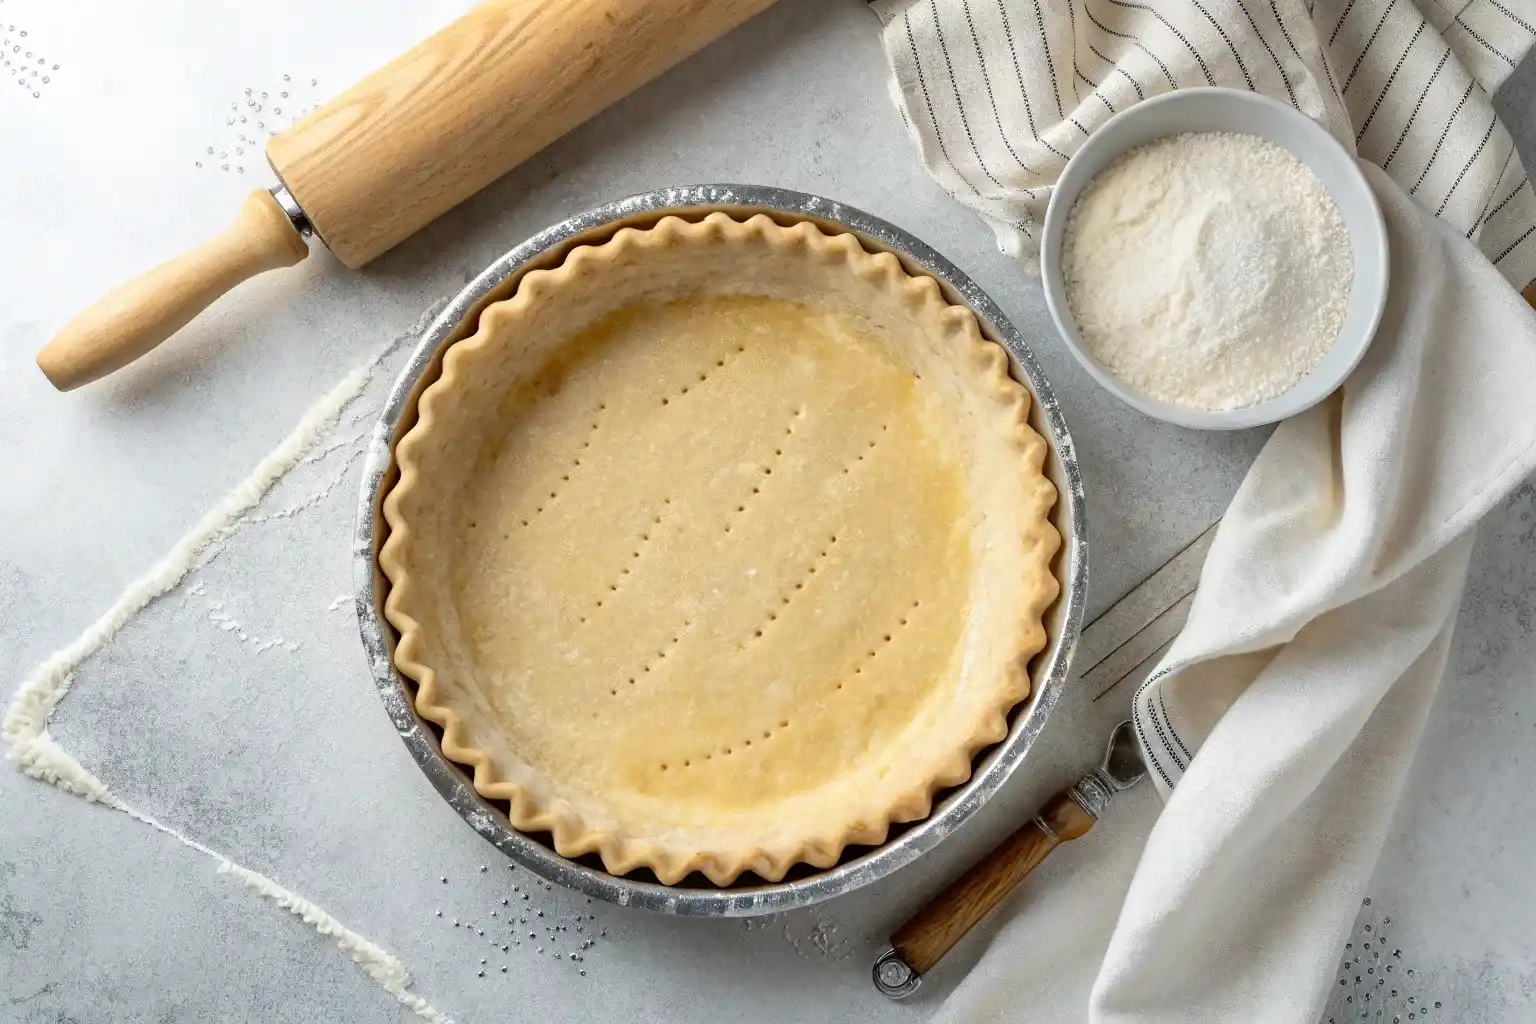
- Even out the border of the crust, then crimp the edges.
- I like to use two fingers from one hand in a pinching shape and one finger from the other hand to create a pretty edge.
8. Bake
- Follow the baking directions for your specific pie recipe.
- Fill with pie filling and bake, or blind bake the crust if directed.

How to Blind Bake Pie Crust
If your recipe calls for blind baking (baking the crust alone), here’s how to do it:
1. Prepare the Dough
- Follow the steps above through rolling out the dough and placing it in the pan.
- Crimp or style the border as desired.
2. Prick the Bottom
- Use a fork to gently prick the bottom of the crust.
- This helps trapped air escape and keeps the bottom flat.
3. Line with Parchment
- Cut a 9-10 inch square of parchment paper.
- Gently tuck it into the bottom of the crust.
4. Add Pie Weights
- Top the parchment with ceramic pie weights, dry beans, or uncooked rice.
- This prevents the crust from puffing up.
5. Bake
- Bake according to your recipe instructions.
- For partial baking, 10-15 minutes is usually enough.
- For a fully baked crust, bake at 375°F for 25-30 minutes, or until set and edges are golden.
6. Cool & Add Filling
- Carefully remove the parchment and pie weights.
- Let the crust cool before filling.
Nutritional Benefits
This gluten free pie crust is a great option for those avoiding gluten. Here are a few key benefits:
- Gluten free – Safe for those with gluten intolerance or Celiac disease.
- Vegan-friendly – Made with plant-based shortening.
- Customizable – Works with sweet or savory fillings.
- Make-ahead friendly – Dough can be frozen for future baking.
Storage & Meal Prep Tips
- Refrigerate dough – Wrap well and store in the fridge for up to 3 days.
- Freeze dough – Wrap tightly and freeze for up to 3 months.
- Freeze baked crust – Once baked and cooled, crust can also be frozen.
When ready to use, thaw overnight in the refrigerator and bring to room temperature before rolling.
Flavor Variations
This basic gluten free pie crust can be customized in many ways:
- Savory pies – Add a teaspoon of dried herbs like thyme or rosemary.
- Sweet pies – Add a splash of vanilla or almond extract to the dough.
- Nutty flavor – Substitute a small portion of the flour blend with almond flour.
FAQs
Can I use butter instead of shortening?
Yes! If you’re not vegan, you can use cold butter instead of shortening for a richer flavor.
What flour blend do you recommend?
Use a Measure-For-Measure Gluten-Free Flour Blend designed for baking. Not all blends perform the same, so stick with one you trust.
Why is the dough sticky?
Gluten free dough is naturally more delicate and sticky. Resist the urge to add extra flour—rolling between parchment paper helps tremendously.
Can I make the dough ahead of time?
Yes! You can refrigerate or freeze the dough. Just bring it to room temperature before rolling out.
Final Thoughts
With this method, you’ll have a flaky, tender gluten free pie crust that’s perfect for any filling—sweet or savory. It’s become a staple in my kitchen, and I hope it becomes one in yours too.
If you try this recipe, I’d love to hear how it turns out! Don’t forget to save this to Pinterest so you can come back to it anytime. And if you’re looking for more delicious recipes, check out my Slow Cooker BBQ Beef and Bang Bang Chicken Burgers for more family-friendly favorites.
PrintGluten Free Pie Crust
If you’ve ever tried making pie crust gluten free, you know it can be a challenge. But don’t worry—I’ve got you covered with my nearly fool-proof method for flaky, tender gluten free pie crust every single time.
- Prep Time: 20 minutes
- Cook Time: 25 minutes
- Total Time: 45 minutes
- Yield: 1 9-inch pie crust 1x
- Category: Baking
- Method: Oven
- Cuisine: American
- Diet: Gluten Free
Ingredients
For the Slurry
- 1/3 cup Measure-For-Measure Gluten-Free Flour Blend (40 grams)
- 1/2 cup cold water
For the Pie Dough
- 2 cups Measure-For-Measure Gluten-Free Flour Blend (240 grams)
- 1 cup shortening (I prefer Spectrum non-hydrogenated shortening)
- 1 tablespoon sugar, honey, or agave
- 1 teaspoon kosher salt
- 1 tablespoon gluten-free flour (for the countertop)
Instructions
1. Make the Slurry
- In a small bowl, combine the cold water and 1/3 cup gluten-free flour.
- Whisk or stir until well blended and evenly combined.
- Set aside while you prepare the dough.
2. Combine the Dry Ingredients
- In a food processor, combine 2 cups gluten-free flour, the shortening, sugar, and salt.
- Pulse briefly to combine. The mixture will still have clumps—this is normal!
- Alternatively, you can use a pastry blender to cut the shortening into the dry ingredients.
3. Add the Slurry
- Pour the prepared slurry over the pie dough mixture.
- Pulse to combine until the dough starts to come together. It will be quite sticky—don’t add extra flour!
4. Shape the Dough
- Sprinkle about 1 tablespoon of gluten-free flour onto your countertop.
- Scoop the dough onto the floured surface.
- Use your hands to gently shape the dough into a ball.
5. Divide the Dough
- Use a knife to divide the dough in half.
- Shape each half into a disc.
- If not baking right away, wrap each disc in plastic wrap and chill or freeze.
- To use later, thaw and bring to room temperature before rolling out.
6. Roll Out the Dough
- Place one disc between two large sheets of parchment paper.
- Roll out into a 9-10 inch circle, about the size of your pie pan.
- Remove the top sheet of parchment.
- Place your pie pan face down onto the rolled-out dough, then carefully flip the pan right side up.
7. Crimp the Edges
- Adjust the crust so it is evenly placed in the pan.
- Gently patch any cracks with your fingers.
- Even out the border of the crust, then crimp the edges.
- I like to use two fingers from one hand in a pinching shape and one finger from the other hand to create a pretty edge.
8. Bake
- Follow the baking directions for your specific pie recipe.
- Fill with pie filling and bake, or blind bake the crust if directed.
Nutrition
- Serving Size: 1 slice (1/8 of crust)
- Calories: 210
- Sugar: 1g
- Sodium: 150mg
- Fat: 18g
- Saturated Fat: 8g
- Unsaturated Fat: 10g
- Trans Fat: 0g
- Carbohydrates: 14g
- Fiber: 1g
- Protein: 1g
- Cholesterol: 0mg
Keywords: gluten free pie crust, flaky pie crust, vegan pie crust, gluten free baking, pie dough, sweet or savory pie crust