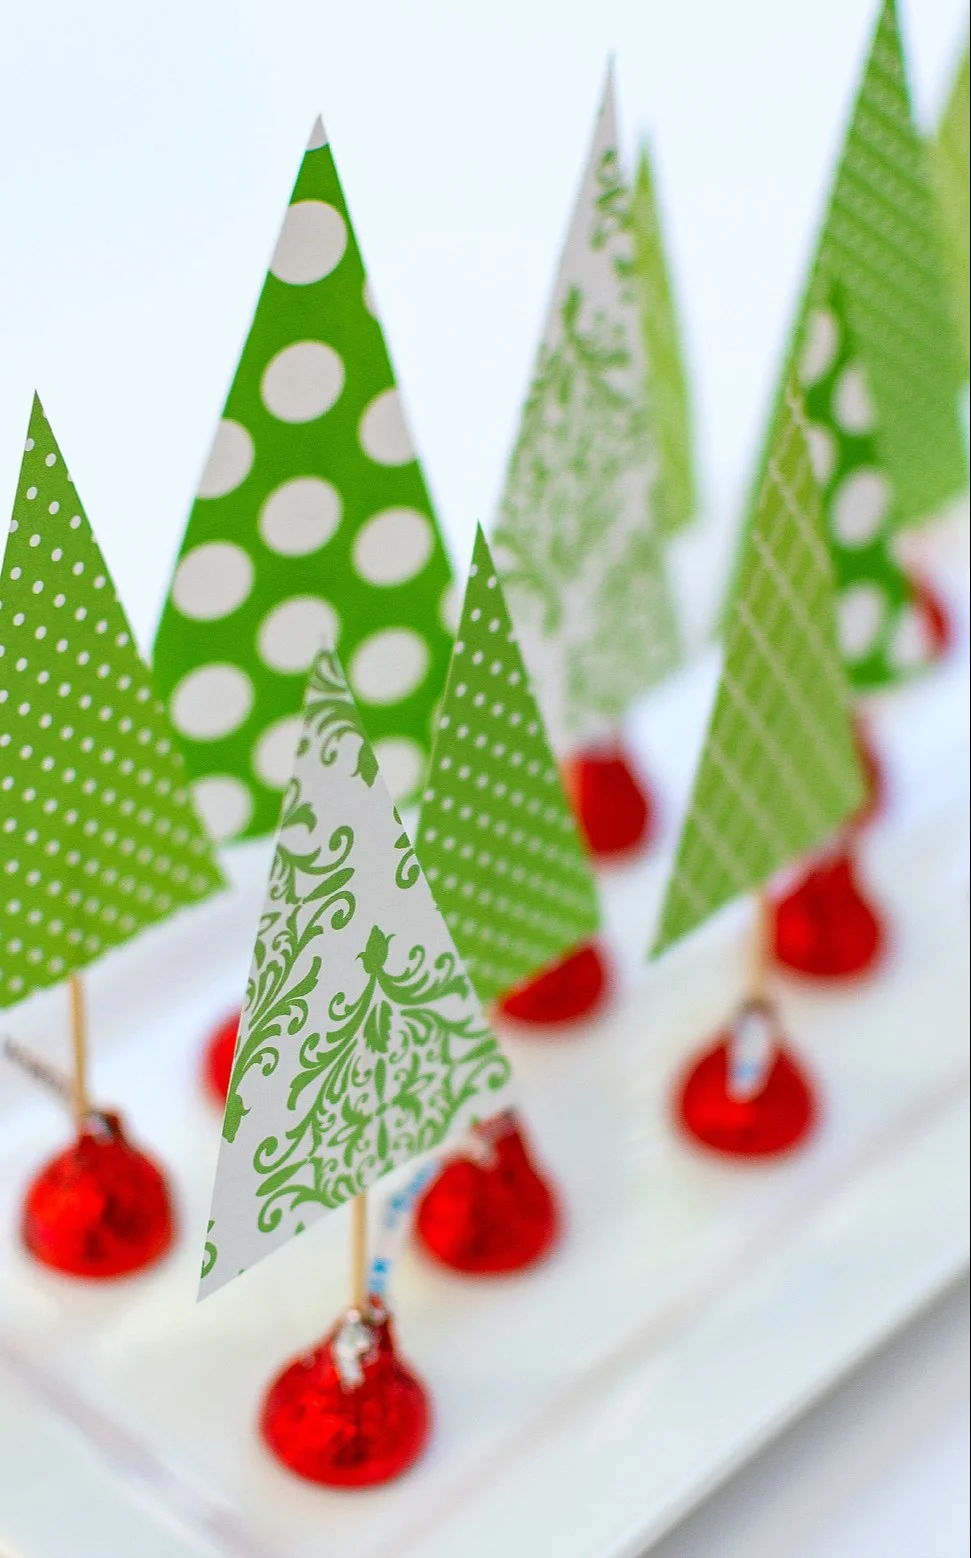
Are you looking for a fun and easy craft that can brighten up your home during the holiday season? The Kiss Mass Tree Centerpiece is a delightful DIY project that is both budget-friendly and beginner-friendly. This festive centerpiece is a creative way to bring a festive touch to your holiday decor using simple materials like Hershey’s Kisses chocolate, wine corks, and scrapbook paper. Plus, it makes a charming handmade gift!
WHY YOU WILL LOVE THIS Kiss Mass Tree Centerpiece
Creating the Kiss Mass Tree Centerpiece is an enjoyable experience for everyone, whether you’re a seasoned crafter or just starting. This project is:
- Easy for beginners: The steps involved are straightforward, making it a perfect starter project.
- Uses simple materials: Most of the materials can be found around your home or at a local craft store.
- Budget-friendly: You won’t need to spend much on this craft, making it an excellent choice for the holidays.
- Quick to make: You can whip this up in a short amount of time, allowing you to focus on other festive preparations.
- Great for home decor: This centerpiece adds a cheerful touch to your holiday table settings.
- Great for gifts: With a few variations, it can also serve as a thoughtful homemade gift for friends and family.
- Easy to customize: You can modify colors and sizes to fit your aesthetic.
PROJECT DETAILS
Skill Level
Beginner-Friendly: This project is perfect for crafters of all ages and skill levels.
Estimated Time
1-2 Hours: Depending on your crafting speed, this project is relatively quick and simple.
Approximate Cost
$10-$15: Most materials are inexpensive and can often be found around your home.
Best For
Home Decor and Gifts: This project is ideal for adding a festive touch to your living space or giving as a thoughtful holiday gift.
Project Type
Seasonal Craft: This project can be made for the winter holidays or adapted throughout the year.
TOOLS AND EQUIPMENT NEEDED
Tape
Used to secure the toothpick to the scrapbook paper, ensuring that your decorations stay in place.
Paint Brushes
These are necessary for applying paint to the wine corks and give you better control over the finishing details.
Sharpie
A simple black marker used to draw eyes or any other detailing on your project.
Scissors
Essential for cutting out the triangle shapes from the scrapbook paper.
Platter
An attractive serving plate helps display your centerpiece beautifully.
MATERIALS
Scrapbook Paper
This colorful paper will be cut into triangle shapes to represent tree decorations.
Toothpicks
These will be used to attach the scrapbook paper trees to the Hershey’s Kisses chocolates.
Tape
Used to attach the toothpicks to the scrapbook paper.
Hershey’s Kisses Chocolates in Christmas Foil Colors
These serve as the base of your centerpiece and add a sweet treat to the display.
Hershey’s Kisses Chocolates in Holiday Foil Colors
Using different foil colors gives variety and enhances the festive look of the centerpiece.
Wine Corks
These are the perfect base for creating the "trunks" of your candy trees.
Red and Green Paint
Used to color half of each wine cork, giving it a festive appearance.
Black Paint
This will be used for creating Santa’s belts on the wine corks.
Paint Brushes
For painting the wine corks and achieving a neat finish.
Sharpie
For drawing faces or details on your crafts.
Fuzzy Yarn
Utilized for Santa’s beard or elf accessories, adding texture and charm to the pieces.
Little Red Pom Poms (5mm)
These serve as little noses or decoration spots.
Little White Pom Poms (10mm)
Used to embellish the tops of the Hershey’s Kisses chocolates, mimicking Santa’s hat.
Multi-Surface Glue
A strong adhesive to secure the yarn and decorations in place.

HOW TO MAKE Kiss Mass Tree Centerpiece
Step 1: Cut Out Triangle Shapes
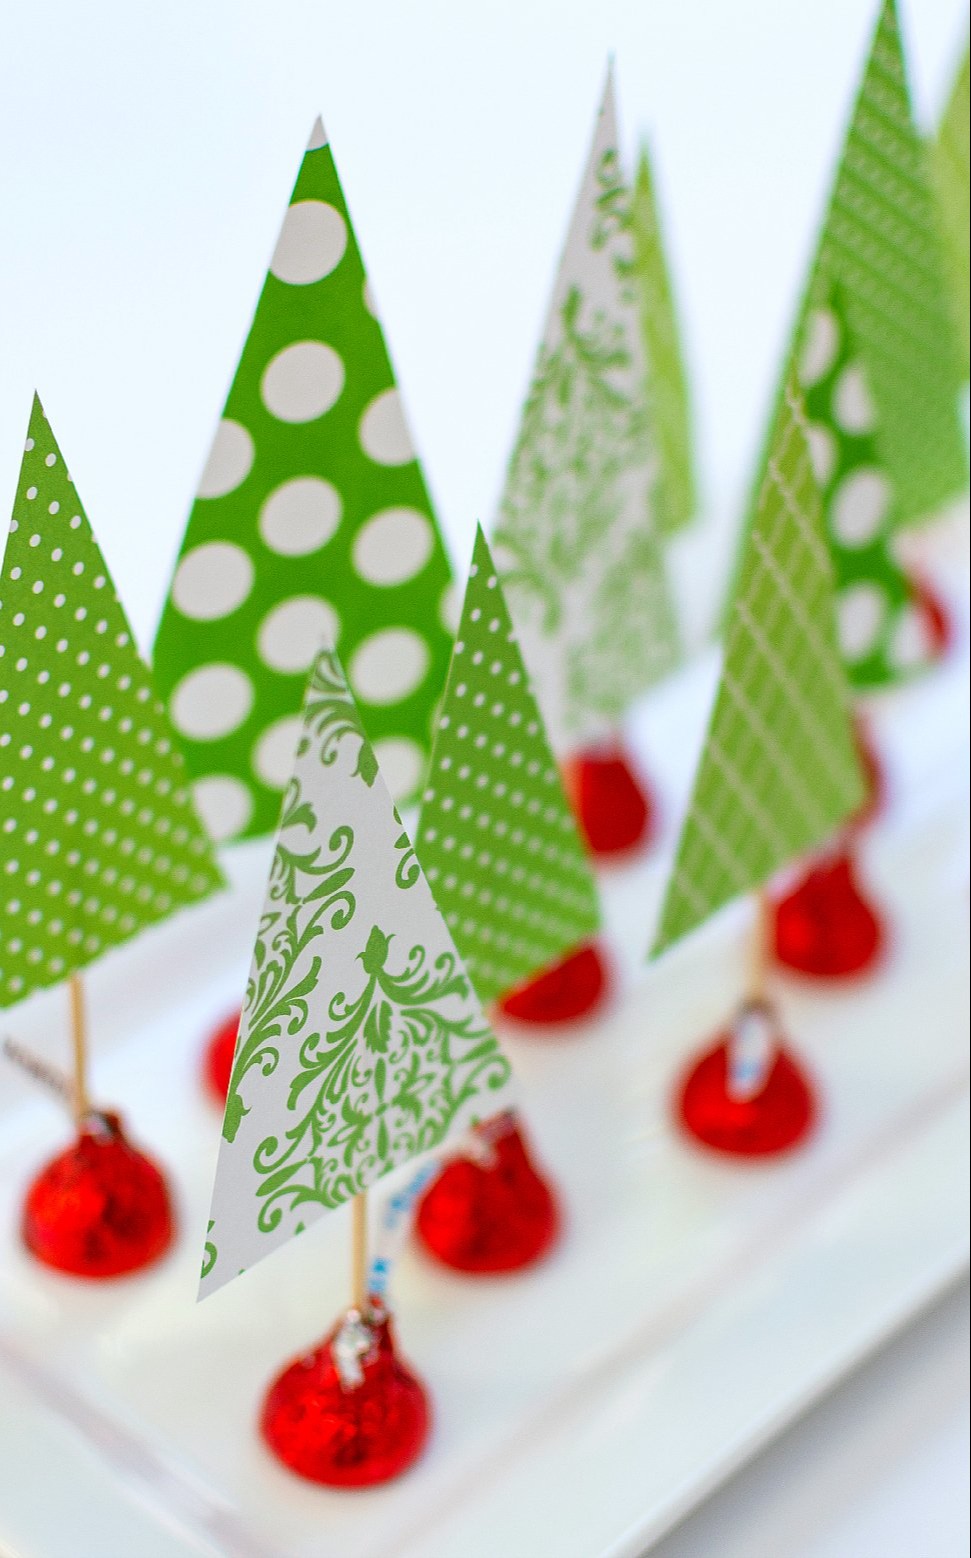
Start by cutting triangle shapes from the scrapbook paper. Aim for various sizes to create a pleasing arrangement of "decorated trees."
Step 2: Attach Toothpicks
Using tape, secure a toothpick to the back of each triangle shape. This will allow you to stick the triangle shapes into the Hershey’s Kisses for a festive look.
Step 3: Insert Toothpicks
Gently insert the toothpicks from the decorated triangles into the top of the Hershey’s Kisses chocolates. Arrange them on a platter, creating a vibrant centerpiece.
Step 4: Paint Wine Corks
Take a wine cork and paint one half red and the other half green. Allow them to dry completely. This helps to give a colorful base for your candy “trees.”
Step 5: Secure Hershey’s Kisses
Once the paint is dry, apply a generous amount of multi-surface glue on top of the wine cork. Carefully place an assortment of Hershey’s Kisses on top of the glue. Let this dry thoroughly.
Step 6: Add a Black Strip
After everything is dry, paint a black strip around the middle of the wine cork to serve as a decorative belt.
Step 7: Draw Eyes
Next, use the Sharpie to draw eyes on the wine cork for a fun character.
Step 8: Attach a Pom Pom Nose
Put a dab of glue under the eyes and attach a small red pom pom to serve as a cute nose.
Step 9: Add White Pom Pom
For the final touch, glue a smaller white pom pom on top of the Hershey’s Kisses to represent Santa’s hat.
Step 10: Add Fuzzy Yarn
Cut a length of fuzzy yarn and attach it around the bottom of the Hershey’s Kisses. For Santa, add glue to the sides of the wine cork for his beard, or use it midday down the green painted area for an elf.
TIPS AND TRICKS
- Choosing Materials: Pick colorful scrapbook paper that matches your holiday theme for added impact.
- Cutting and Gluing: Use sharp scissors to cut clean edges and ensure a neat fit when gluing.
- Avoiding Common Mistakes: Let the paint dry thoroughly before adding glue or other layers.
- Making the Project Easier: Use an array of colorful papers for more dynamic trees without needing to paint every detail.
- Getting a Better Finish: When applying paint, use light strokes to avoid drips and ensure an even color.
- Saving Money: Gather materials from your recycling bin or local thrift store to minimize craft costs.
- Making Craft Last Longer: Use waterproof glue if the centerpiece will be exposed to moisture.
- Working Safely: Keep scissors and paint materials out of reach of small children during the crafting process.
VARIATIONS AND CUSTOMIZATION IDEAS
- Different Colors: Use pastel or metallic paints for a different seasonal approach.
- Different Sizes: Create larger or smaller versions of the Kiss Mass trees based on your display needs.
- Different Materials: Swap Hershey’s Kisses with other candies or chocolate to create diverse thematic versions.
- Seasonal Versions: Adapt the colors and shapes for other seasons—like hearts for Valentine’s or bunnies for Easter.
- Holiday Versions: Personalize candy colors and decorations to fit various seasonal celebrations.
- Different Patterns: Use patterned scrapbook paper for added visual interest.
- Personalized Versions: Include names or messages on the trees for customization.
Kiss Mass Tree Centerpiece FAQ
How difficult is this craft?
This Kiss Mass Tree Centerpiece is a beginner-friendly craft, making it suitable for all skill levels. If you follow the instructions carefully, you’ll find it enjoyable and satisfying.
What materials do I need for this craft?
You will need scrapbook paper, toothpicks, tape, Hershey’s Kisses chocolates, wine corks, paints, brushes, a Sharpie, fuzzy yarn, pom poms, and multi-surface glue. Most of these materials are affordable and easy to find.
How should I store my finished centerpiece?
Store your Kiss Mass Tree Centerpiece in a cool, dry place. Be gentle when handling it to prevent any pieces from coming loose. If you used food items, consider consuming the candies within a reasonable time.
How long does it take to make this project?
This project typically takes 1-2 hours, depending on your skill level and the drying times for paint and glue.
Can I customize this craft?
Absolutely! You can customize this centerpiece by changing colors, sizes, and materials to fit your holiday theme or personal preference.
CONCLUSION
In summary, the Kiss Mass Tree Centerpiece is an easy craft idea that injects festive cheer into your home decor. This budget-friendly DIY project is perfect for beginners and can be customized to suit your style. Not only will you create an adorable decoration, but you’ll also have a lovely handmade gift to share. With its simple materials and joyful theme, make this craft part of your holiday traditions! We encourage you to try this easy DIY project, and feel free to share your experience or customization ideas!
PrintKiss Mass Tree Centerpiece
A delightful DIY project for creating a festive centerpiece using Hershey’s Kisses, wine corks, and scrapbook paper. Perfect for holiday decor and gifts!
- Prep Time: 10 minutes
- Cook Time: 60 minutes
- Total Time: 70 minutes
- Yield: 1 centerpiece
- Category: Craft
- Method: DIY Crafting
- Cuisine: Seasonal
- Diet: N/A
Ingredients
- Scrapbook Paper
- Toothpicks
- Tape
- Hershey’s Kisses Chocolates in Christmas Foil Colors
- Wine Corks
- Red and Green Paint
- Black Paint
- Paint Brushes
- Sharpie
- Fuzzy Yarn
- Little Red Pom Poms (5mm)
- Little White Pom Poms (10mm)
- Multi-Surface Glue
Instructions
- Cut out triangle shapes from the scrapbook paper.
- Attach a toothpick to the back of each triangle with tape.
- Insert the toothpicks into the top of the Hershey’s Kisses.
- Paint one half of each wine cork red and the other half green.
- Secure Hershey’s Kisses on top of the glue on the wine corks.
- Add a black strip around the middle of the wine cork.
- Draw eyes on the wine cork using a Sharpie.
- Attach a small red pom pom as a nose.
- Add a white pom pom on top of the Hershey’s Kisses.
- Attach fuzzy yarn around the bottom of the Hershey’s Kisses.
Notes
Use waterproof glue if the centerpiece will be exposed to moisture. Customize colors and sizes as needed.
Nutrition
- Serving Size: 1 centerpiece
- Calories: 0
- Sugar: 0g
- Sodium: 0mg
- Fat: 0g
- Saturated Fat: 0g
- Unsaturated Fat: 0g
- Trans Fat: 0g
- Carbohydrates: 0g
- Fiber: 0g
- Protein: 0g
- Cholesterol: 0mg
Keywords: DIY, holiday decor, centerpiece, crafts, gifts