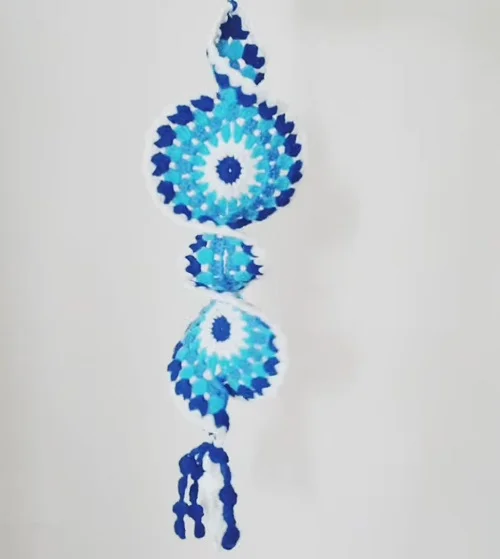
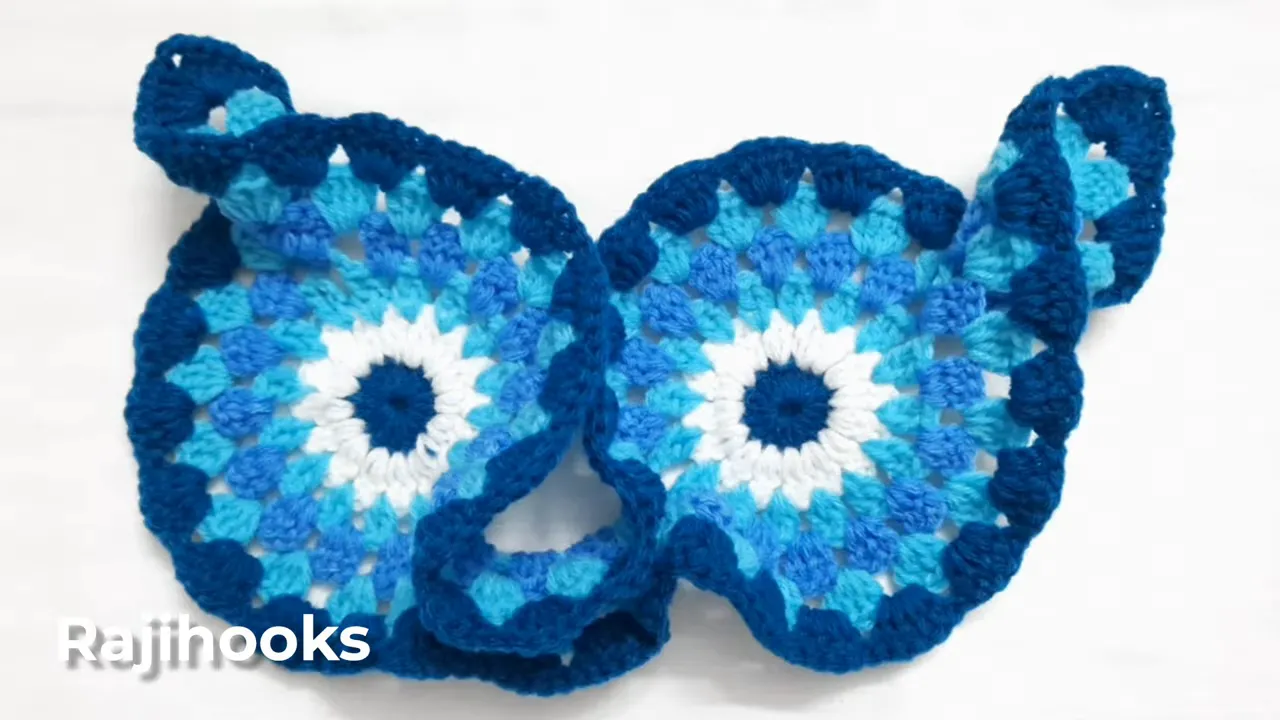
Two simple crochet circles become a decorative wind spinner with layers of blue, airy joining sections, and a crisp white edging. The construction starts flat, then develops soft waves as larger stitch groups are added around the motifs and connecting chains.
This design uses a blue monochromatic palette with white accents. Dark centers, turquoise and blue rounds, and a navy outer border give the finished hanging depth without needing lots of different colors.
Begin with two round motifs, join them with chains, and build the decorative border around the connected piece. The instructions below use US crochet terms and retain the stitch repeats shown in the demonstration. Keep the close-up demonstration handy for the precise placement of stitches at the joining points and final edging.
What You’ll Learn
- Make two matching motifs with dark blue centers and white increase rounds.
- Use turquoise chains to connect the motifs and form different-sized end loops.
- Build fullness with progressively larger double crochet groups around the connected piece.
- Finish the dark blue scallops with a contrasting white decorative edging.
Table of Contents
- Materials and Crochet Abbreviations
- Step 1: Make Two Round Motifs
- Step 2: Join the Motifs with Turquoise Yarn
- Step 3: Add the Blue Three-Stitch Round
- Step 4: Build the Turquoise Four-Stitch Round
- Step 5: Add the Dark Blue Five-Stitch Border
- Step 6: Finish with White Decorative Edging
- Hang the Finished Crochet Wind Spinner
Materials and Crochet Abbreviations
Gather your blue and white yarn, a crochet hook suited to the yarn, and scissors. The project uses dark blue, a brighter blue, turquoise, and white. No specific yarn weight, hook size, gauge, or finished measurements are given, so those details are not fixed in this guide.
The design assumes basic crochet skills, particularly working into a magic ring, making double crochet stitches, changing colors, and working into chain spaces.
- MR: magic ring
- ch: chain
- sc: single crochet
- dc: double crochet
- sl st: slip stitch
- R: round
- JR: joining round
- LR: last round
Asterisks indicate a repeating stitch sequence. For a reference to standard US terminology, see the Craft Yarn Council’s crochet abbreviations.
Step 1: Make Two Round Motifs
Both motifs begin with a dark blue center and a white second round. Complete the first circle, then repeat the same process to make another.
Round 1: Dark Blue Center
- Make a magic ring with dark blue yarn.
- Chain 3.
- Work 15 double crochet stitches into the ring.
- Pull the ring closed and join the round.
- Fasten off the dark blue yarn.
The starting chain 3 serves as the first double crochet, giving the center 16 stitch positions for the next round.
Round 2: White Increase Round
Join white yarn and work 2 double crochet stitches into each stitch around. Join the round and fasten off. With the starting chain counted as a stitch in the first round, this increase round gives 32 double crochet stitches.
Make a second matching motif. At this stage, you should have two small circles with dark centers surrounded by white.

Step 2: Join the Motifs with Turquoise Yarn
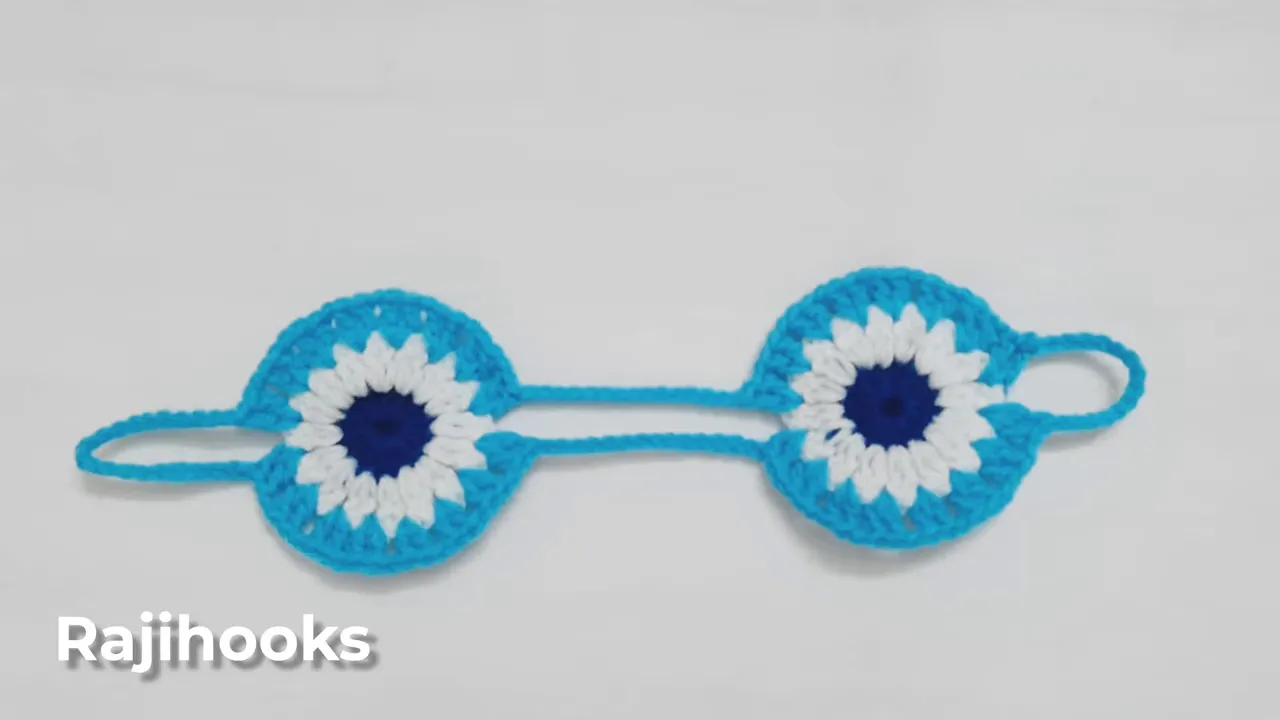
The first joining round adds a turquoise border and establishes the structure of the hanging. It includes the motif edging, the chains between the circles, and a loop at each outer end.
Joining Round 1: Two-Stitch Groups
Join turquoise yarn to the white round. The displayed repeat is:
JR 1: Repeat 2 dc, ch 1, skip 2 dc.
Continue this sequence around the motif, following the demonstrated stitch placement. The skipped stitches and chain spaces create the openings used by the larger groups in the following rounds.
Connect the Second Circle
At the joining position, chain 15 and continue the turquoise edging on the second motif. The completed turquoise structure has two parallel chain sections between the circles, rather than a single connecting strand.
Work the motif edges and connecting sections as one continuous joining round. The arrangement is easiest to understand with the piece laid flat: a circle at either side, two chain bridges in the middle, and loops at the outer ends.
Add the Lower and Upper End Loops
The end-chain lengths are different:
- Lower end: chain 15.
- Upper end: chain 21.
Return each end chain to its attachment point to form a loop, following the joining placement in the demonstration. Complete the turquoise round and fasten off.
Step 3: Add the Blue Three-Stitch Round
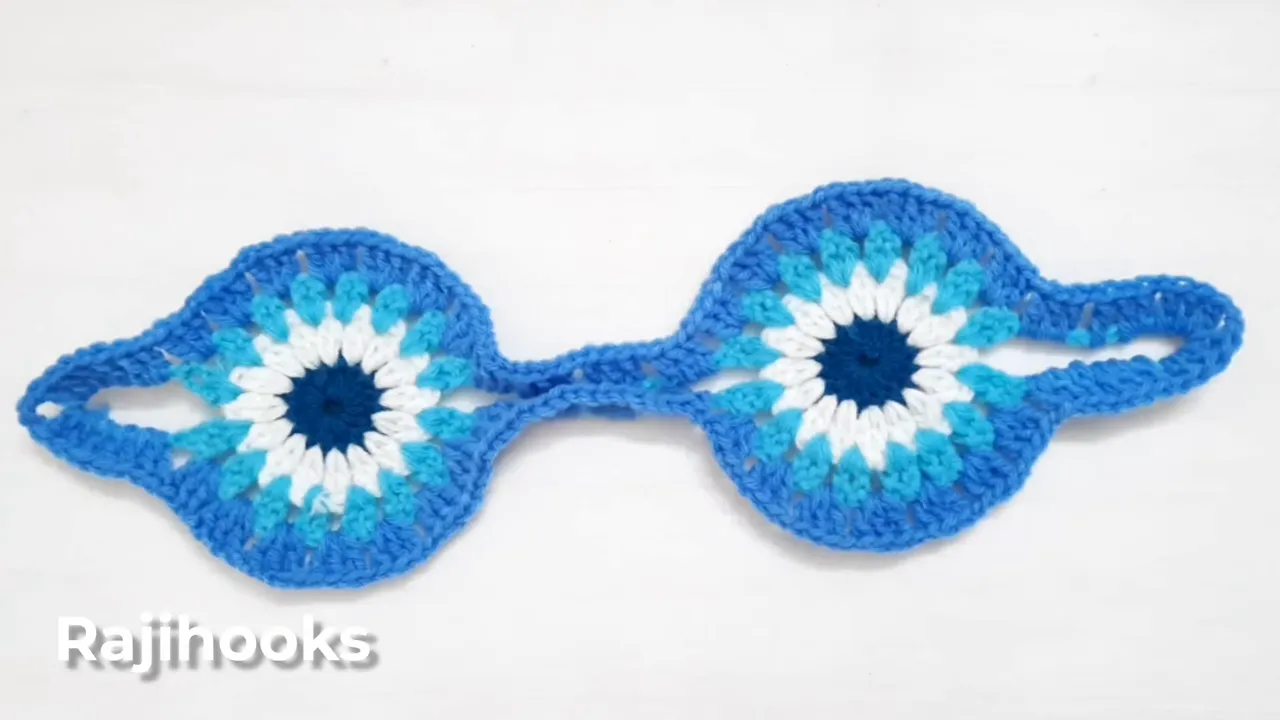
Change to the brighter blue yarn. This round builds groups into the spaces established by the turquoise round, including the connecting sections and end loops.
JR 2: Repeat 3 dc, ch 1.
Work the three-double-crochet groups into the chain spaces around the motifs. Keep the chain-1 gaps between groups so the next round has clear insertion points.
Work Across the Joining Chains
Across each joining section, work 3 dc, ch 1 four times, following the demonstrated placement along the chain bridge.
These groups turn the narrow connecting chains into decorative bands. Work both sides of the connected piece, not just around the circles.
Work the End Loops
The end loops use chain-2 spacing and different numbers of repeats:
- Lower end: work the three-double-crochet group with ch 2 spacing four times.
- Upper end: work the three-double-crochet group with ch 2 spacing six times.
The longer upper loop accommodates more groups than the lower loop. Continue around the entire outline, join, and finish the blue round.
Step 4: Build the Turquoise Four-Stitch Round
Change back to turquoise for the next layer.
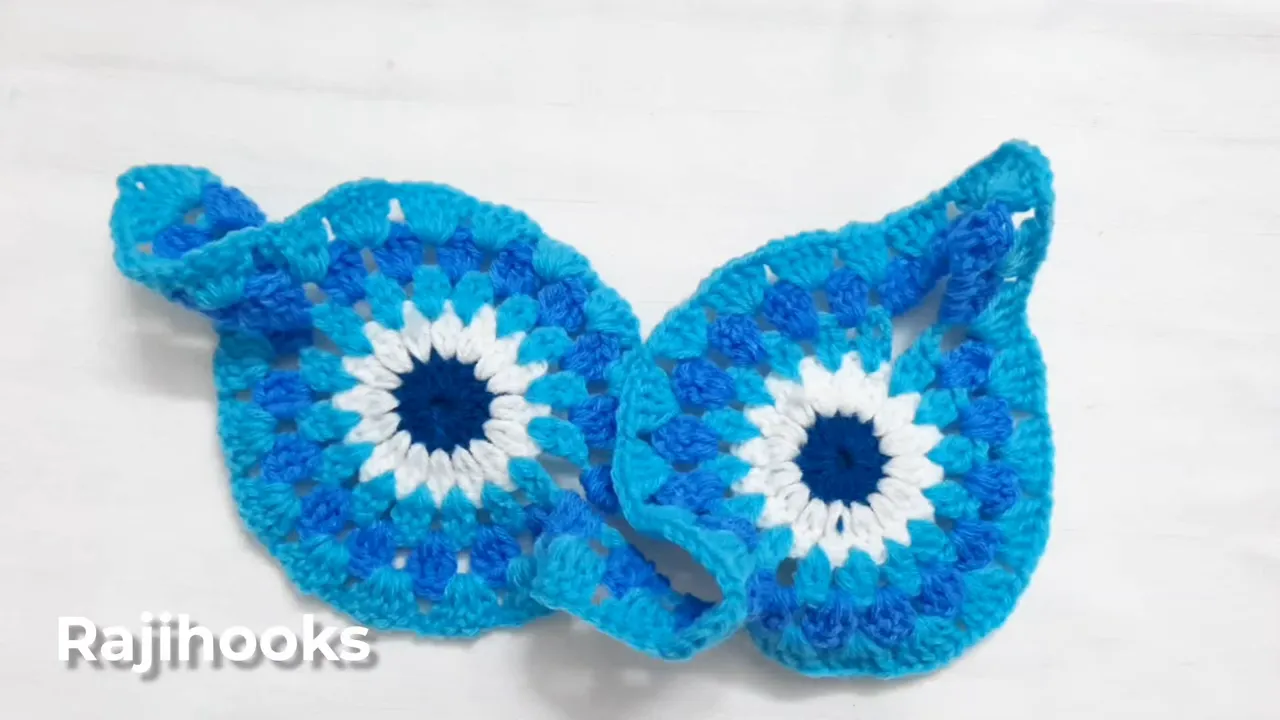
JR 3: Repeat 4 dc, ch 1.
Work four-double-crochet groups into the spaces of the previous round, with a chain 1 between groups. Continue around both motifs, the connecting bands, and the end sections.
The progression matters: the groups have grown from two stitches to three, and now to four. As the outer rounds gain fullness, the piece begins to curl and ripple instead of remaining a completely flat strip.
Spread the fabric gently as you work so you can identify the next space. The connecting sections can fold over one another, so check that you are continuing along the outline rather than accidentally working into an overlapping layer.
Step 5: Add the Dark Blue Five-Stitch Border
Join dark blue yarn for the final substantial border round.
JR 4: Repeat 5 dc.
Work five double crochet stitches into each space around the outline. Unlike the preceding joining rounds, this displayed repeat does not include a chain between the groups.
The five-stitch groups form a fuller, scalloped outer edge. Continue across the joining bands and around the end sections as well as around the circular motifs.
The dark blue repeats the color of the centers, tying the whole design together. Finish the round before moving to the white trim.
Step 6: Finish with White Decorative Edging
Join white yarn to the dark blue border. The last-round repeat is:
LR: Repeat 1 sc, ch 2, 1 dc, using the placement demonstrated.
This sequence creates small white points along the dark scallops. The contrast makes the outline more defined and echoes the white round around each center.
Work the edging around the connected piece, repositioning the fabric as needed to reach the next attachment point. The exact insertion points are important here: follow the close-up demonstration rather than treating the repeat as an instruction to work into every individual dark blue stitch.
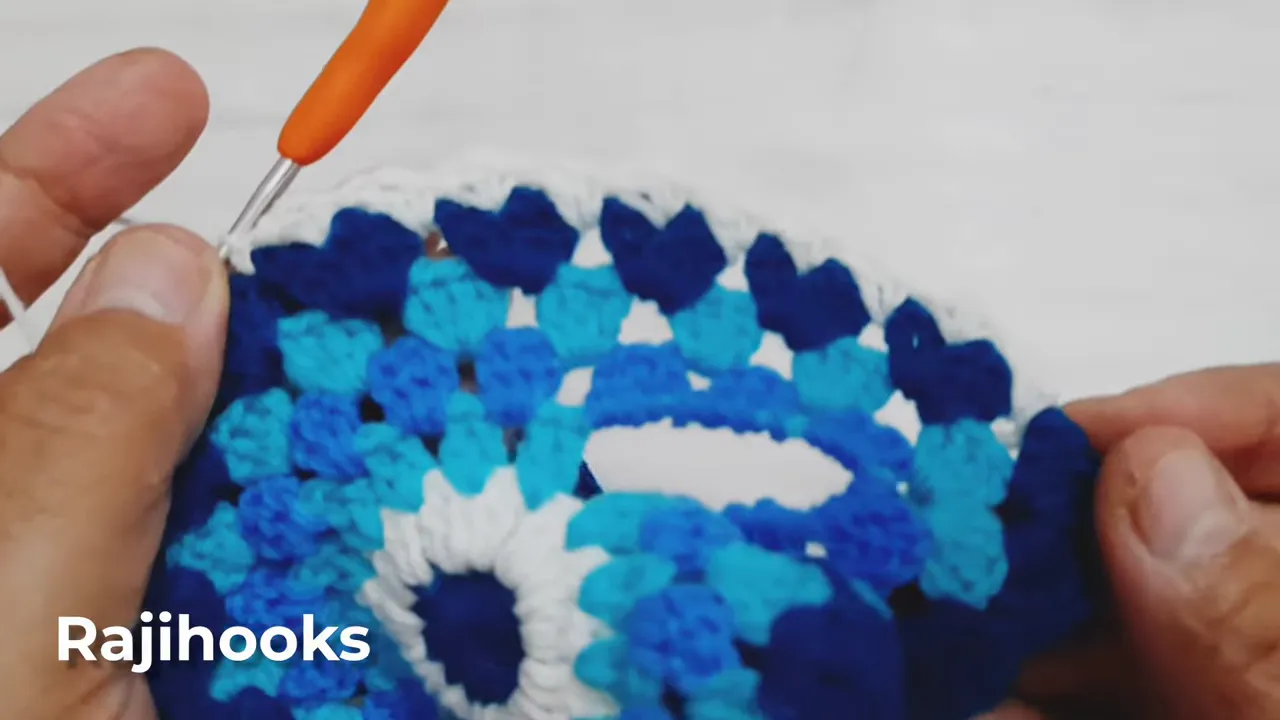
Complete the white edging, fasten off, and secure the yarn ends. The finished fabric has two circular focal points, layered openwork between them, and a lightly pointed white outline.
Hang the Finished Crochet Wind Spinner
Orient the piece vertically with the upper end at the top. Let the connecting sections settle into their twists so the circles sit at different angles rather than forcing everything flat.
The finished hanging also has dark blue curled strands at the bottom. Their construction and the final hanging attachment are not detailed in the step-by-step demonstration, so they are separate finishing details rather than part of the stitch sequence above.
The charm of this crochet wind spinner comes from a simple progression: two round motifs, connecting chains, increasingly full stitch groups, and a contrasting final edge. The blue shades keep the design cohesive, while the white accents bring out both the centers and the rippling outline.
Tutorial Made using Monochromatic Crochet Wind Spinner Tutorial | Easy DIY Decor Idea