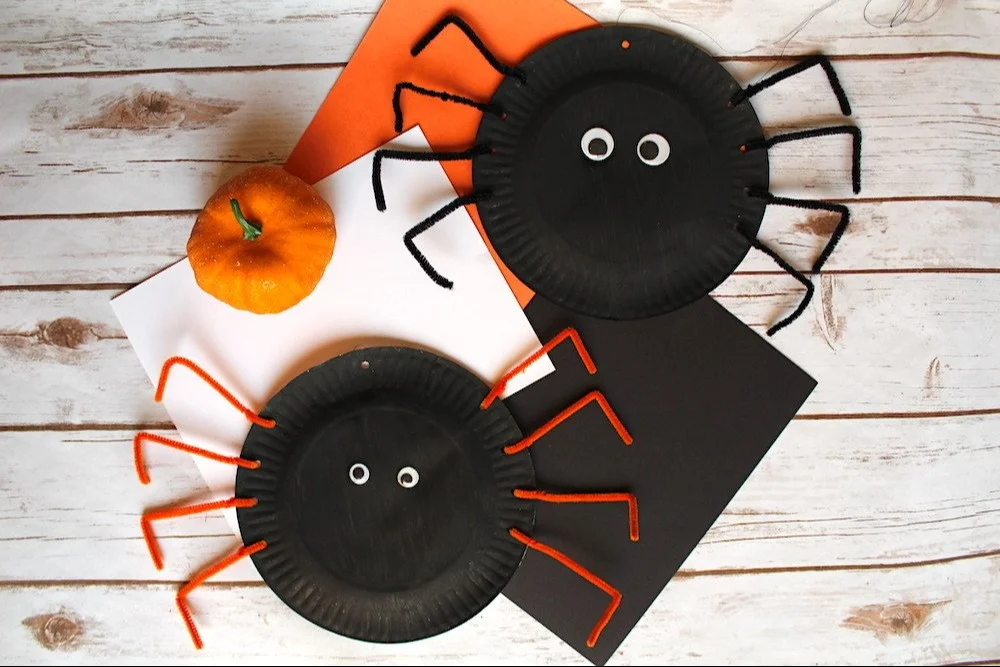
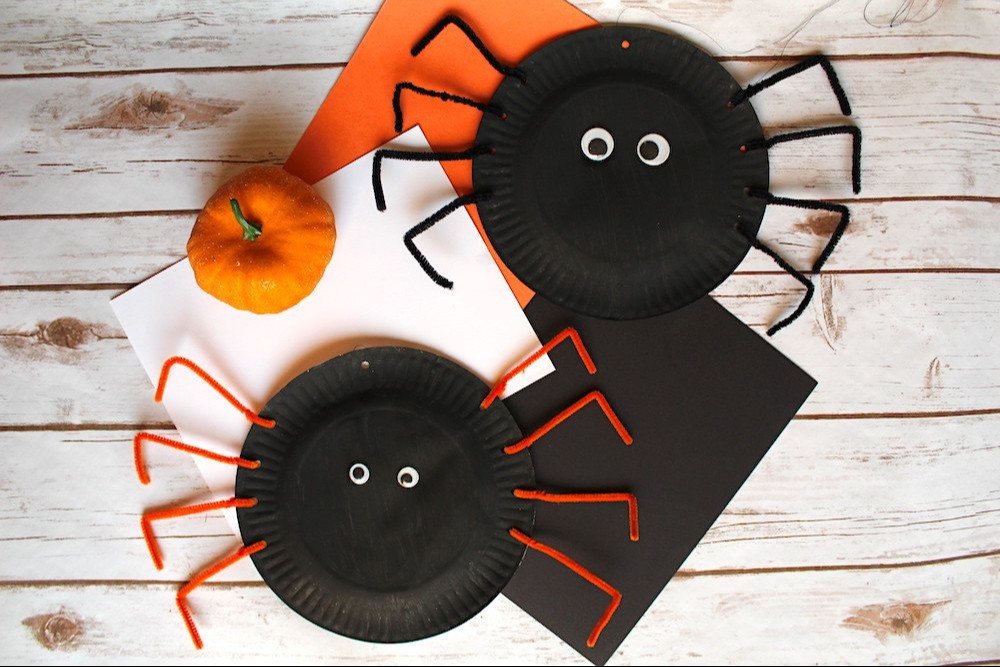
Looking for an easy craft idea that’s perfect for beginners? Try the Paper Plate Spider Craft! This fun DIY project is not only simple and budget-friendly but also a great way to add some homemade decor for Halloween or any spooky-themed party. With just a few materials and easy-to-follow instructions, you can create delightful paper plate spiders that will charm kids and adults alike. Let’s dive into this creative DIY project!
WHY YOU WILL LOVE THIS Paper Plate Spider Craft
This Paper Plate Spider Craft is a fantastic choice for crafters of all skill levels, especially beginners. Here are some reasons why you will enjoy making this fun and easy DIY project:
- Easy for Beginners: The steps are clear and straightforward, making it perfect for crafters who are just starting out.
- Uses Simple Materials: All the materials are common household items, which makes it easy to gather everything you need.
- Budget-Friendly: This project requires minimal supplies, making it a great budget-friendly DIY that won’t break the bank.
- Quick to Make: You can complete this craft in about an hour, making it a fun activity for a short afternoon.
- Great for Home Decor: Use your spiders to decorate your home for Halloween or other festive occasions.
- Easy to Customize: Add your own flair with different colors and sizes.
- Perfect for Kids: It’s a wonderful project for kids to engage in, whether in the classroom or at home.
PROJECT DETAILS
Skill Level
Beginner. This craft is perfect for those new to DIY projects, thanks to its straightforward instructions.
Estimated Time
About 1 hour. This includes preparation, making the spiders, and allowing glue to dry.
Approximate Cost
Around $10. Since most materials are inexpensive or already available at home, this is a cost-effective project.
Best For
Halloween parties, kids’ crafts, or simply a fun family activity.
Project Type
Seasonal craft, homemade décor, and creative DIY project.
TOOLS AND EQUIPMENT NEEDED
Scissors
Used for cutting pipe cleaners and newspaper. A good pair of scissors will help create clean edges easily.
Hole Punch
This tool will help you punch holes in the paper plates to insert legs quickly and accurately.
Paintbrush
Required for applying black paint to the paper plates. A medium-sized brush will make this step easier.
Newspaper
Used as a protective layer to avoid messes while painting.
MATERIALS
Paper Plates
The base of your spider craft. Choose sturdy and durable plates to ensure your spider holds its shape.
Black Paint
Used to paint the underside of the paper plates to give your spider a spooky look.
Paintbrushes
Needed for applying the black paint evenly on the plates.
Pipe Cleaners
Serves as the spider’s legs. You will need eight pieces for each spider.
Googly Eyes
These add a fun touch to your spider, giving it personality and charm.
Hole Punch
To create holes in the plates for inserting the pipe cleaners legs.
Scissors
Used to cut the pipe cleaners into the desired lengths for legs.
White School Glue
To attach googly eyes securely on the spider’s body.
Black Thread or Yarn
Used for hanging your crafted spider, if desired.
Newspaper
To use as a workspace covering to easily clean up after painting.
HOW TO MAKE Paper Plate Spider Craft
Creating your own paper plate spider is simple! Follow these steps to make your fun and spooky craft.
Step 1: Punch Holes for the Legs
Use the hole punch to create four holes on each side of the paper plate, and one hole at the top center. The holes will allow you to insert the pipe cleaners for the spider’s legs.
Step 2: Paint the Plates
Using a paintbrush, paint the underside of the paper plate with black paint. This makes your spider appear more realistic and spooky. Once you finish painting, set the plate aside and let it dry completely.
Step 3: Prepare the Spider Legs
Take the pipe cleaners and cut each one in half. You will need a total of eight pieces for each spider. Fold them in half to create the appearance of legs.
Step 4: Insert the Pipe Cleaners
Insert the ends of the cut pipe cleaners into the holes you punched earlier. Bend and twist them to secure them into place. Shape the legs to your desire, making them look a bit more lifelike as they bend.
Step 5: Add Googly Eyes
Once the plate is completely dry, use white school glue to attach two googly eyes to the front of the spider. This gives your spider a cute and friendly look.
Step 6: Create a Hanging Loop
Take a piece of black yarn or thread and thread it through the top hole you made in Step 1. Tie a knot to create a loop for hanging your spider.
Step 7: Allow the Glue to Dry
Before displaying or hanging your spider, make sure the glue is completely dry. This ensures everything stays in place.
Now, your paper plate spider is ready for display!

TIPS AND TRICKS
- Choosing Materials: Use sturdy paper plates that can hold weight, preventing the legs from sagging.
- Cutting: When cutting pipe cleaners, make sure to use scissors for a clean cut, but you can also pinch them off with your hands.
- Gluing: Apply just enough glue for the googly eyes to stick. Too much can lead to a mess!
- Avoid Common Mistakes: Ensure that the paint is fully dry before attaching the legs and eyes to avoid smudging.
- Save Money: If you don’t have pipe cleaners, you can use rolled-up paper or straws as a cheaper alternative.
- Making It Last: To keep your craft durable, consider using acrylic paint, which dries to a water-resistant finish.
- Work Safely: Supervise children when using scissors and glue to ensure safety during the craft.
VARIATIONS AND CUSTOMIZATION IDEAS
- Different Colors: Try using different colors like orange or purple paint for a more festive look.
- Larger or Smaller Spiders: Use larger plates for creature decorations or smaller plates for mini spiders.
- Seasonal Versions: Create mini spiders in different colors for various holidays, such as Christmas or Easter, using festive colors.
- Add Accessories: Attach sparkles, feathers, or even small witch hats to give your spider unique features.
- Personalized Versions: Write names on the spiders to use them as place settings at a party.
Paper Plate Spider Craft FAQ
How difficult is this craft?
This craft is beginner-friendly, with easy-to-follow steps suitable for all ages.
What materials are needed for the spider craft?
You will need paper plates, black paint, paintbrushes, pipe cleaners, googly eyes, a hole punch, scissors, white school glue, black thread or yarn, and newspaper.
What is the best way to store my paper plate spider?
Store your finished spiders in a dry place. You can place them in a box or hang them, ensuring the legs don’t get bent.
How long will this craft take to complete?
You can expect to spend about an hour making this craft, including drying time for paint and glue.
Can I use different materials for this craft?
Yes! You can substitute pipe cleaners with straws or folded paper for legs. Customize as you like!
CONCLUSION
The Paper Plate Spider Craft is an easy DIY project that’s perfect for anyone looking to create fun and spooky decorations. With minimal materials and straightforward steps, it’s a simple craft that helps beginners tap into their creativity while producing adorable holiday decor. Try this easy craft idea today, and don’t forget to share your finished projects or creative variations! Happy crafting!
PrintPaper Plate Spider Craft
An easy DIY project perfect for beginners to create spooky paper plate spiders for Halloween or festive occasions.
- Prep Time: 15 minutes
- Cook Time: 0 minutes
- Total Time: 60 minutes
- Yield: 1 spider
- Category: Craft
- Method: Crafting
- Cuisine: General
- Diet: N/A
Ingredients
- Paper Plates
- Black Paint
- Paintbrushes
- Pipe Cleaners
- Googly Eyes
- Hole Punch
- Scissors
- White School Glue
- Black Thread or Yarn
- Newspaper
Instructions
- Punch holes for the legs using the hole punch on each side and at the top center of the paper plate.
- Paint the underside of the paper plate with black paint and let it dry.
- Prepare the spider legs by cutting the pipe cleaners in half and folding them.
- Insert the ends of the pipe cleaners into the holes you punched and shape them as desired.
- Add googly eyes using white school glue once the plate is dry.
- Create a hanging loop with black yarn or thread through the top hole and tie a knot.
- Allow the glue to dry completely before displaying your spider.
Notes
Use sturdy paper plates for better structural integrity.
Nutrition
- Serving Size: 1 spider
- Calories: 10
- Sugar: 0g
- Sodium: 0mg
- Fat: 0g
- Saturated Fat: 0g
- Unsaturated Fat: 0g
- Trans Fat: 0g
- Carbohydrates: 2g
- Fiber: 0g
- Protein: 0g
- Cholesterol: 0mg
Keywords: craft, DIY, Halloween, kids, decoration, easy craft