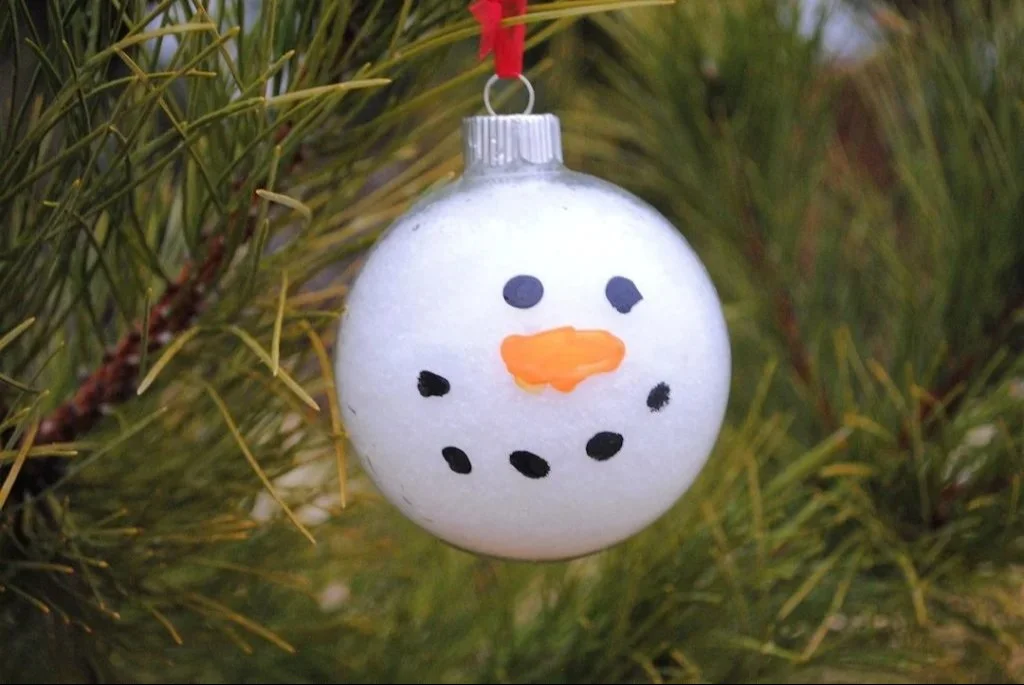
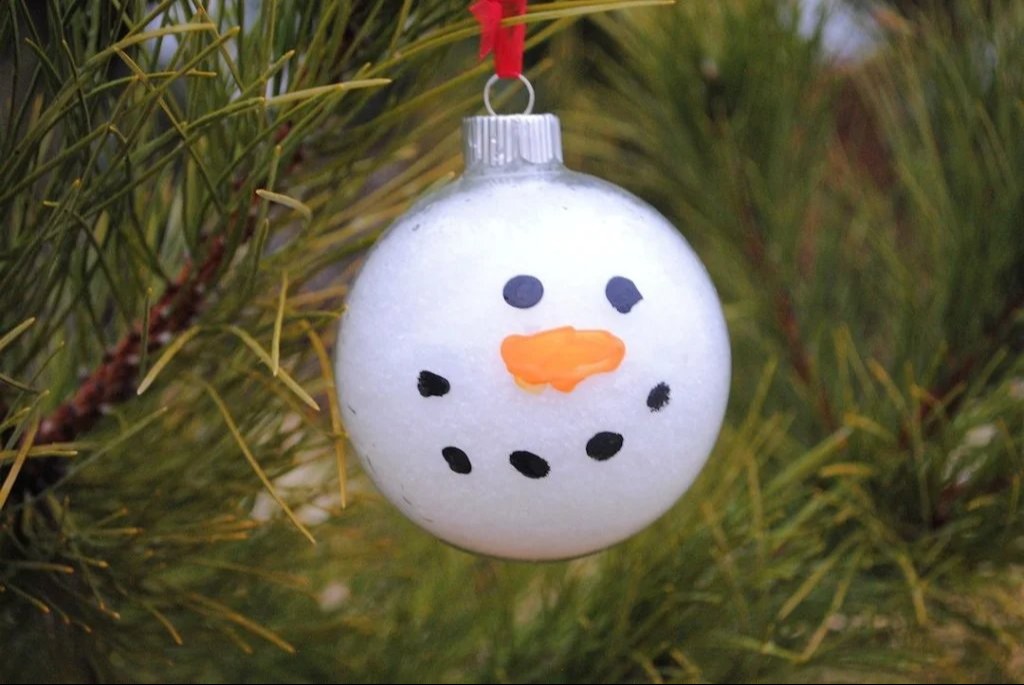
Create a delightful Snowy Snowman Ornament Craft for Kids with this easy DIY project. This simple craft is perfect for a fun holiday activity that can be enjoyed by children and beginners alike. Using budget-friendly materials, this festive DIY home decor will bring cheer to your winter celebrations. Make handmade gifts or seasonal decorations with this creative DIY idea that is perfect for all ages!
WHY YOU WILL LOVE THIS Snowy Snowman Ornament Craft for Kids
Making the Snowy Snowman Ornament Craft for Kids is a joy-filled project that anyone can tackle. Here’s why you will love it:
- Easy for beginners: This craft is simple to follow, making it accessible for kids and those new to crafting.
- Uses simple materials: You don’t need fancy supplies; everything can be found around the home or a craft store.
- Budget-friendly: It’s a great way to create ornaments without spending a lot of money.
- Quick to make: You can complete this craft in a short time, making it excellent for busy families.
- Great for home decor: Once finished, the ornaments can brighten up your holiday decorations.
- Perfect for gifts: Handmade gifts hold a special significance; these snowman ornaments are ideal for friends and family.
- Easy to customize: You can personalize your snowmen in many ways, allowing for endless creativity!
PROJECT DETAILS
Skill Level
Beginner-friendly: This project is suitable for kids and beginners, requiring no advanced skills.
Estimated Time
Approximately 30 minutes: You’ll have your festive ornaments ready quickly!
Approximate Cost
Under $10: Enjoy a budget-friendly DIY project that uses common materials you may already own.
Best For
Kids and families: This craft is perfect for family bonding or holiday gatherings.
Project Type
Seasonal crafts: It’s an enjoyable activity that fits perfectly into holiday decor as well as winter celebrations.
TOOLS AND EQUIPMENT NEEDED
Scissors
Scissors will be used to cut various materials, so ensure they are kid-safe and suitable for the age group participating in the craft.
Hot Glue Gun (optional)
A hot glue gun can speed up the assembly of the snowman ornament. Ensure adult supervision when using this tool for safety.
Paintbrush
A paintbrush may be needed if you’re adding decorative elements to your snowman, such as paint or glue for glitter.
Ruler (optional)
A ruler can assist in measuring materials if you prefer precision in your craft.
MATERIALS
White Felt or Foam Balls
Use white felt or foam to create the body of the snowman. This will give a soft and fluffy appearance to your ornament.
Pipe Cleaners
Pipe cleaners can be used for the snowman’s arms and accessories, adding charm and character to your creation.
Buttons
Buttons can be added to the body of the snowman for decoration and detail, allowing for a personalized touch.
Googly Eyes
These eyes make the snowman come alive with personality. They can be glued onto the snowman for a cute effect.
Fabric Scraps
Fabric scraps can be used to create scarves or hats for your snowman, making it a truly unique piece.
String or Ribbon
Use string or ribbon to hang your snowman ornament on a tree or display it in your home.
Glitter (optional)
Glitter can provide that sparkling snowy effect, bringing a festive touch to your craft.
Marker or Paint
Markers or paint can add details and color to your ornaments, enhancing your snowman’s look.

HOW TO MAKE Snowy Snowman Ornament Craft for Kids
Step 1: Prepare Your Materials
Gather all your materials on a clean, flat surface. Make sure everything is easily accessible to minimize mess and confusion as you work.
Step 2: Create the Snowman Body
If using foam balls, stack two different-sized balls to form the snowman’s body (a larger one for the bottom and a smaller one for the head). If you are using felt, cut out three circles of various sizes and stack them, securing them together with glue. Choose the size that fits your design vision best.
Step 3: Attach the Arms
Take the pipe cleaners and cut them to about 4-5 inches long. Bend each pipe cleaner into a “V” shape to create arms, and insert them into the sides of the snowman body. You can secure them with hot glue if desired.
Step 4: Add Eyes and Smile
Glue on the googly eyes towards the top of the snowman’s head. Use a marker or small buttons to create a mouth, giving your snowman personality.
Step 5: Create a Hat and Scarf
Take your fabric scraps and cut them into small pieces to create a scarf and a hat. Wrap the scarf around the snowman’s neck and either glue or tape it in place. For the hat, simply glue a piece of fabric on top of the head, or create a hat shape from another round piece of felt.
Step 6: Add Final Touches
Embellish your snowman with any remaining materials, like buttons down the front. If you want to add glitter, now is the time. Carefully apply glue to areas where you’d like to apply the glitter, sprinkle it on, and let it dry.
Step 7: Attach a Hanger
Using string or ribbon, create a loop to hang your snowman ornament. Glue it securely on the top of the head, ensuring it holds well.
Step 8: Let Dry
Allow your ornament to dry completely before handling or hanging it. This ensures all glue is set and you won’t accidentally detach pieces.
TIPS AND TRICKS
- Choosing materials: Feel free to upcycle materials around your home. Look for unused buttons, fabric scraps, or even old toys to incorporate.
- Safety first: If using a hot glue gun, make sure there is adult supervision. An alternative would be to use washable school glue, safe for younger children.
- Ask for help: If crafting with younger children, assist them with cutting and gluing parts to prevent frustration.
- Creative finishes: Encourage kids to experiment with different colors and designs when decorating their snowmen.
- Storage: Once the ornaments are made, store them in a dry place. If possible, place them in a soft cloth to avoid damage.
- Clean up: Use materials like glitter with care, as they can scatter easily. Have a designated area for glitter applications, possibly with newspaper underneath.
VARIATIONS AND CUSTOMIZATION IDEAS
- Seasonal themes: Create variations for different seasons. For instance, use colored felt for an Easter bunny or summer-themed ornaments.
- Different sizes: Vary the size of your snowmen by making large snowmen for outdoors and mini ones for the Christmas tree.
- Alternative colors: Use colored felt or fabric for a different look, such as a more whimsical snowman.
- Creative Patterns: Doodle or paint designs on the snowman’s body, making each ornament unique.
- Character theming: Make a whole family of snowmen with different features to represent everyone in the family.
Snowy Snowman Ornament Craft FAQ
How difficult is this craft?
This project is beginner-friendly and easy to follow, making it perfect for kids and those new to crafting.
What materials do I need?
You will need white felt or foam balls, pipe cleaners, buttons, googly eyes, fabric scraps, string or ribbon, glitter (optional), and markers or paint for details.
How long does it take to make?
This craft can be completed in about 30 minutes, making it a fun, quick holiday activity.
How should I store my finished snowman ornament?
Store your ornaments in a dry place to avoid moisture damage. Wrapping them in a fabric cloth can prevent scratches or breakage.
Can I customize my snowman ornament?
Yes! You can customize your snowman with different colors, materials, eyes, scarves, and unique decorations to suit your style.
CONCLUSION
Creating a Snowy Snowman Ornament Craft for Kids is an enjoyable and easy DIY project that everyone can participate in. With simple, budget-friendly materials, you’ll find this craft quick and perfect for seasonal decorating. It’s a great way to bond with family while making delightful handmade gifts and holiday decorations.
So gather your materials, round up your crafting buddies, and dive into this fun experience! We’d love to hear about your adventures, so feel free to share your creations or any customization ideas you come up with!
PrintSnowy Snowman Ornament Craft for Kids
A delightful and easy DIY project for creating festive snowman ornaments, perfect for kids and families during the holiday season.
- Prep Time: 10 minutes
- Cook Time: 20 minutes
- Total Time: 30 minutes
- Yield: 4 ornaments
- Category: Craft
- Method: DIY Crafting
- Cuisine: N/A
- Diet: N/A
Ingredients
- White Felt or Foam Balls
- Pipe Cleaners
- Buttons
- Googly Eyes
- Fabric Scraps
- String or Ribbon
- Glitter (optional)
- Marker or Paint
Instructions
- Prepare Your Materials
- Create the Snowman Body
- Attach the Arms
- Add Eyes and Smile
- Create a Hat and Scarf
- Add Final Touches
- Attach a Hanger
- Let Dry
Notes
Use kid-safe scissors and ensure adult supervision when using a hot glue gun.
Nutrition
- Serving Size: 1 ornament
- Calories: 0
- Sugar: 0g
- Sodium: 0mg
- Fat: 0g
- Saturated Fat: 0g
- Unsaturated Fat: 0g
- Trans Fat: 0g
- Carbohydrates: 0g
- Fiber: 0g
- Protein: 0g
- Cholesterol: 0mg
Keywords: DIY, Craft, Snowman, Kids, Ornaments, Holiday, Winter, Family