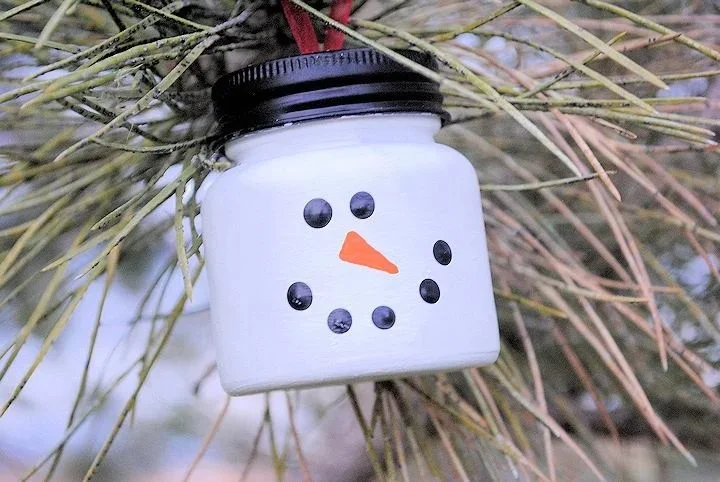
If you’re looking for a fun and creative DIY project to add some holiday cheer to your home, consider making Snowman Ornaments. This easy craft is perfect for the festive season and is suitable for all ages, making it a great project for families, friends, or anyone new to crafting. With a few simple materials and straightforward instructions, you can create charming homemade decor that can be used as gifts or as delightful ornaments on your Christmas tree. Get ready to enjoy a budget-friendly way to make your own holiday decorations with this festive and beginner-friendly craft!
WHY YOU WILL LOVE THIS Snowman Ornaments Craft
Making Snowman Ornaments is a delightful way to celebrate the holiday season. Here are several reasons why you’ll enjoy this easy DIY project:
- Easy for beginners: This craft is simple to follow, making it a great choice for those who are new to crafting.
- Uses simple materials: Most of the materials needed are easy to find, ensuring a smooth crafting experience.
- Budget-friendly: With inexpensive supplies, this is an affordable way to create festive decorations or gifts.
- Quick to make: Each ornament can be put together in a short amount of time, allowing you to make several at once.
- Great for home decor: These adorable ornaments are perfect for hanging on your tree or using as cheerful additions to your holiday decorations.
- Creative personalization: You can easily customize each snowman to suit your style or theme.
PROJECT DETAILS
Skill Level
Beginner-friendly. This craft is suitable for those with little to no crafting experience.
Estimated Time
Approximately 30 minutes to 1 hour, depending on how many ornaments you wish to create.
Approximate Cost
Around $10 to $15, depending on the materials you have at home and what you need to purchase.
Best For
This project is ideal for families, school groups, or anyone looking to enjoy a festive activity together.
Project Type
DIY home decor / holiday crafts.
TOOLS AND EQUIPMENT NEEDED
Scissors
Scissors will be used to cut the materials, like fabric or ribbon, into the desired shapes and sizes.
Glue Gun and Glue Sticks
A glue gun is essential for attaching various components of the ornaments securely. Make sure to use glue sticks in the glue gun.
Marker or Paint
This is used for adding details such as facial features or decorations on the snowmen.
MATERIALS
White Felt or Fabric
The main material for creating the snowman’s body. Felt is durable and easy to work with, making it perfect for beginners.
Colored Felt or Fabric
Used for creating the accessories of the snowman, such as scarves, hats, and buttons. Choose festive colors like red, green, or blue.
Wiggly Eyes
These add a fun and playful element to your snowman’s face. They are easy to apply with glue, making them beginner-friendly.
Ribbon or String
This will be used to hang your ornaments on the tree. Choose colors that contrast well with the snowman for a cute touch.
Stuffing Material (Optional)
If you want your snowman to have a puffier look, you can use cotton balls, polyester stuffing, or even shredded paper to fill the ornament.
Small Accessories (Optional)
Think mini hats, buttons, or embellishments that add personality to your snowman. You can use items you already have at home to make it more budget-friendly.

HOW TO MAKE Snowman Ornaments
Step 1: Cut the Fabric
Start by cutting out two identical circles from the white felt or fabric. These will form the snowman’s body. You can adjust the size depending on how large you want your ornaments to be.
Step 2: Create the Base
Place one of the circles on the flat surface. If you’re using stuffing, place it in the center of the circle. Then, position the second circle on top, covering the stuffing. This gives your snowman a plush appearance.
Step 3: glue the edges
Using the glue gun, carefully glue around the edges of the two circles to hold them together. Make sure to leave a small opening if you’re adding stuffing. Press the fabric firmly to ensure a strong bond.
Step 4: Flip and Stuff (Optional)
If you left an opening, flip the snowman inside out to hide the seams and fill it with the stuffing material to achieve your desired puffiness. Secure the opening with more glue once you’re satisfied with the thickness.
Step 5: Add Facial Features
Attach the wiggly eyes using glue to create your snowman’s face. Next, you can draw or glue on a small carrot nose and a smile using a marker or small fabric pieces.
Step 6: Create Accessories
Cut small pieces of colored felt or fabric to make scarves and hats. Glue these accessories onto your snowman for a finished look. You can even create small buttons down the front with bead or felt cutouts to add more character.
Step 7: Create a Hanging Ribbon
Cut a small piece of ribbon or string and glue it securely to the top of the snowman’s head to make a loop for hanging. Make sure it’s sturdy enough to hold the weight of the ornament.
Step 8: Let It Dry
Allow your ornaments to dry thoroughly before handling or hanging them on your tree.
TIPS AND TRICKS
- Choosing Material: Opt for felt if you’re looking for something durable. It’s easy to cut and glue, making it a favorite for simple crafts.
- Cutting and Gluing: Take your time when cutting fabric to ensure neat edges. When using a glue gun, be careful of hot glue to avoid burns.
- Avoiding Common Mistakes: Ensure the glue is not too hot when applying to avoid damaging the felt or fabric.
- Getting a Better Finish: Use sharp scissors for clean cuts, and press firmly when gluing to ensure no gaps remain between the fabric pieces.
- Saving Money: You can use scraps of fabric, old clothing, or materials you have on hand instead of purchasing new supplies.
- Making the Craft Last Longer: Store your ornaments in a cool dry place to avoid them getting squished or damaged.
VARIATIONS AND CUSTOMIZATION IDEAS
- Different Colors: Use various shades of white or even glitter fabric to make snowmen that sparkle.
- Different Sizes: Create a set of snowmen ornaments in different sizes for a more dynamic display.
- Seasonal Versions: Make variations for other holidays by changing the colors or adding elements related to those seasons.
- Personalized Versions: Write names on the snowman’s body, making them great gifts for family and friends.
- Patterns: Instead of plain fabric, use patterned fabric to add a unique twist to each snowman.
- Festive Accessories: Create hats or scarves using seasonal prints or holiday-themed fabrics, such as snowflakes or holiday patterns.
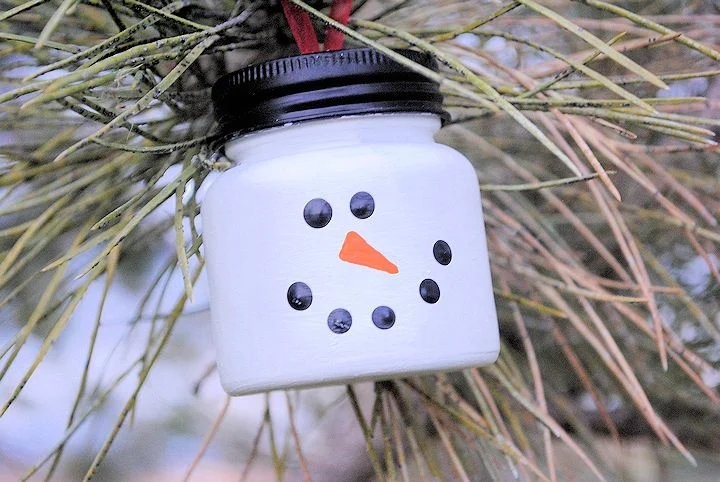
Snowman Ornaments FAQ
Q1: How difficult are Snowman Ornaments to make?
These ornaments are quite easy. They are a beginner-friendly craft, perfect for those new to DIY projects.
Q2: Can I use different materials for making my snowman?
Yes! You can use various materials like cotton, paper, or even recycled items to create your snowmen, as long as they are safe to glue.
Q3: How do I clean my snowman ornaments?
To clean your snowman ornaments, use a soft, damp cloth and gently wipe down the surface. Avoid soaking them in water.
Q4: How long will it take to make these ornaments?
It typically takes about 30 minutes to 1 hour to create a set of snowman ornaments, depending on your crafting speed and the number of ornaments.
Q5: Are these ornaments durable?
Yes, if made properly and stored correctly, the ornaments can last for many holiday seasons. Just ensure not to squish them when storing.
CONCLUSION
In summary, making Snowman Ornaments is an enjoyable and straightforward craft that is perfect for the holiday season. With easy-to-follow instructions and affordable materials, this beginner-friendly project allows you to create charming decorations for your home or thoughtful handmade gifts for loved ones. Don’t hesitate to personalize your ornaments, making them unique and special. Gather your materials and get started on this easy DIY project today! We encourage you to share your finished snowmen and any creative twists you incorporate into your decorations. Happy crafting!
PrintSnowman Ornaments
Create charming snowman ornaments with this easy and fun DIY project, perfect for the holiday season.
- Prep Time: 15 minutes
- Cook Time: 30 minutes
- Total Time: 45 minutes
- Yield: 5 ornaments
- Category: DIY Crafts
- Method: Crafting
- Cuisine: N/A
- Diet: N/A
Ingredients
- White Felt or Fabric
- Colored Felt or Fabric
- Wiggly Eyes
- Ribbon or String
- Stuffing Material (Optional)
- Small Accessories (Optional)
Instructions
- Cut the Fabric: Cut out two identical circles from the white felt or fabric.
- Create the Base: Place one circle down and add stuffing if desired.
- Glue the edges: Use a glue gun to glue around the edges of the circles.
- Flip and Stuff (Optional): Flip inside out and stuff if you left an opening.
- Add Facial Features: Attach wiggly eyes and add a nose and mouth.
- Create Accessories: Cut pieces of colored fabric for scarves and hats.
- Create a Hanging Ribbon: Glue a piece of ribbon securely to the top.
- Let It Dry: Allow ornaments to dry thoroughly before use.
Notes
Use sharp scissors for clean cuts and be careful with hot glue.
Nutrition
- Serving Size: 1 ornament
- Calories: 50
- Sugar: 0g
- Sodium: 1mg
- Fat: 1g
- Saturated Fat: 0g
- Unsaturated Fat: 0g
- Trans Fat: 0g
- Carbohydrates: 10g
- Fiber: 0g
- Protein: 1g
- Cholesterol: 0mg
Keywords: DIY, Christmas, ornaments, holiday crafts, snowman