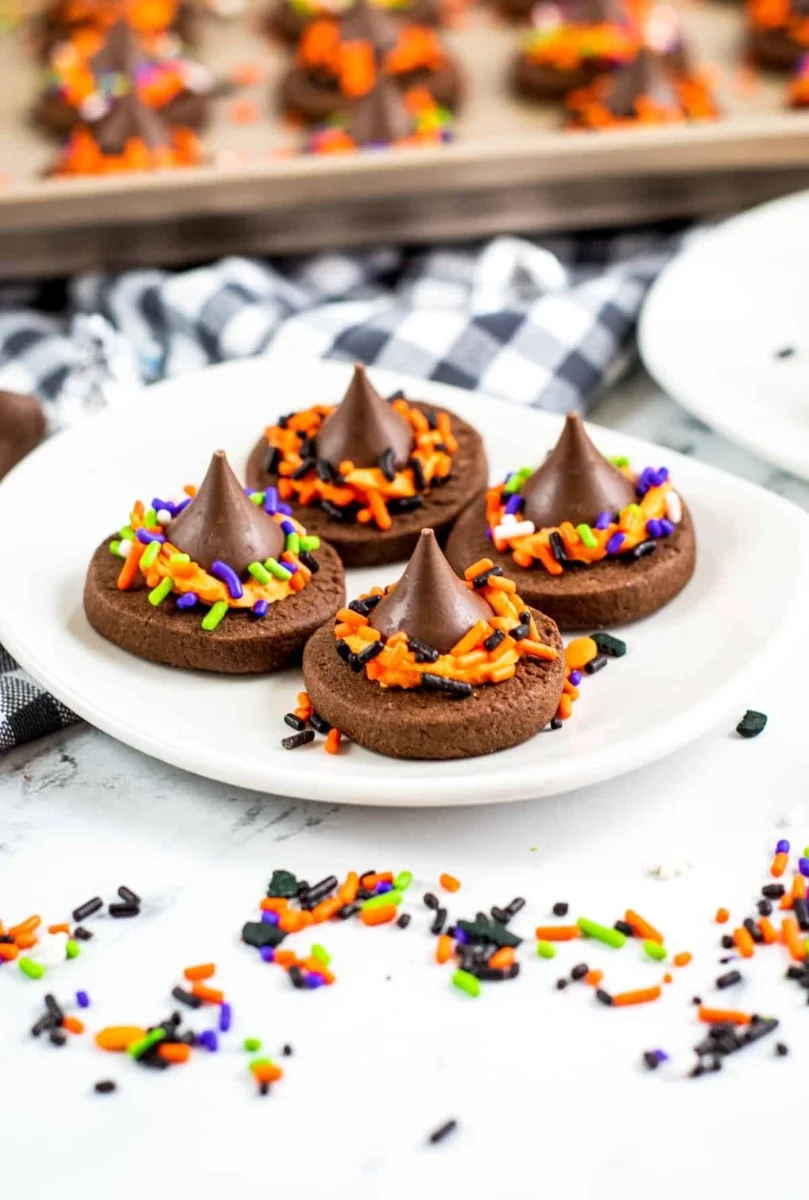
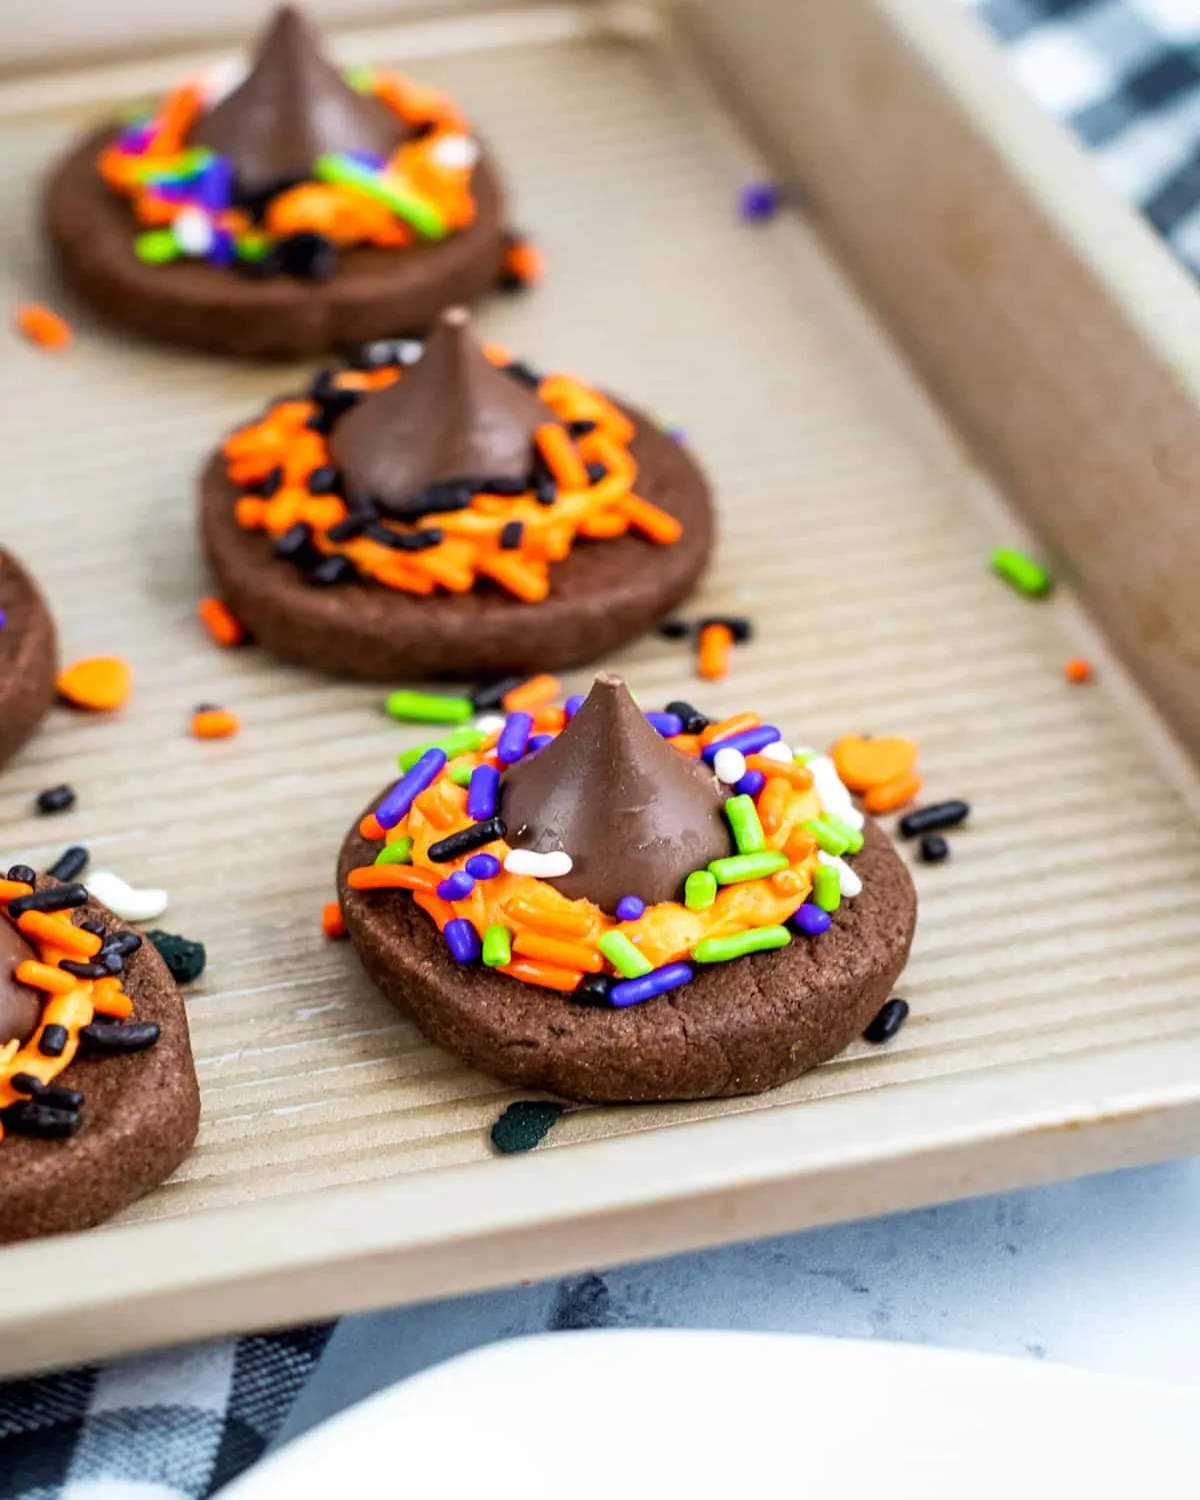
Witch Hat Cookies are a fun and festive treat perfect for Halloween celebrations. They capture the spirit of the season with their adorable hat shape and delicious chocolate flavor. Not only do they look great on any Halloween dessert table, but they are also simple enough for anyone to make, from kids to adults. These cookies are a delightful combination of soft, chocolatey cookie and sweet frosting, topped off with a classic Hershey’s Kiss. Making these cookies is a delightful activity, especially when enjoyed with family and friends. Whether you’re hosting a Halloween party or just looking to share some sweet treats, Witch Hat Cookies are sure to impress!
HOW TO MAKE Witch Hat Cookies
Ingredients
- 2 cups all-purpose flour
- 2 tablespoons corn starch
- 1 1/2 teaspoons salt
- 3/4 cup unsweetened cocoa powder
- 1 cup granulated sugar
- 1 cup butter, room temperature
- 1 large egg
- 2 teaspoons pure vanilla extract
- 1/2 cup butter, room temperature (for frosting)
- 2 cups confectioners sugar
- 1 1/2 tablespoons heavy cream
- 1/2 teaspoon pure vanilla extract (for frosting)
- Orange gel food coloring
- 60 Hershey’s Kisses
- Halloween sprinkles
DIRECTIONS
Make the cookies:
- Start by gathering all your ingredients. In a medium-sized bowl, whisk together the all-purpose flour, corn starch, cocoa powder, and salt. This creates a dry mixture that will give your cookies a great texture.
- In a separate bowl, using a stand mixer or a handheld mixer, beat the butter and granulated sugar together until the mixture is light and fluffy. This step is essential as it helps incorporate air into the batter, which will make for soft cookies.
- Next, add in the egg and vanilla extract to the butter and sugar mixture. Mix until everything is well blended.
- Gradually add the flour mixture to the butter mixture, little by little. Mix after each addition until fully combined.
- Once your dough is mixed, roll it into a log about 1.5 inches in diameter. Then, wrap the dough log in parchment or wax paper and place it in the refrigerator to chill for 1 hour. Chilling the dough helps it hold its shape better when baked.
- When you are ready to bake, preheat your oven to 350 degrees Fahrenheit. Line baking sheets with parchment paper or silicone liners to prevent sticking.
- Carefully slice the chilled dough into 1/4 to 1/2 inch slices. Place these slices on the prepared baking sheet, giving them some space to spread out.
- Bake the cookies in the preheated oven for 8 to 12 minutes or until they are set.
- Once baked, remove them from the oven and allow the cookies to cool on the baking sheet for 2 to 3 minutes. This helps them firm up a bit before you move them.
- After a few minutes, transfer the cookies to a cooling rack to finish cooling completely.
Prepare the frosting and decorate:
- In a large bowl, beat the room temperature butter until it is light and fluffy.
- Gradually mix in the confectioners’ sugar, adding about 1/2 cup at a time until you have a smooth mixture.
- Add the heavy cream, vanilla extract, and a few drops of orange gel food coloring. Mix until everything is well combined. You can adjust the color of the frosting by adding more gel food coloring until it reaches your desired shade of orange.
- Once your frosting is ready, it’s time to decorate!
- Using a piping bag, pipe a small dot of frosting on the bottom of each unwrapped Hershey’s Kiss. This is a crucial step as it acts like glue to hold the kiss in place on the cookie.
- Place the Hershey’s Kiss in the center of each cookie.
- Next, pipe some frosting around the base of the Hershey’s Kiss to create the appearance of a witch’s hat.
- Finally, add Halloween sprinkles on top for an extra festive touch.
- Repeat this process until all cookies are decorated.
- Let the cookies sit on the countertop for a while to allow the frosting to harden slightly. Once they are set, you can place them in an airtight container until you are ready to serve.
HOW TO SERVE Witch Hat Cookies
Serving Witch Hat Cookies is very straightforward. Arrange them on a festive platter or dessert table surrounded by other Halloween-themed treats, such as pumpkin cupcakes or ghost-shaped brownies. These cookies are perfect as a sweet treat for Halloween parties, school events, or family gatherings. You can also package them in treat bags as fun handouts for trick-or-treaters or party favors. Encourage guests to enjoy them with a glass of cold milk or a warm cup of hot chocolate to enhance the festive spirit.
HOW TO STORE Witch Hat Cookies
To keep your Witch Hat Cookies fresh, store them in an airtight container at room temperature. This will help maintain their soft texture and prevent them from getting stale. The cookies can typically last for about 1 week when stored properly. If you want to keep them for a longer period, consider refrigerating them, but be sure to bring them back to room temperature before serving. You can also freeze the cookies for up to 3 months. To freeze, make sure they are completely cooled then place them in a freezer-safe container or freezer bag. Thaw the cookies in the refrigerator overnight before enjoying.
TIPS TO MAKE Witch Hat Cookies
- Chill your dough: This helps the cookies maintain their shape during baking and results in a thicker cookie.
- Don’t overbake: Keep an eye on the baking time. Remove the cookies from the oven as soon as they are set for a soft, chewy texture.
- Use room temperature ingredients: Ensure your butter and eggs are at room temperature for better mixing and a smoother dough.
- Customize the sprinkles: Feel free to get creative with your toppings! Use different colors of sprinkles or even edible glitter to make your cookies stand out.
- Double the recipe: If you’re planning for a big crowd or want to have leftovers, consider doubling the recipe to ensure everyone gets to enjoy them.
VARIATIONS
- Different Shapes: Instead of making traditional witch hats, try using cookie cutters to create different Halloween shapes like pumpkins, ghosts, or bats.
- Flavor Twist: Consider adding a little peppermint extract to the frosting for a festive twist, especially if you’re making these cookies for a winter event.
- Nutty Addition: Mix in some chopped nuts or chocolate chips to the cookie dough for an additional texture.
- Gluten-Free: Use a gluten-free flour blend in place of all-purpose flour for a gluten-free version of these cookies.
- Color Variations: Change the gel food coloring to create other festive colors for different seasons or celebrations.
FAQs
Can I make the cookie dough ahead of time?
Yes! You can prepare the cookie dough and store it in the refrigerator for up to 2 days, or freeze it for up to 3 months. Just make sure to wrap it tightly to prevent it from drying out.
How do I know when the cookies are done baking?
The cookies should look set and firm, but they will continue to harden as they cool. Avoid letting them get too dark, as they may become hard.
Can I use a different type of chocolate than Hershey’s Kisses?
Absolutely! You can use any type of chocolate candy or even chocolate molded figures that fit within the theme you’re going for.
With these simple steps, tips, and variations, making Witch Hat Cookies can be a fun and enjoyable experience that results in delightful treats for everyone to enjoy!
PrintWitch Hat Cookies
Fun and festive Witch Hat Cookies that are perfect for Halloween celebrations, combining soft, chocolatey cookies with sweet frosting and Hershey’s Kisses.
- Prep Time: 15 minutes
- Cook Time: 12 minutes
- Total Time: 75 minutes
- Yield: 60 cookies 1x
- Category: Dessert
- Method: Baking
- Cuisine: American
- Diet: Vegetarian
Ingredients
- 2 cups all-purpose flour
- 2 tablespoons corn starch
- 1 1/2 teaspoons salt
- 3/4 cup unsweetened cocoa powder
- 1 cup granulated sugar
- 1 cup butter, room temperature
- 1 large egg
- 2 teaspoons pure vanilla extract
- 1/2 cup butter, room temperature (for frosting)
- 2 cups confectioners sugar
- 1 1/2 tablespoons heavy cream
- 1/2 teaspoon pure vanilla extract (for frosting)
- Orange gel food coloring
- 60 Hershey’s Kisses
- Halloween sprinkles
Instructions
- In a medium-sized bowl, whisk together the all-purpose flour, corn starch, cocoa powder, and salt.
- In a separate bowl, beat the butter and granulated sugar together until light and fluffy.
- Add in the egg and vanilla extract, mixing until well blended.
- Gradually mix in the flour mixture until fully combined.
- Roll the dough into a log (1.5 inches in diameter), wrap in parchment paper, and chill for 1 hour.
- Preheat oven to 350°F (175°C) and prepare baking sheets with parchment or silicone liners.
- Slice chilled dough into 1/4 to 1/2 inch slices and place on the baking sheet.
- Bake for 8 to 12 minutes or until set. Cool on sheets for 2-3 minutes before transferring to a wire rack.
- For the frosting, beat room temperature butter until light and fluffy, then mix in confectioners’ sugar until smooth.
- Add heavy cream, vanilla extract, and gel food coloring until combined.
- Pipe frosting onto the bottom of each Hershey’s Kiss and place in the center of each cookie.
- Pipe frosting around the base of each Kiss and top with Halloween sprinkles.
Notes
Chill your dough to maintain shape and prevent overbaking for soft cookies.
Nutrition
- Serving Size: 1 cookie
- Calories: 150
- Sugar: 10g
- Sodium: 100mg
- Fat: 7g
- Saturated Fat: 4g
- Unsaturated Fat: 2g
- Trans Fat: 0g
- Carbohydrates: 20g
- Fiber: 1g
- Protein: 1g
- Cholesterol: 20mg
Keywords: Halloween, cookies, desserts, festive recipes, chocolate cookies


