
how to make healthy homemade jello is one of those things I didn’t think I needed to learn until I got tired of the neon boxes at the store. You know the ones, super bright, super sweet, and somehow they always leave my tongue feeling a little weird. I wanted something fruity, not fake, and something I could feel good serving after dinner or packing into lunches. The good news is that it’s honestly easy once you know the few little rules that make it set up nicely. If you can stir and wait for the fridge to do its thing, you can do this.

Simple Ingredients To Start
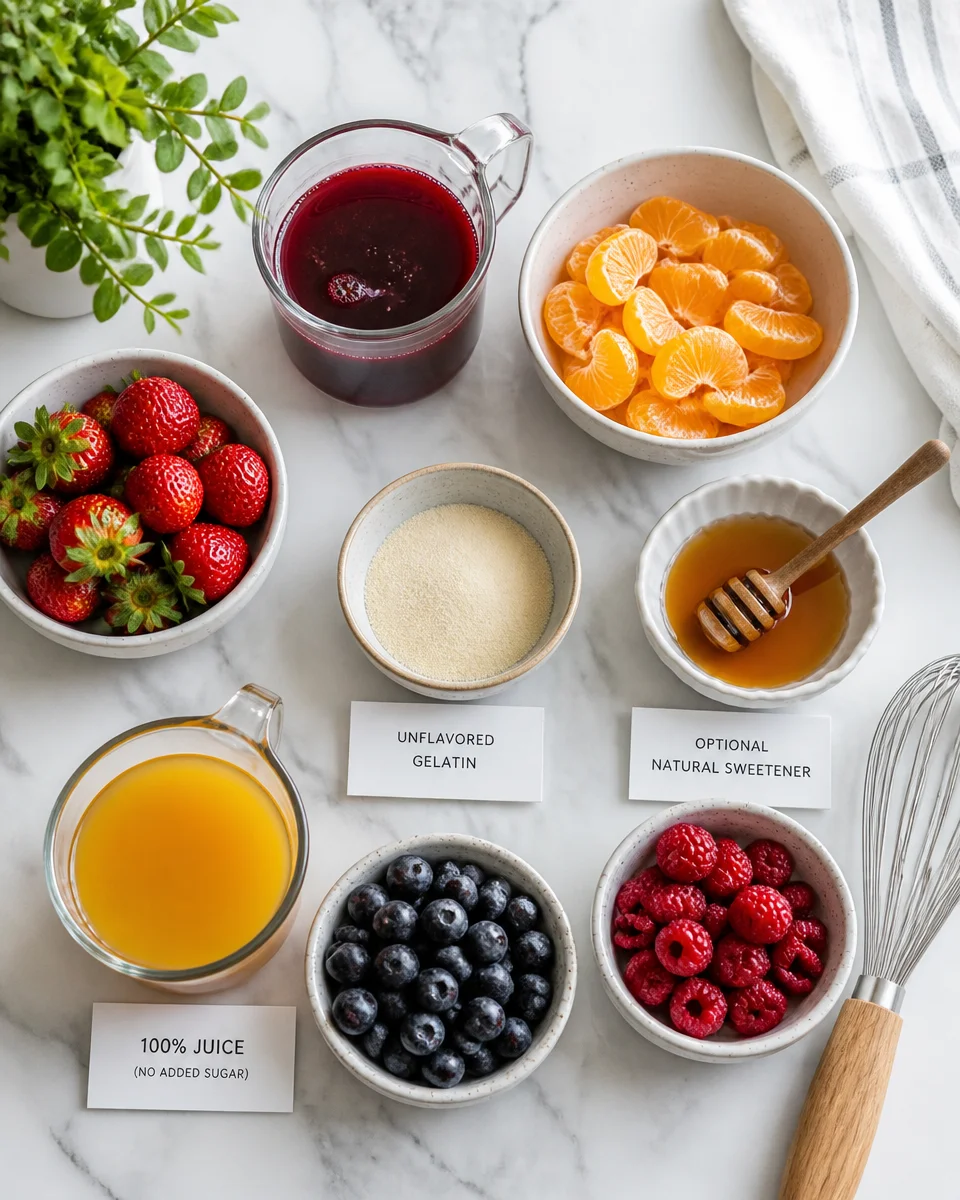
I love recipes with short ingredient lists, and this is definitely one of them. The base is juice plus a gelling ingredient. That’s it. You can keep it super clean, or you can add little extras like fruit, citrus zest, or a touch of honey.
My go to ingredient list
- 100 percent juice (or a mix of juice and water if it’s very strong)
- Gelatin (unflavored) or agar agar if you want a plant based option
- Sweetener (optional) like honey or maple syrup, only if your juice needs it
- Fresh fruit (optional) like berries, peeled orange segments, or sliced grapes
- Lemon or lime juice (optional) for brightness
Gelatin is the classic way and it has a nice soft bounce. Agar agar sets firmer and a little more “clean” in texture, which some people love and others find a bit less jiggly. Either works, you just treat them slightly differently, and I’ll walk you through it below.
Quick side note: when I’m in a prep mood, I’m usually also making something else cozy for the week. If you’re into kitchen basics, I’ve used this method for how to make golden milk paste instant anti inflammatory lattes and it’s the same kind of satisfying, low effort meal prep vibe.
What Kind Of Juice Works?
This is where homemade jello gets fun because the flavor is totally in your hands. Pretty much any juice can work, but a few will fight your gelatin if they’re used raw. I learned that the messy way after trying pineapple juice and ending up with a cup of fruity liquid that never set. Still tasty, but not jello.
Here’s the quick and helpful rule. Some fruits contain enzymes that mess with gelatin’s ability to set, especially when the juice is raw: pineapple, kiwi, papaya, and fresh figs. If you use juice that’s been pasteurized or heated, it usually works because the heat calms those enzymes down. Most store bought juices are pasteurized, so they’re typically fine, but fresh pressed can be tricky.
My favorite choices:
Best easy wins: apple, white grape, purple grape, cherry, cranberry blends, pomegranate blends, mango nectar, and most berry juices.
Citrus tips: orange and grapefruit are great, but they can taste flat once chilled, so I often add a squeeze of lemon to wake them up.
If the juice is super tart: add a teaspoon or two of honey. Chill dulls sweetness, so taste the warm mixture before you pour it.
Also, if you’re tossing in fruit pieces, avoid raw pineapple chunks for the same reason. Use berries, sliced strawberries, peaches, or even mandarin segments instead.
Random kitchen comparison, but it makes sense: getting the right texture in jello reminds me of getting sauces to behave. When I was learning thickening tricks, I bookmarked how to make gluten free roux for keto sauces soups because it’s the same idea of understanding what makes something set and hold together.
How To Make Homemade Jello, Step By Step
Let’s do the actual recipe. This is the version I make most often, using unflavored gelatin. It’s reliable, it’s easy, and it has that classic jiggly feel. And yes, this whole post is really about how to make healthy homemade jello without needing anything weird or artificial.
Basic homemade jello method (gelatin)
What you’ll need: a small saucepan, a whisk or spoon, a measuring cup, and a dish or silicone molds.
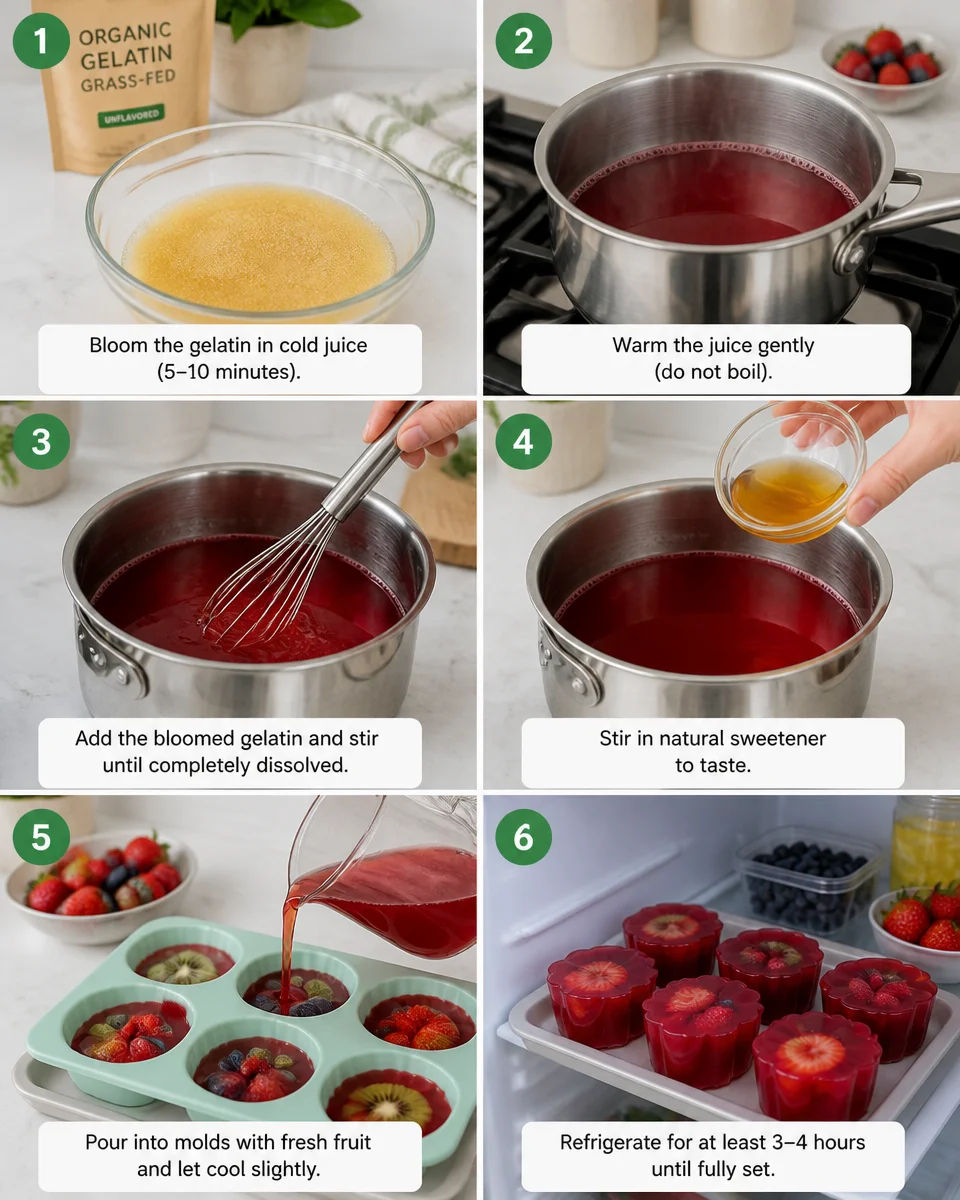
- Pour 1 cup of juice into a bowl or measuring cup. Sprinkle 2 and 1/2 tablespoons unflavored gelatin over the top and let it sit for 5 minutes. This step is called blooming, but really it just means “let it get spongy.”
- Warm 3 cups of juice in a saucepan over medium low heat. You want it hot, not boiling. If it’s steaming and you can’t comfortably stick your finger in it, you’re there.
- Scrape in the bloomed gelatin and whisk until completely dissolved, about 1 to 2 minutes.
- Taste it. If it needs a little sweetness, whisk in honey or maple syrup now. If it needs brightness, add a squeeze of lemon.
- Pour into a glass dish or molds. If adding fruit, place fruit in the dish first, then pour the liquid over it.
- Refrigerate 4 hours, or overnight for the cleanest slice.
That’s it. Truly. The most important part is not boiling the gelatin. If you boil it, the set can get weaker, and you’ll be annoyed later when it’s more like soft pudding than jello.
If you’re going agar agar instead, follow the package because brands vary, but the basic idea is: you usually whisk agar into liquid, bring it to a brief simmer, then pour and chill. Agar sets as it cools, so it can firm up faster than gelatin.
This is the point where I usually do other kitchen projects while I wait for things to cool. If you like trying seasonal stuff, I got weirdly into sprucy flavors last year, and I still make how to make spruce tips tincture for fun cocktails and little mocktail splashes. Not jello related, but it’s a good reminder that homemade things can be simple and kind of magical.
“I made this with 100 percent cherry juice and a little honey. My kids thought it was candy, and I felt way better about dessert night. It set perfectly on the first try.”
Best Tips for Getting Homemade Jello to Turn Out
Once you make it once, you’ll feel confident, but here are the practical tips that save you from the most common jello heartbreak. If your goal is how to make healthy homemade jello that sets beautifully and tastes like real fruit, these little details matter.
1. Do not boil gelatin. Warm is good. Boiling is trouble. If you’re unsure, lower the heat and take your time.
2. Measure your gelatin. Eyeballing is fine for soup, not for set desserts. If you want a softer jiggle, use a little less next time. If you want clean cubes for lunchboxes, use a tiny bit more.
3. Chill time is real. It might look set at 2 hours, but the center is usually still loose. Give it the full 4 hours if you want neat slices.
4. Mind the “fresh pineapple problem.” If you’re using fresh pressed pineapple juice, heat it first or skip it. Pasteurized pineapple juice often works, but I still treat it carefully and test a small batch if I’m unsure.
5. Fruit floats. If you want fruit suspended in the middle, let the liquid cool for 10 to 15 minutes before pouring, or pour halfway, chill 20 minutes, then add fruit, then top off. I do the lazy version and embrace the fruit layer on top. It’s cute.
Also, not to go off track, but if you ever bake quick bread and get annoyed when it falls apart, I swear by this guide on how to make jiffy cornbread less crumbly. It’s the same type of “tiny fix, big difference” cooking wisdom.
Fun Variations for Homemade Jello
This is where you can play. Once you know the base method, you can keep it super simple or get creative depending on the season.
Layered jello: Make one flavor, pour it in, chill until set. Then make a second flavor and gently pour it over a spoon so it doesn’t punch holes in the first layer.
“Creamsicle” style: Use orange juice, and replace 1/2 cup of juice with coconut milk. It turns soft and dreamy, like a childhood treat but lighter.
Herbal twist: Add a small handful of mint leaves to the warm juice, let it steep 10 minutes, then strain before adding gelatin. It tastes extra refreshing with watermelon juice.
Berry lemonade: Do a mix of berry juice and lemonade, then toss in a few blueberries. It’s bright and kind of addictive.
Cold season comfort: Use apple juice, add cinnamon sticks while warming, then remove them. It tastes like apple cider in jello form.
And if you’re the kind of person who likes foraging flavors, you might also like how to make spruce tips tincture 2. It has that fresh, outdoorsy note that surprisingly works in small doses with citrus desserts.
One more gentle reminder for the keyword count lovers and the people who found this while searching: yes, how to make healthy homemade jello really can be this simple, and once you do it, you’ll probably stop buying the box.
Common Questions
Can I make this without gelatin?
Yes. Use agar agar. Expect a firmer set and follow your brand’s directions since the strength can vary.
Why did my jello not set?
Most likely the liquid was too hot for too long, you used too little gelling agent, or you used a raw enzyme heavy juice like fresh pineapple or kiwi.
How long does homemade jello last in the fridge?
Usually 5 to 7 days in a covered container. If you added fresh fruit, aim for the shorter end since fruit can soften and weep.
Can I reduce the sugar even more?
Totally. Start with unsweetened juice (or dilute with water), skip added sweeteners, and use tart bright flavors like pomegranate or berry blends. Cold jello tastes less sweet than warm liquid, so taste before chilling.
Can I freeze homemade jello?
I don’t recommend it. The texture gets watery and broken when it thaws. If you want a frozen treat, pour the mixture into popsicle molds before it fully sets and freeze it as “juice pops” instead.
A sweet little wrap up
If you take anything from this post, let it be this: how to make healthy homemade jello is mostly about picking a good juice and treating your gelatin gently. Once you get that down, you can make it as simple or as playful as you want, with fruit, herbs, layers, or creamy swirls. If you want another solid reference point, I also like reading How to Make Healthy Homemade Jello – One Lovely Life and Healthy Homemade Jello to compare ratios and flavor ideas. Now go grab a bottle of real juice, clear a little space in the fridge, and make a batch that tastes like actual fruit.