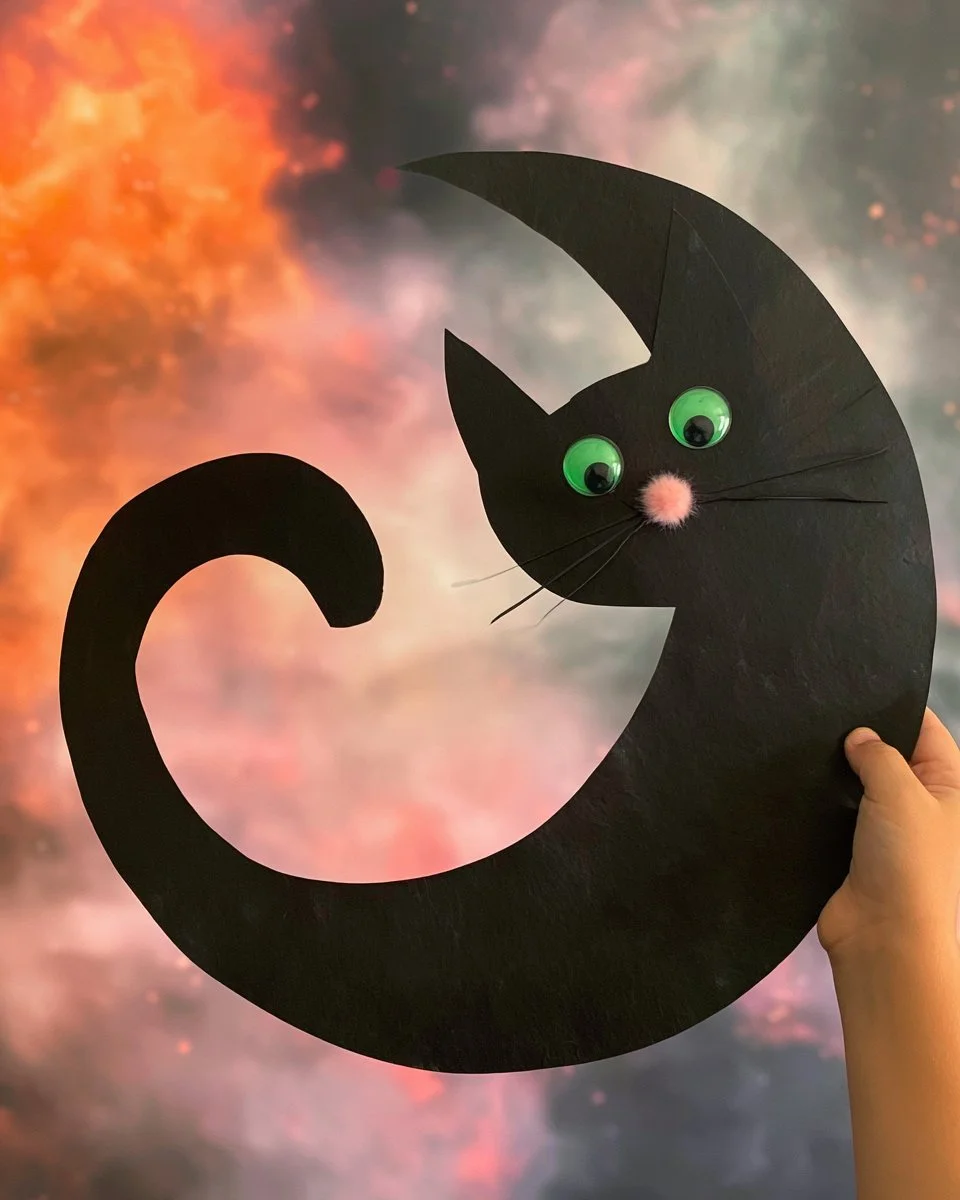
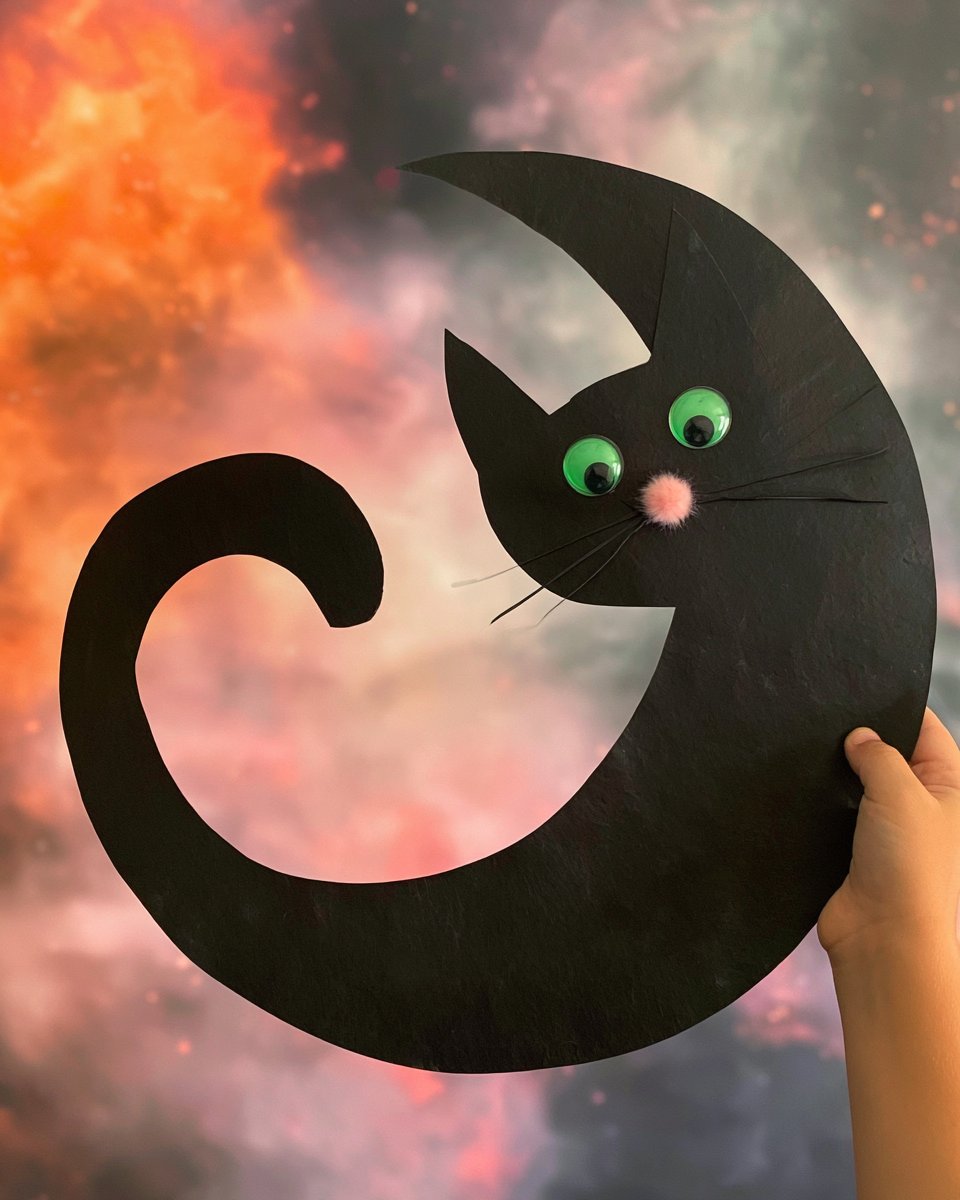
If you’re looking for an easy DIY project that combines creativity and fun, the Paper Plate Black Cat is a fantastic choice. This seasonal craft not only serves as an engaging activity for kids but also adds a charming touch to your Halloween decorations. With minimal materials and straightforward instructions, this craft is perfect for beginners and seasoned crafters alike. Plus, it offers endless possibilities for customization and personalization, making it an ideal project for parties or handmade gifts. Let’s dive in and explore this delightful craft!
WHY YOU WILL LOVE THIS Paper Plate Black Cat
Creating a Paper Plate Black Cat is an enjoyable experience that many people will love for several reasons:
- Easy for Beginners: This craft uses simple steps, making it suitable for crafters of all skill levels, including children.
- Uses Simple Materials: You only need a few materials that are often already in your home, keeping the supply list short and manageable.
- Budget-Friendly: This is a low-cost craft requiring inexpensive items, making it ideal for those keeping an eye on their budget.
- Quick to Make: You can complete this project in less than an hour, making it a great option for an afternoon craft activity.
- Great for Home Decor: The finished product can be a cute Halloween decoration or a playful addition to your home decor in the fall.
- Easy to Customize: You can personalize the black cat by using different colors or styles, allowing for creative exploration.
PROJECT DETAILS
Skill Level
This project is classified as easy, making it perfect for beginners or kids who are learning to craft.
Estimated Time
You can complete the Paper Plate Black Cat craft in approximately 30 to 45 minutes, allowing for a quick yet satisfying craft session.
Approximate Cost
The total cost is minimal, generally under $10, depending on whether you have some materials already at home.
Best For
This project is suitable for kids, families, and anyone who enjoys simple crafts. It’s also an excellent choice for Halloween or autumn-themed activities.
Project Type
It falls under the category of seasonal crafts and DIY home decor, allowing you to create fun decorations that reflect the spirit of the fall season.
TOOLS AND EQUIPMENT NEEDED
Scissors
Scissors are necessary for cutting the paper plate into the desired shapes and sizes for the cat’s ears and other features.
Glue or Tape
You will need glue or tape to secure the different elements of your cat together, allowing for a sturdy construction.
Paintbrush (optional)
A paintbrush can be helpful if you choose to paint your cat, especially for applying lots of color evenly.
MATERIALS
Paper Plate
The paper plate is the main body of your black cat. It serves as a sturdy foundation for building your craft.
Black Construction Paper
Use black construction paper to create the cat’s ears and other features. This strong paper adds vibrancy to your cat’s design.
Googly Eyes
These add fun and personality to your black cat. You can use any size of googly eyes to create a playful look.
White Paper
This paper is essential for creating the cat’s teeth and whiskers, adding detail and charm to your finished product.
Markers or Paint
Soft colors like pink or any other color of your choice can be used to color the cat’s nose and other facial features, giving it character.
Optional Decorations
Consider using glitter, stickers, or other embellishments to personalize your black cat further!

HOW TO MAKE Paper Plate Black Cat
Now that you have your materials and tools ready, let’s go through the steps for making your Paper Plate Black Cat.
Step 1: Prepare the Paper Plate
Start by placing your paper plate upside down. Paint or color the back side of the plate entirely using black paint or a black marker. Make sure to cover any white spots to get a uniform look.
Step 2: Create the Cat’s Ears
Using your black construction paper, cut out two triangular shapes for the ears. Each triangle should be about 4-5 inches long. If you want, you can make the inner ears a different color by cutting smaller triangles from the white paper and gluing them on top of the black ones.
Step 3: Attach the Ears
Using glue or tape, attach the ears to the top side of the paper plate. Position them slightly apart to create a playful and realistic look for your cat.
Step 4: Add Facial Features
Now let’s bring your black cat to life! Using your googly eyes, glue them onto the paper plate. You can use two large eyes for a cute effect, or mix it up with different sizes. Next, cut a small triangle from the white paper for the cat’s nose and glue that below the eyes. Finally, cut thin strips from the white paper for whiskers and attach them on either side of the nose.
Step 5: Draw or Paint Details
Use markers or paint to create details. Draw a mouth below the nose and add any additional features like eyebrows or patterns on the ears to add charm to your black cat.
Step 6: Allow to Dry
If you’ve used glue or paint, allow the craft to dry before handling it too much. This ensures everything stays intact.
TIPS AND TRICKS
- Choosing Materials: Stick with what you have at home to keep this a budget-friendly DIY. You can use colored paper, fabric scraps, or even recycled paper for the craft.
- Cutting: Use children’s safety scissors for younger kids to ensure safety while crafting.
- Avoiding Mistakes: Take your time when gluing to prevent any off-center placement.
- Customization: Experiment with different colors or even add patterns instead of solid colors for a more unique look.
- Making the Craft Last Longer: To preserve your black cat, consider spraying it lightly with a clear varnish once it’s dry.
- Working Safely: Supervise younger children while using scissors or any small items to prevent choking hazards.
VARIATIONS AND CUSTOMIZATION IDEAS
- Different Colors: Try making a colorful cat using a variety of different colored plates and paper for a fun twist on the traditional black cat.
- Seasonal Versions: Change the theme depending on the occasion! For Halloween, make spooky accessories like a witch hat or a pumpkin. For autumn, create a harvest theme with leaf designs.
- Different Sizes: Consider utilizing larger or smaller plates to create different-sized cats, perfect for various displays.
- Patterns: Instead of a plain black cat, paint stripes or spots to create a unique design that stands out.
- Personalized Versions: Incorporate your pet’s features and colors for a fun, personalized take on this easy craft.
Paper Plate Black Cat FAQ
What skill level is this craft suitable for?
The Paper Plate Black Cat is designed for beginners, making it a fun and easy craft for children and those new to crafting.
How long does this craft take to complete?
The estimated time to complete this craft is around 30 to 45 minutes, making it a quick and enjoyable activity.
What materials do I need for this project?
You will need a paper plate, black construction paper, googly eyes, white paper, markers or paint, and glue or tape for this project.
How do I store and preserve the finished craft?
Once completed, keep your black cat in a safe spot away from direct sunlight and moisture. If you used paint, consider applying a clear varnish to make it more durable.
How can I customize this craft?
You can personalize your black cat by using different colors, patterns, adding seasonal elements, or even adjusting its size to suit your decorating needs.
CONCLUSION
The Paper Plate Black Cat is an easy, beginner-friendly craft that can be completed quickly and affordably. This simple craft idea is perfect for creating festive decorations for Halloween, bringing joy to your home or making a personalized gift. With endless possibilities for customization, it’s a creative DIY project that allows crafters to express their individuality. Whether you’re working on a school project, a fun family activity, or looking for budget-friendly DIY home decor, this craft is sure to make a delightful addition to your autumn decorations. Grab your materials and get started on your Paper Plate Black Cat today! Don’t forget to share your experiences or finished project ideas!
PrintPaper Plate Black Cat
Create an adorable Paper Plate Black Cat decoration with this easy DIY craft, perfect for Halloween and autumn decor.
- Prep Time: 10 minutes
- Cook Time: 30 minutes
- Total Time: 40 minutes
- Yield: 1 black cat decoration 1x
- Category: Craft
- Method: Crafting
- Cuisine: Seasonal
- Diet: N/A
Ingredients
- 1 Paper Plate
- 1 sheet Black Construction Paper
- Googly Eyes
- 1 sheet White Paper
- Markers or Paint
- Glue or Tape
Instructions
- Prepare the Paper Plate by painting the back side black.
- Create the cat’s ears by cutting triangular shapes from black construction paper.
- Attach the ears to the top of the paper plate with glue or tape.
- Add facial features with googly eyes, a nose from white paper, and whiskers.
- Draw or paint additional details to enhance your cat.
- Allow the craft to dry before handling.
Notes
Supervise younger children while crafting, and consider customizing with different colors or patterns for a unique look.
Nutrition
- Serving Size: 1 decoration
- Calories: 0
- Sugar: 0g
- Sodium: 0mg
- Fat: 0g
- Saturated Fat: 0g
- Unsaturated Fat: 0g
- Trans Fat: 0g
- Carbohydrates: 0g
- Fiber: 0g
- Protein: 0g
- Cholesterol: 0mg
Keywords: DIY craft, Halloween decoration, kids crafts, Paper Plate Black Cat, seasonal decor