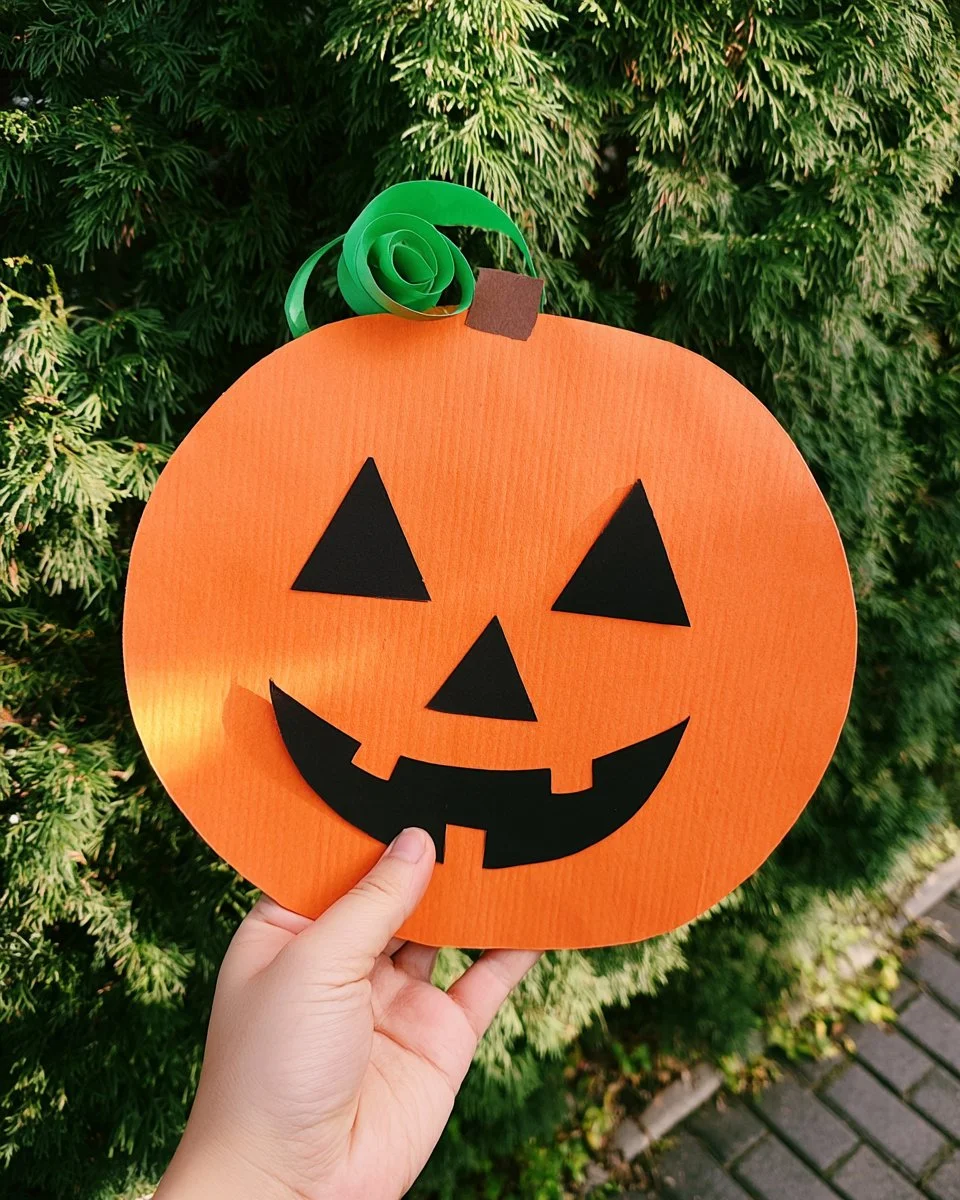
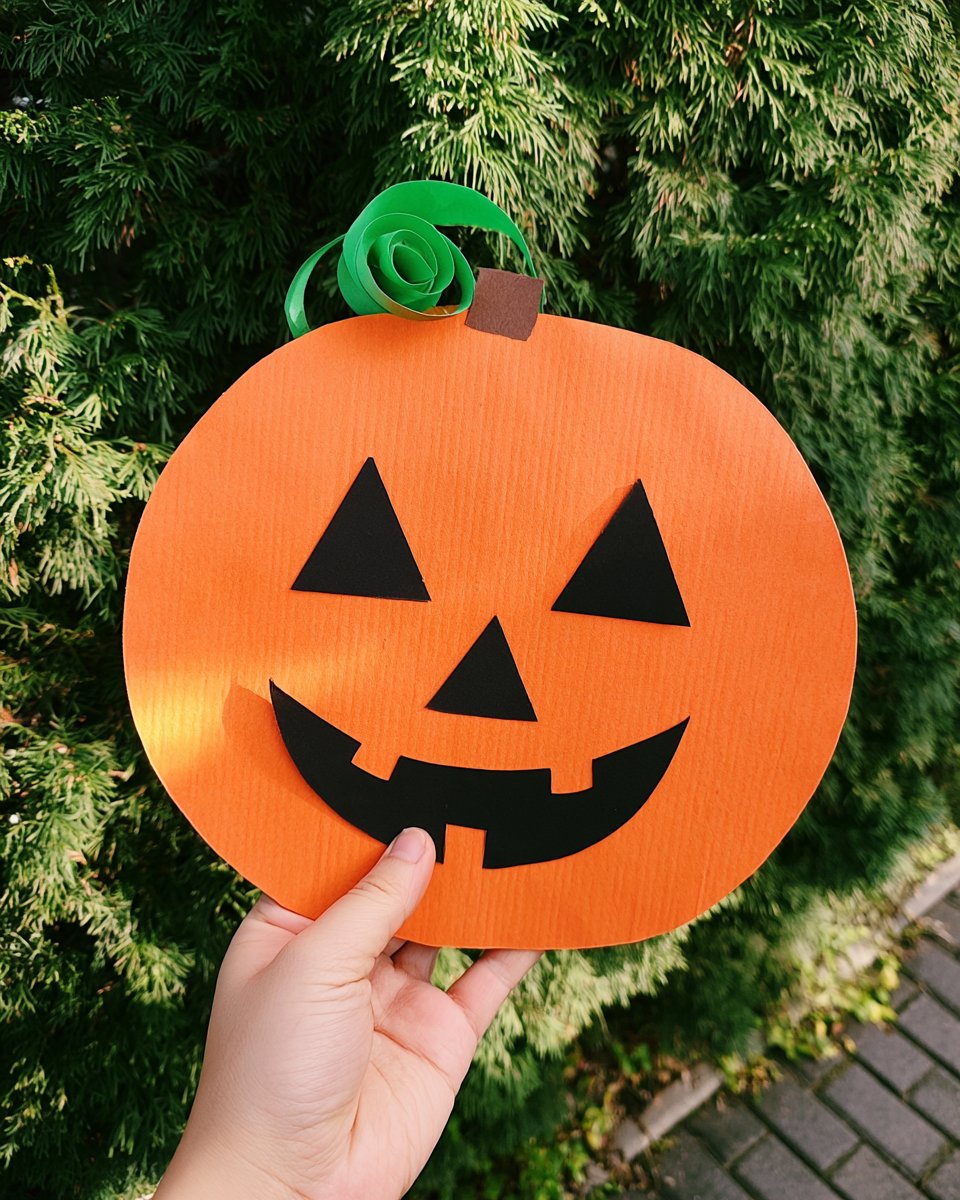
Creating a charming pumpkin craft is the perfect way to embrace the spirit of the season. This easy craft project allows you to express your creativity and add a festive touch to your home. With simple materials that you may already have, this beginner-friendly craft is an ideal DIY project for individuals and families alike. Whether you’re making seasonal decorations or planning to create handmade gifts for friends, this pumpkin craft can be customized to meet your needs.
WHY YOU WILL LOVE THIS Pumpkin Craft
You’ll enjoy making this pumpkin craft for several reasons:
- Easy for beginners: This project is simple and straightforward, making it perfect for those who are new to crafting.
- Uses simple materials: You don’t need to buy expensive items; most of what you need can be found at home or in basic craft supplies.
- Budget-friendly: This craft can be done on a budget, allowing you to use minimal resources while having fun.
- Quick to make: You can complete this project in no time, making it suitable for a quick DIY session.
- Great for home decor: Once completed, your pumpkin can be displayed as part of your autumn decorating.
- Perfect for gifts: This craft makes an excellent personalized gift for friends and family.
- Ideal for seasonal decorating: It’s a delightful addition to your holiday decor, bringing warmth and color to your home.
- Easy to customize: You can modify your pumpkin’s design to reflect your personal style or seasonal themes.
PROJECT DETAILS
Skill Level
Beginner. This craft is very accessible, making it ideal for those new to DIY projects.
Estimated Time
Approximately 30–45 minutes, depending on drying times between steps.
Approximate Cost
This project costs around $5 to $10, depending on materials you already have at home.
Best For
This pumpkin craft is best for families, school projects, or anyone looking to add a bit of fun to their autumn activities.
Project Type
This is a simple craft that doubles as decorative art. It can also be used as a homemade gift or seasonal decoration.
TOOLS AND EQUIPMENT NEEDED
Scissors
A pair of scissors is essential for cutting out shapes from the construction paper for the eyes, nose, mouth, and leaves.
Paintbrushes
These are necessary for applying paint evenly across the paper plate to create the pumpkin’s base color.
Pen or Pencil
You will use a pen or pencil to trace your designs on the construction paper before cutting them out.
MATERIALS
Paper Plate
The main structure of your pumpkin craft, you’ll paint this to give it an orange hue, representing a traditional pumpkin.
Orange Paint
This paint will be used to color the paper plate, giving it the signature pumpkin look.
Black Construction Paper
You’ll use this to create facial features for your pumpkin, such as the eyes, nose, and mouth.
Green Construction Paper
This will be used for the curled leaves on the top of your pumpkin, adding a touch of realism.
Brown Construction Paper
Use this material for the stem of the pumpkin, providing a suitable contrast to the orange body.
Glue
This will hold all your cut pieces together, securing the features and leaves to your pumpkin.
HOW TO MAKE Pumpkin Craft
Step 1: Prepare the Paper Plate
Start by painting your entire paper plate orange. This will be the main body of your pumpkin. Flip it onto its backside for better dimension. If necessary, apply multiple coats of paint, allowing each coat to dry completely.
Step 2: Create Facial Features
While the paint dries, cut out the facial features from the black construction paper. You’ll need:
- Two large black triangles for the eyes
- One small triangle for the nose
- An expressive mouth (cut out a smile or any expression you prefer).
Step 3: Cut the Leaves and Stem
Now grab the green construction paper. Cut two thin strips of green construction paper for the curled leaves and one brown piece for the stem.
Step 4: Curl the Green Strips
To curl the green strips, hold one end against a pen or pencil and gently curl the remaining paper around it. Repeat this for the second strip, creating a lovely, natural curl.
Step 5: Assemble the Facial Features
After the paint on your plate is fully dry and your pieces are cut, it’s time to put your pumpkin together. Start gluing the eyes, nose, and mouth onto the painted pumpkin body.
Step 6: Complete the Pumpkin
Finally, glue the brown stem at the top of your pumpkin, positioning it as you like. Complete the look by attaching the curled green leaves next to the stem.

TIPS AND TRICKS
- Choosing Materials: Look around your house for materials before buying anything. The more you can repurpose, the better for your budget and the environment.
- Cutting: Take your time cutting out the facial features. Using sharp scissors will give you cleaner cuts and nicer shapes.
- Gluing: Apply glue sparingly to avoid a messy finish. You can always add more if necessary, but too much can cause pieces to slide around.
- Drying: Be patient and allow your paint to dry completely. Rushing this process can lead to smudges or uneven coloring.
- Cost-Effective: If you’re doing this project multiple times, consider buying supplies in bulk to save on costs.
- Making It Last: To keep your pumpkin looking good throughout the season, store it in a cool, dry place when not on display.
VARIATIONS AND CUSTOMIZATION IDEAS
- Different Colors: Instead of orange, try creating pumpkins in various colors like teal, purple, or pastel shades for a unique twist.
- Size Options: Use larger or smaller plates to create a variety of pumpkin sizes and display them together for a cute arrangement.
- Material Changes: Experiment with different types of paper or add texture using fabric scraps or burlap.
- Holiday Themes: Decorate your pumpkin with holiday-specific designs or messages for Halloween or Thanksgiving.
- Personalized Versions: Add names or personal designs on the pumpkin for a thoughtful touch in your seasonal decor.
Pumpkin Craft FAQ
Q1: Is this pumpkin craft difficult to make?
A1: No, this craft is beginner-friendly and easy to follow. If you can paint and cut paper, you can make this pumpkin.
Q2: What materials do I need for this project?
A2: You’ll need a paper plate, orange paint, paintbrushes, scissors, glue, and construction paper in black, green, and brown.
Q3: How long does it take to make the pumpkin?
A3: The entire project usually takes about 30–45 minutes, including drying time.
Q4: Can I store the pumpkin craft for future use?
A4: Yes, it’s best to keep it in a cool and dry place to maintain its appearance. Avoid direct sunlight which may fade the colors.
Q5: How can I clean the pumpkin if it gets dirty?
A5: Gently wipe it with a damp cloth. Make sure to avoid soaking it, as too much water may damage the paper.
CONCLUSION
Making a pumpkin craft is an easy and enjoyable project that anyone can tackle, regardless of crafting experience. With straightforward steps and widely available materials, you can create beautiful handmade decorations perfect for your home or as personalized gifts for friends. This budget-friendly DIY project not only adds character to your seasonal decor but also sparks joy through creativity. So gather your materials, unleash your creativity, and give this pumpkin craft a try today! Don’t forget to share your finished projects or custom ideas with others!
PrintDIY Pumpkin Craft
Create charming pumpkins using simple materials to enhance your seasonal decor.
- Prep Time: 10 minutes
- Cook Time: 20 minutes
- Total Time: 30 minutes
- Yield: 1 pumpkin craft
- Category: Craft
- Method: DIY
- Cuisine: Seasonal
- Diet: N/A
Ingredients
- Paper Plate
- Orange Paint
- Black Construction Paper
- Green Construction Paper
- Brown Construction Paper
- Glue
- Scissors
- Paintbrushes
- Pen or Pencil
Instructions
- Prepare the Paper Plate by painting it orange.
- Create the facial features from black construction paper.
- Cut the leaves and stem from green and brown construction paper.
- Curl the green strips with a pen or pencil.
- Assemble the facial features onto the painted pumpkin.
- Complete the pumpkin by gluing the stem and leaves.
Notes
Using repurposed materials is encouraged for budget-saving and environmental benefits.
Nutrition
- Serving Size: 1 craft
- Calories: 50
- Sugar: 0g
- Sodium: 0mg
- Fat: 2g
- Saturated Fat: 0g
- Unsaturated Fat: 2g
- Trans Fat: 0g
- Carbohydrates: 10g
- Fiber: 1g
- Protein: 1g
- Cholesterol: 0mg
Keywords: pumpkin craft, DIY decoration, autumn craft, seasonal decor