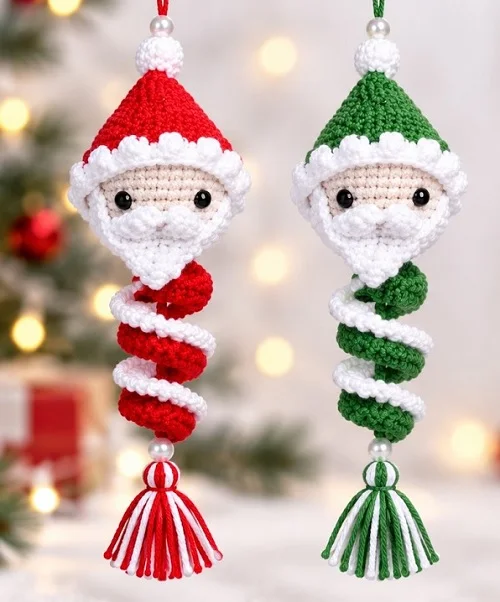
A little Santa face, a bright red hat, and a red-and-white spiral make such a cheerful Christmas decoration! This crochet Santa wind spinner combines a small stuffed head with a twisting body and a matching tassel. Hang it in a window, on your Christmas tree, or as part of your holiday display.
The lovely part of this project is how the pieces come together. The head uses single crochet, the facial details are made separately, and the spinner grows from a foundation of open loops. Increasing into those loops creates the curl, with the two yarn colors forming matching sides of the spiral.
Work through the pieces in order, taking a little extra care with stitch counts and placement. The mustache, beard, and hat give Santa his personality, so it is worth arranging each one before sewing it down.
Step 1: Gather Your Materials and Check the Crochet Terms
For this free Santa crochet pattern, you will need:
- Fine yarn in white, red, and a skin-tone color
- A 2 mm crochet hook
- Two 6 mm safety eyes
- A small amount of fiberfill
- A sewing needle suitable for your yarn
- Scissors
- Beads for decoration
The skin-tone yarn is for the head. White creates the mustache, beard, hat pompom, and brim, while red forms the main part of the hat. Both red and white are used for the wind spinner and tassel.
All stitch names use US crochet terminology. Here is a quick reference:
- ch: chain
- sc: single crochet
- sl st: slip stitch
- inc: work 2 single crochets into one stitch
- dec: work 2 stitches together as a single crochet decrease
- dc: double crochet
- dcinc: work 2 double crochets into one stitch
- tr: treble crochet
- st: stitch
Numbers in parentheses indicate the stitch count at the end of a round or row. Instructions described as a repeat are worked the stated number of times. For additional help reading abbreviations, the Craft Yarn Council crochet abbreviation guide is a useful reference.
The head and the beginning of the hat are crocheted in a continuous spiral. After closing the magic ring, continue directly into the next round rather than joining each round with a slip stitch.
Step 2: Crochet and Stuff Santa’s Head
Begin with skin-tone yarn and make a magic ring. The first six rounds gradually widen the head to 36 stitches.
- Round 1: Work 6 sc into the magic ring. (6)
- Round 2: Inc in each stitch, 6 times. (12)
- Round 3: Repeat 1 sc, inc, 6 times. (18)
- Round 4: Repeat 1 sc, inc, 1 sc, 6 times. (24)
- Round 5: Repeat 3 sc, inc, 6 times. (30)
- Round 6: Repeat 2 sc, inc, 2 sc, 6 times. (36)
- Rounds 7 through 16: Work 1 sc into every stitch for 10 rounds. (36 per round)
Close the magic ring firmly so there is no opening at the top. As you work the straight rounds, the little circle becomes a rounded cup.
Insert the safety eyes between rounds 12 and 13, with 7 stitches between them. Attach them before decreasing the opening, while you can still reach inside to secure the backs.
Now narrow the bottom of the head:
- Round 17: Repeat 1 sc, dec, 12 times. (24)
- Round 18: Dec 12 times. (12)
- Round 19: Repeat 1 sc, dec, 4 times. (8)
Add the fiberfill after round 17. This leaves enough room to distribute the stuffing before the opening becomes smaller. Shape the head gently with your fingers as you fill it, then finish the remaining decreases.
Fasten off and weave in the ends. Put the head aside while you make the white facial details.
Step 3: Make the Mustache and Sew It Below the Eyes
The mustache is a small piece, but its shaped ends make a big difference to Santa’s face. Use white yarn and chain 10.
Turn and begin in the second chain from the hook. Work this sequence along the foundation chain:
- Dec across the next 2 chains.
- Work 1 sc in the next chain.
- Work a dcinc in the next chain.
- Ch 2.
- Work 1 sl st in the next chain.
- Ch 2.
- Work a dcinc in the next chain.
- Work 1 sc in the next chain.
- Dec across the final 2 chains.
The taller double crochet stitches create the fuller parts of the mustache, while the central slip stitch brings the middle down. Keep the chain sections distinct from the foundation stitches so you do not accidentally skip a placement.
Cut the yarn, leaving a long tail for sewing. Position the mustache below the eyes, with its center aligned between them. Pin it in place, then sew it onto the head.
Before securing it completely, check the face from the front. Both sides should sit comfortably below the eyes, leaving room for the beard underneath.
Step 4: Crochet the Beard and Attach It Under the Mustache
The beard begins with a small circular base. Two chain extensions then form the sides, creating a piece that wraps around the lower face.
With white yarn, make a magic ring:
- Round 1: Work 6 sc into the ring. (6)
- Round 2: Repeat 2 sc, inc, twice. (8)
- Round 3: Repeat 3 sc, inc, twice. (10)
Close the magic ring and continue in a spiral for these base rounds.
For the next stage, chain 14. Turn and work into the second chain from the hook, using only one loop of each chain. Work 13 sc along the chain, then work 1 sc into each of the next 5 stitches on the circular base.
Make the second extension the same way: chain 14, turn, and work 13 sc back along the chain in one loop only. Finish by working 1 sc into each of the remaining 5 base stitches.
This stage contains 36 newly worked stitches: 13 on each extension and 10 around the base.
Round 5: Work sc around the entire outline of the piece, including the unused sides of the chain extensions. The total is 62 stitches.
Cut the yarn and leave a long sewing tail. Arrange the beard under the mustache, with the narrow central section pointing downward and the extensions following the sides of the face. Pin it, then sew it in place.

Take your time with this placement. The beard should frame the face without covering the eyes or hiding the mustache.
Step 5: Crochet the Pompom, Red Hat, and White Brim
The hat is made from the tip downward. Start in white for the little stuffed pompom, then change to red and gradually widen the cone.
Make the white pompom
- Round 1: Work 6 sc into a magic ring. (6)
- Round 2: Inc 6 times. (12)
- Rounds 3 through 5: Sc in every stitch for 3 rounds. (12 per round)
- Round 6: Dec 6 times. (6)
Close the magic ring and work continuously. Lightly stuff the pompom before completing the decreases. After round 6, change to red and cut the white yarn.
Build the red cone
- Round 7: Repeat 1 sc, inc, 3 times. (9)
- Round 8: Repeat 1 sc, inc, 1 sc, 3 times. (12)
- Round 9: Repeat 3 sc, inc, 3 times. (15)
- Round 10: Repeat 2 sc, inc, 2 sc, 3 times. (18)
- Round 11: Repeat 5 sc, inc, 3 times. (21)
- Round 12: Repeat 3 sc, inc, 3 sc, 3 times. (24)
- Round 13: Repeat 7 sc, inc, 3 times. (27)
- Round 14: Repeat 4 sc, inc, 4 sc, 3 times. (30)
- Round 15: Repeat 9 sc, inc, 3 times. (33)
- Round 16: Repeat 5 sc, inc, 5 sc, 3 times. (36)
- Round 17: Repeat 11 sc, inc, 3 times. (39)
- Round 18: Repeat 6 sc, inc, 6 sc, 3 times. (42)
- Round 19: Repeat 13 sc, inc, 3 times. (45)
- Rounds 20 through 23: Sc in every stitch for 4 rounds. (45 per round)
Keep 45 stitches throughout the final four red rounds. There are no decreases here, and the white brim continues over the same 45-stitch opening.
Add the textured white brim
Change to white and cut the red yarn.
- Round 24: Repeat 1 sc, 1 bobble stitch, 1 sc, 15 times. (45)
- Round 25: Sc in every stitch. (45)
The bobbles create the raised white trim around the hat. Use the embedded demonstration for the bobble technique, since this stitch needs more than an abbreviation to show its construction clearly.
Fasten off and weave in the ends. Place the hat on Santa’s head, pin it in position, and sew it on with red yarn. Keep the white brim above the eyes so the face remains visible.
Step 6: Crochet the Red Half of the Wind Spinner
Now for the spiral! Its foundation is not an ordinary long chain. Instead, make a series of open loops that provide space for groups of stitches.
With red yarn, work the following foundation unit:
- Ch 4.
- Work 1 tr into the first chain of that group.
- Repeat this unit until you have 5 loops in total.
For a longer spinner, repeat the foundation unit more times. The five-loop version gives the stitch counts below.
Fill the loops
Row 1: Work 7 sc into each loop. With 5 loops, you will have 35 stitches.
At the end, return to the beginning of the row and join red yarn there. The next row begins from the same end rather than being worked back across after a normal turn.
Row 2: Ch 3, then work 1 dc into the same stitch. Continue with a dcinc in every remaining stitch. Counting the starting chain as a double crochet, the total is 70 stitches.
The increases give the outside edge more length than the foundation, allowing the strip to curl.
Row 3: Ch 1 and work reverse sc in all 70 stitches. Fasten off and weave in the ends.
Reverse single crochet finishes the edge with a textured border. Keep your tension comfortable rather than pulling this edging tight.
Step 7: Add the White Half and Connect the Spinner to Santa
The white half uses the same foundation loops as the red half. Join white yarn to a loop and work along the foundation.
- Row 1: Work 7 sc into each loop. (35)
- Cut the yarn at the end and return to the beginning.
- Join white yarn at the beginning of the row.
- Row 2: Ch 3, work 1 dc in the same stitch, then dcinc in every remaining stitch. (70)
- Row 3: Ch 1 and work reverse sc in every stitch. (70)
Fasten off and weave in the ends. Gently arrange the red and white sides into their spiral shape.
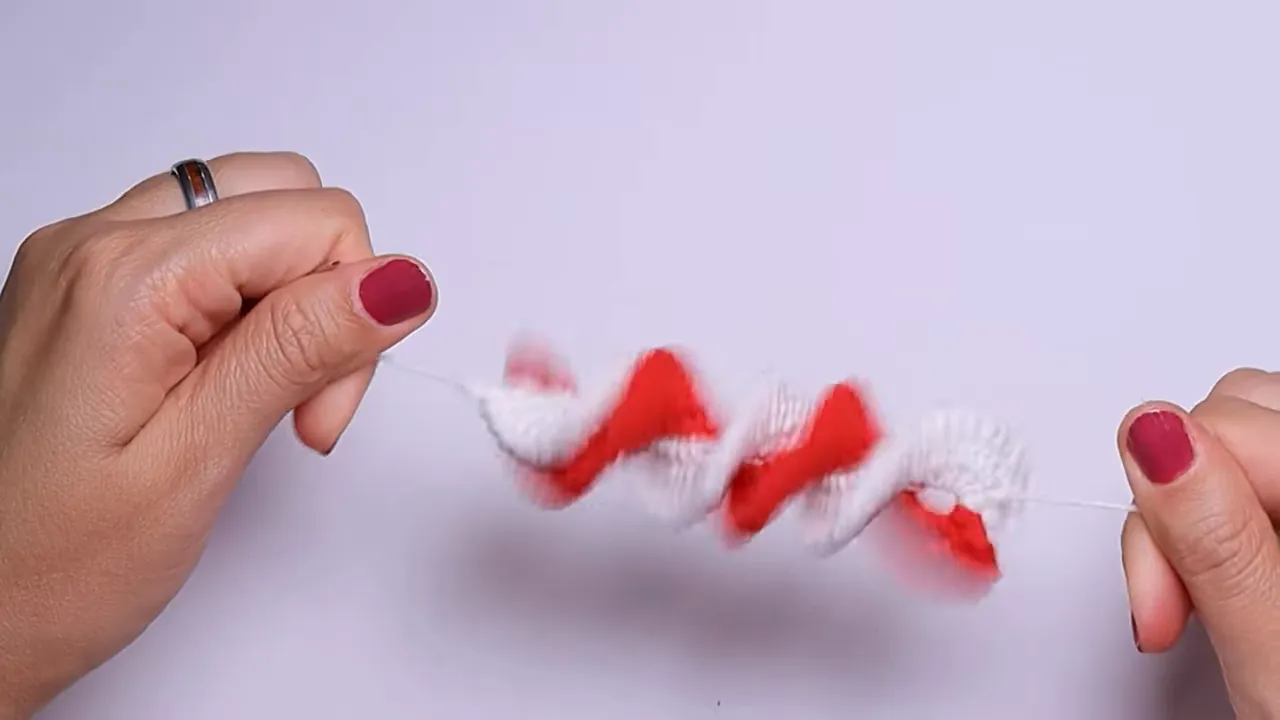
At the top of the spiral, sew the two colors together with one stitch. Add decorative beads to the joining yarn, then sew the spinner to the bottom of Santa’s head.
Check the attachment before moving on. The head should sit above the spiral, with the beard facing forward and the two colored sides hanging together.
Step 8: Make the Matching Tassel and Finish Your Ornament
A red-and-white tassel completes the bottom of the Christmas wind spinner.
- Hold red and white yarn together and wrap them around your fingers several times.
- Cut the working yarn and carefully slide the bundle off your fingers.
- Tie the strands together at the top.
- Cut the bottom loops to make the fringe.
- Trim the hanging ends evenly.
- Tie another knot around the bundle approximately 1 cm below the top to form the tassel’s neck.
Add a bead to the attachment yarn. Sew the tassel to the bottom of the spiral, joining the red and white sides with one stitch as you attach it.
Give the finished ornament a gentle final adjustment. Smooth the hat, arrange the beard, and let the spiral settle into its curl. Check that all sewing tails are secured and the tassel hangs neatly below the body.
Your crochet Santa wind spinner is ready for your holiday decorations! The red-and-white spiral looks lovely beneath his little face, and the matching tassel brings the whole ornament together.
If you make one, I would love to see it. Share your finished Santa wind spinner and tag @yarnacadabra on Instagram. Thank you for supporting my free crochet patterns, and happy crocheting!
Tutorial Made using Crochet Santa Wind Spinner Tutorial🎅 Spiral Christmas Ornament DIY