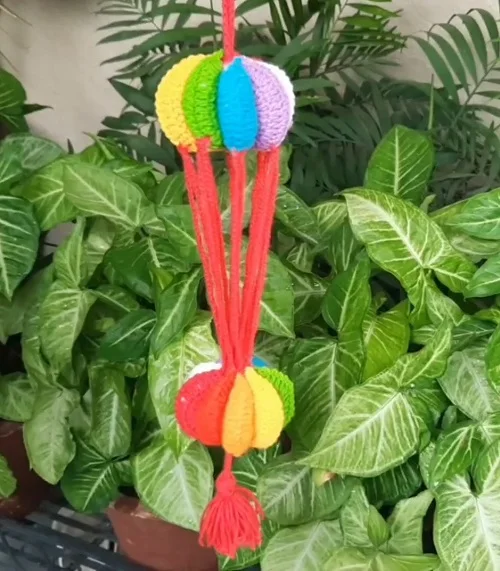
Bright crochet motifs, soft stuffing, and long chain strands come together to make this cheerful handmade wind spinner. The design has two rounded, multicolored sections connected by red crochet chains, with a hanging cord above and a tassel below.
The interesting part is the transformation: small folded motifs first become flower-like fans, then gather into three-dimensional shapes. Take a little time to experiment with their arrangement before securing everything.
What You’ll Learn
- Fold, sew, and stuff round crochet motifs to create padded semicircles.
- Arrange two matching sets of eight motifs before joining their pointed ends.
- Gather the opposite motif ends to turn a flower-like fan into a rounded shape.
- Connect the two colorful sections with strands of 50 crochet chain stitches each.
Materials and Motifs to Prepare
This project begins with ready-made round crochet motifs. The assembly method shows how to fold, stuff, sew, and connect them; it does not provide the stitch counts or rounds for crocheting the starting circles.
Gather the following supplies:
- Round crochet motifs in different colors, enough for two matching sets
- Yarn for sewing the motifs and making the connecting chains
- A crochet hook
- A yarn needle
- Fiber stuffing
- Scissors
- A tassel for the finishing detail
The arrangement shown uses eight motifs in each set, sixteen altogether. The colors move through pink and red tones, orange, yellow, green, turquoise, purple, and white. Red yarn is used for the long connecting strands.
1. Fold, Sew, and Stuff Each Round Motif
Fold a round motif in half so that it forms a semicircle. Sew the aligned edges together, but leave a small opening for the stuffing. The folded edge stays intact, while the sewn edge encloses the little pocket.
Push fiber stuffing through the opening. The rounded end of the crochet hook is used to help tuck the fiber inside. Distribute it through the pocket so that the motif becomes padded rather than remaining flat.
Once the stuffing is inside, use the yarn needle to sew the remaining opening closed. Secure the sewing yarn and trim it. You now have a small, curved, cushion-like piece.
Repeat this process for every color in both sets:
- Fold the circle in half.
- Sew the edges, leaving an opening.
- Insert the fiber stuffing.
- Sew the opening closed.
- Secure and trim the yarn.
Each piece should keep its curved shape. These padded semicircles become the colorful sections of the finished spinner.
2. Arrange Two Matching Color Sequences
Lay out the stuffed motifs before joining them. Place the first set in your chosen color order, then arrange the second set in the same sequence.

This simple preparation makes the next stage easier. Once the pieces are gathered together, they overlap and turn in different directions, so having the sequence settled beforehand helps keep the assembly organized.
3. Sew One End of Each Set Together
Thread the yarn needle and pass it through one pointed end of each motif, following the color sequence. Continue until all eight pieces in the first set are connected at that end.
Bring those ends together and reinforce the join with additional sewing. Spread the curved pieces outward as you work. The result looks like a colorful flower or pinwheel, with all the motifs meeting at a shared center.
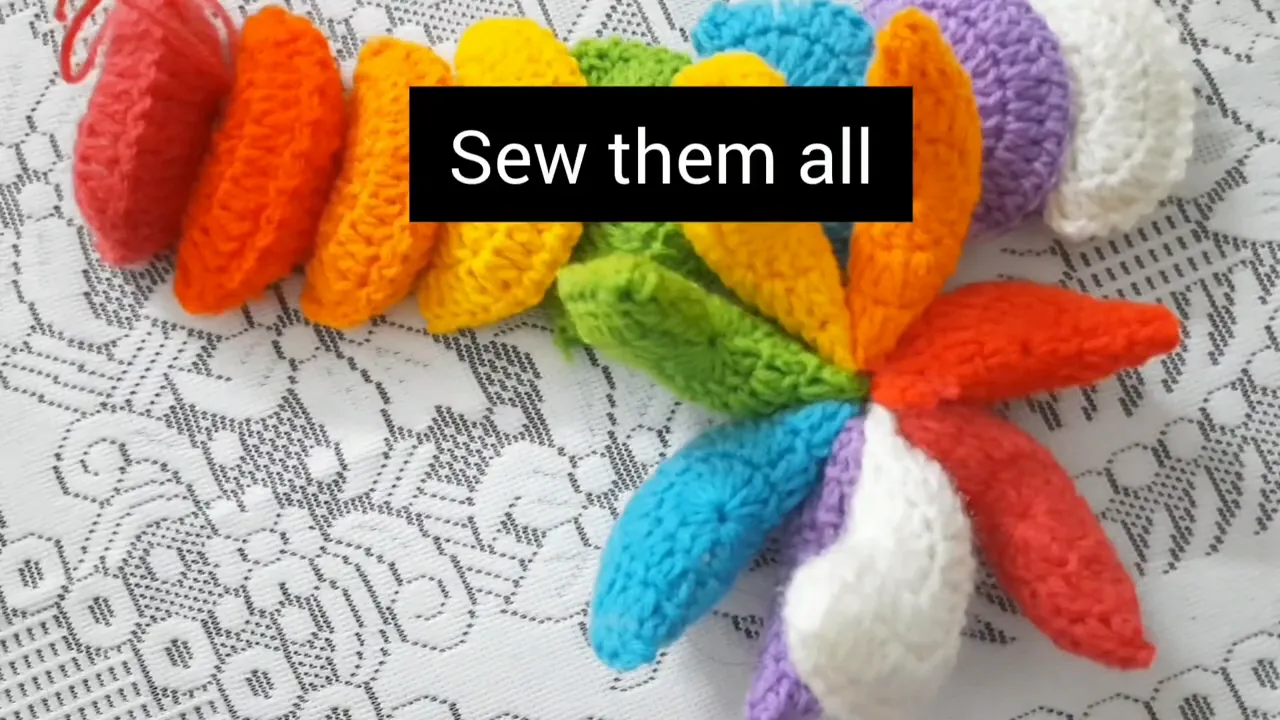
Secure the join and cut the sewing yarn. Repeat the same process with the second set, again joining one end of every motif.
At this stage, you have two separate flower-like assemblies. Their other pointed ends are still free.
4. Test the Arrangement and Form the Rounded Shape
Place the two assemblies beside each other and try different orientations. Turn them, spread the motifs, and check how the colors sit together. The construction allows some experimentation before the final shape is fixed.
For one assembly, bring the remaining free ends together. Sew through those ends in sequence, gathering them into a second shared point. As the ends draw together, the padded motifs stand around the outside and form a rounded, ribbed shape.
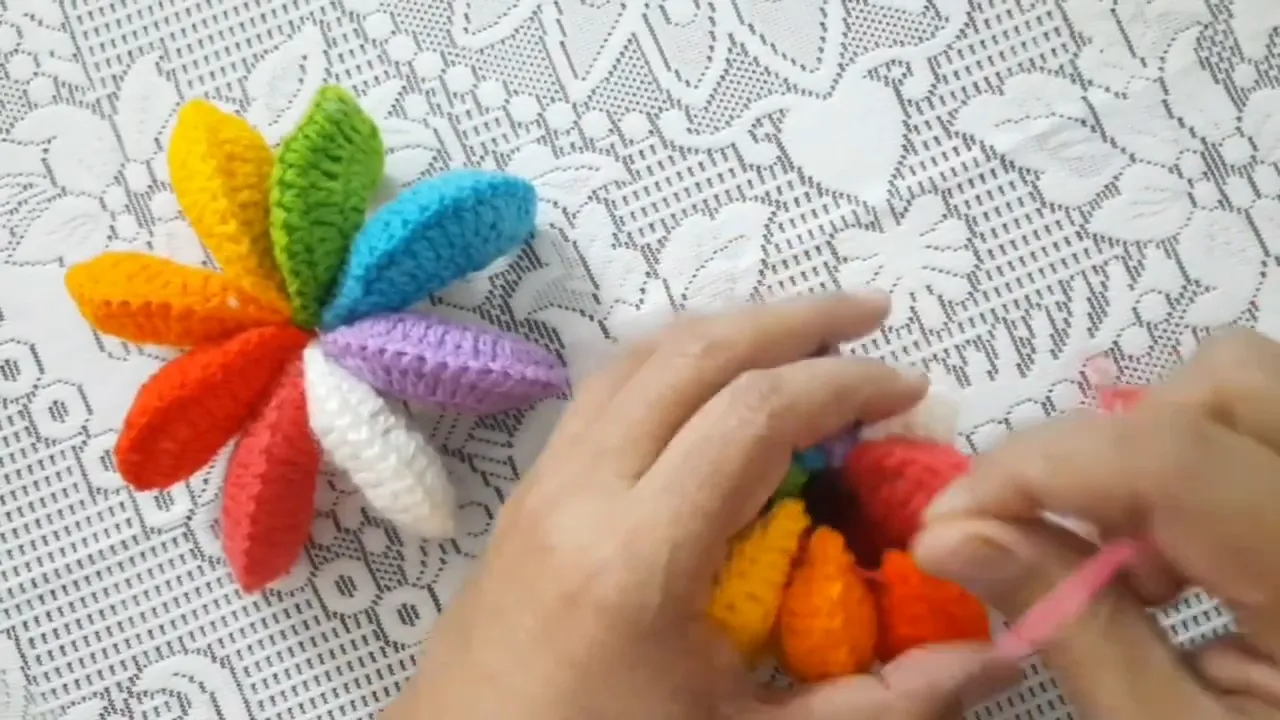
Secure the gathered ends tightly. Continue sewing through the meeting point to hold the motifs together, then fasten off and cut the yarn.
Compare this rounded piece with the second, still-open assembly. You can see how the same curved motifs change from a flat fan into a three-dimensional form simply by joining their opposite ends.
Keep the second set joined at one end while preparing the connecting chains. Its open ends remain accessible for the next stage.
5. Make the Connecting Crochet Chains
The long red strands connect the two multicolored sections. The chain length specified for these connections is 50 chain stitches each.
Attach the red yarn at a motif end, then crochet the chain by repeatedly drawing the yarn through the loop on the hook. Count each chain stitch until you reach 50.
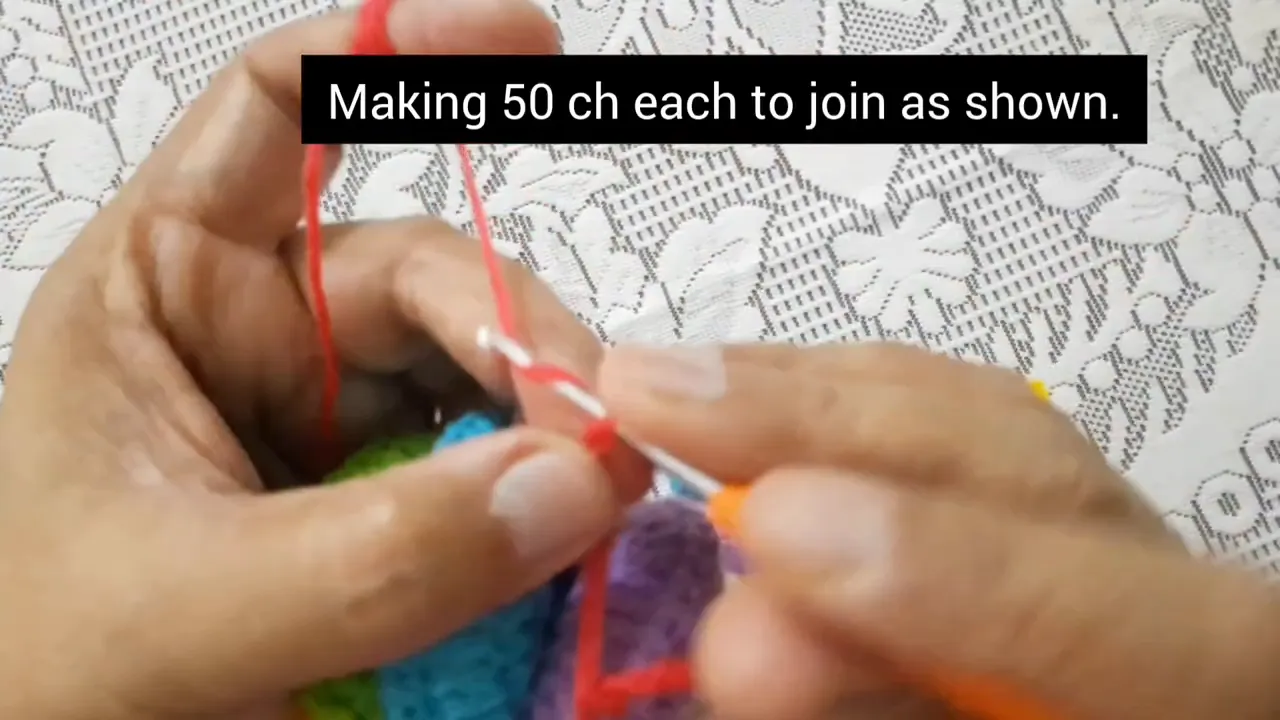
Continue making the connecting chains at the motif ends and joining them to the other assembly, one connection at a time. Move around the pieces methodically so that no motif is missed.
As the strands are attached, gather the second set into its rounded form. The two sections are joined progressively rather than simply tied together with one central cord.
Before finishing the last connections, spread the red strands out and check their arrangement. The completed structure should have the two colorful sections connected by a group of long crochet chains.
6. Finish and Hang the Wind Spinner
With both sections connected, adjust the padded motifs and separate the chain strands. Turn the piece in your hands to check the color arrangement and the joins from different sides.
Complete the hanging finish with a cord above and a tassel below. The finished example includes a red tassel, although a separate tassel-making method and an exact hanging-cord length are not provided.
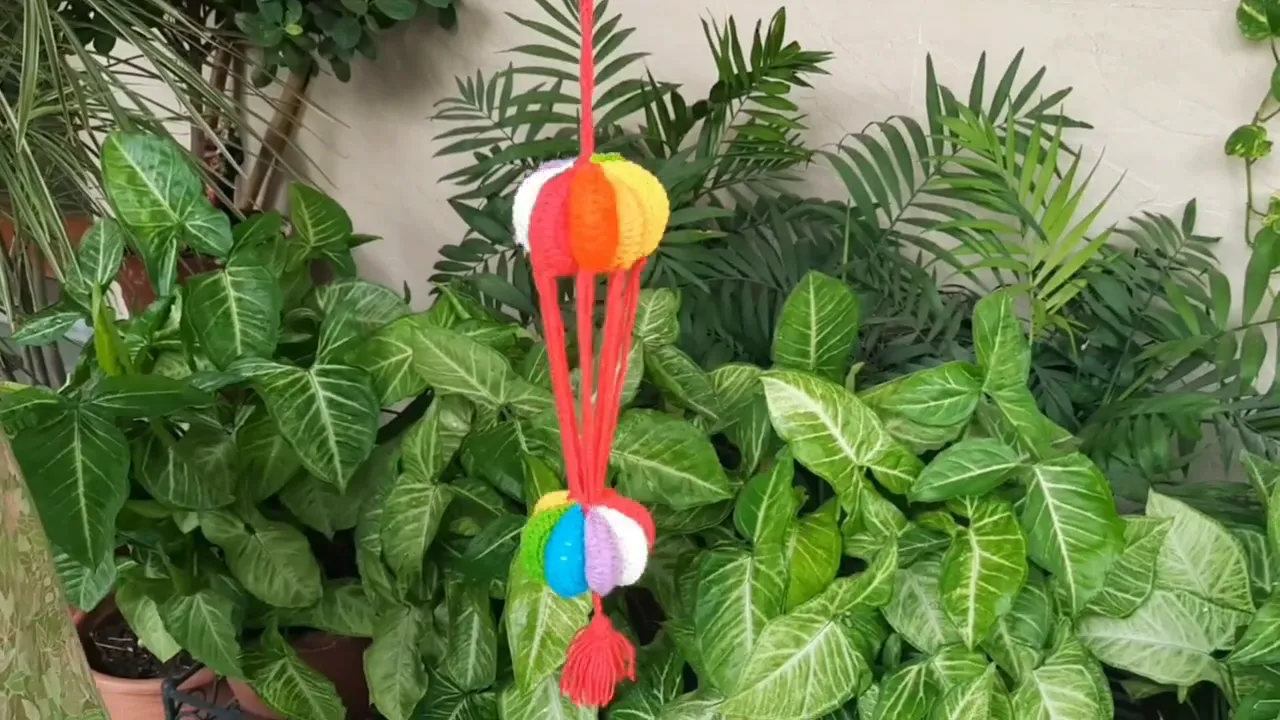
Hang the spinner where it has space to move. The bright padded sections and red strands make a playful addition to home or garden decor.
The charm of this project is in its assembly. A repeated round motif becomes a stuffed semicircle, then a colorful fan, and finally a rounded hanging shape. Keep the sewing points secure, count the connecting chains carefully, and enjoy experimenting with the arrangement before the final finish.
Guide Made using Easy and Unique Crochet Wind Spinner