
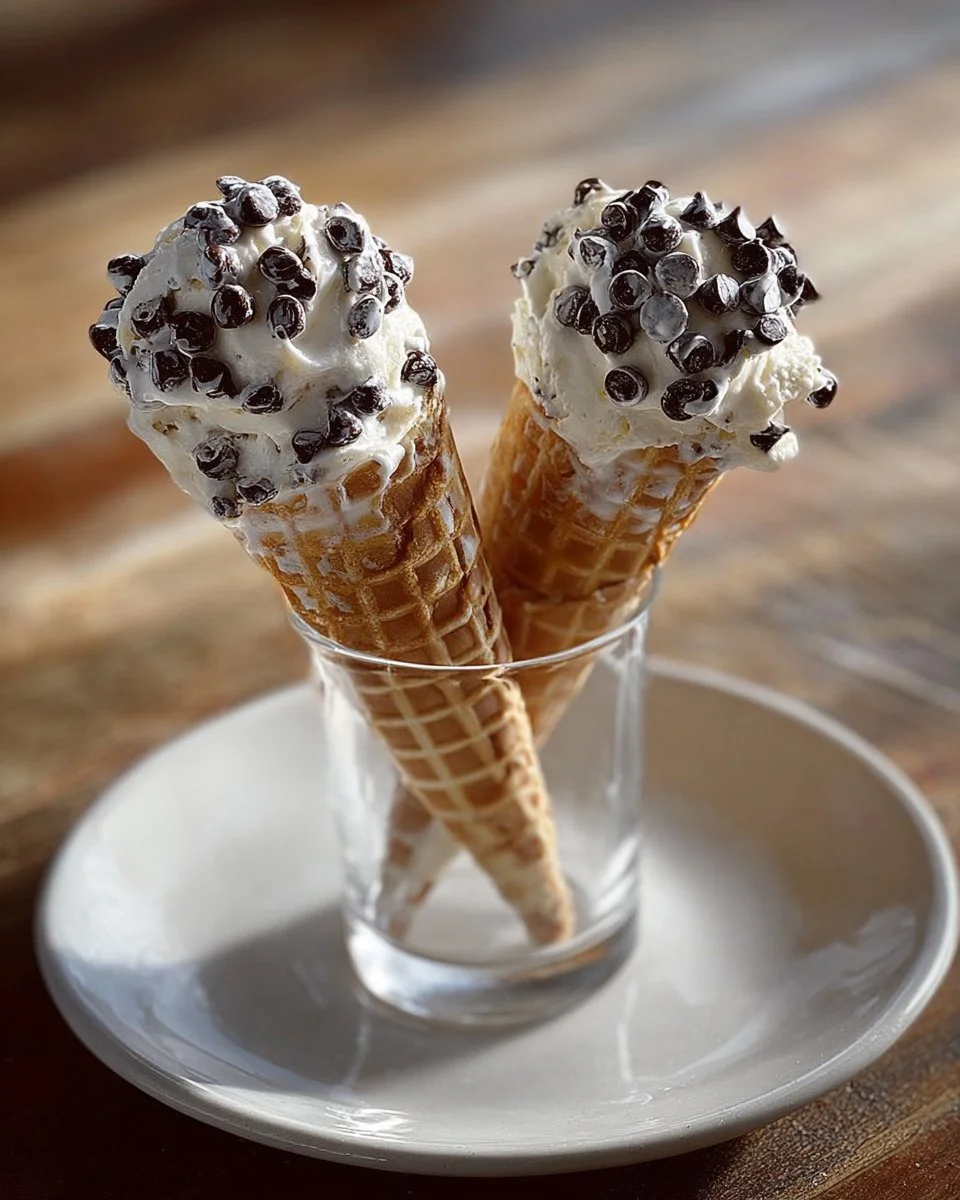
Chocolate Chip Cannoli Cones are a delightful twist on the traditional Italian dessert. This healthier version combines the classic cannoli flavors with a fun and satisfying cone-shaped treat. With ingredients that offer lower calorie counts without sacrificing taste, these cones are an excellent option for anyone looking to enjoy a sweet delight that is also friendly for various dietary needs. Plus, they are perfect for meal prep, allowing you to indulge guilt-free!
WHY YOU WILL LOVE THIS Chocolate Chip Cannoli Cones
Not only are Chocolate Chip Cannoli Cones delicious, but they are also a healthier treat that you can enjoy without the extra calories and sugar often found in traditional desserts. The use of ricotta cheese adds protein, making these cones a satisfying option for those seeking a high protein meal or a great snack for weight loss. With the potential to modify the recipe to fit different dietary requirements like being diabetic-friendly or gluten-free, everyone can savor this delightful treat.
EQUIPMENT NEEDED
Equipment 1: Mixing Bowl
A sturdy mixing bowl is essential for combining the ricotta cheese, Cool Whip, and other ingredients to create the creamy filling for your cannoli cones.
Equipment 2: Hand Mixer or Whisk
Using a hand mixer or whisk will help achieve a smooth and creamy consistency for your filling. If you prefer a little workout, a rubber spatula can also work well.
Equipment 3: Refrigerator
You will need a fridge for chilling your filled cannoli cones, allowing the flavors to meld together and the filling to firm up slightly for the best texture.
INGREDIENTS
Ingredient 1: Cones
You will need 2 sugar cones, which can be swapped for chocolate or Oreo cones for a fun twist. These cones provide a nice crunch and are a fun alternative to traditional pastry shells.
Ingredient 2: Ricotta Cheese
Using 1/2 cup of part-skim ricotta cheese adds protein and keeps the filling light. Full-fat ricotta works equally well but may increase the calories slightly.
Ingredient 3: Cool Whip
For a lighter option, use 6 tablespoons of Cool Whip Lite or TruWhip to create a fluffy texture in the filling. This alternative reduces calories and sugar compared to regular whipped cream.
Ingredient 4: Mini Chocolate Chips
You will need 3 tablespoons of mini chocolate chips to mix into the filling and a couple more to dip the cones in. They add sweetness without overwhelming the dish.
Ingredient 5: Vanilla Extract
1/2 teaspoon of vanilla extract enhances the flavor of the filling, giving it that classic sweetness you love in desserts.
Ingredient 6: Jell-O Vanilla Pudding Mix
2 servings (half a box) of sugar-free Jell-O vanilla pudding mix maintain the sweetness while keeping the dessert lower calorie. It also helps to thicken the filling.
Ingredient 7: Orange Extract
Use 1/8 teaspoon of orange extract for a hint of citrusy flavor, but this is optional! Alternatively, you can stick to the vanilla extract if you prefer.
Ingredient 8: Orange Zest
1 tablespoon of orange zest can be added for a fresh, bright flavor, contributing to the overall appeal of the dish. It’s completely optional but definitely worth trying!
Ingredient 9: Chopped Pecans
Optionally, 2 tablespoons of chopped pecans can add crunch and a nutty flavor that complements the other ingredients nicely.
Ingredient 10: Mini Cinnamon Chips
Another delightful addition is 2 tablespoons of mini cinnamon chips, which can be mixed in for a touch of spice and sweetness.
Ingredient 11: Diced Dried Fruit
Lastly, consider adding 2 tablespoons of diced dried fruits like raisins or apricots for extra sweetness and fiber, making this treat even more nutritious.

HOW TO MAKE Chocolate Chip Cannoli Cones
Step 1: Mix the Ingredients
In a mixing bowl, start by combining all the ingredients except for the remaining 2 tablespoons of mini chocolate chips. Using a hand mixer or whisk, blend everything together until the mixture is smooth. If you prefer using a fork, that’s fine too, just make sure to blend well!
Step 2: Divide the Filling
Once your filling is nice and creamy, divide it evenly into each of your sugar cones. You can do this with a spoon or a piping bag for neatness.
Step 3: Chill the Cones
Place the filled cones in the refrigerator for about 30 minutes. This chilling time allows the filling to set slightly and enhances the flavors.
Step 4: Dip the Cones
After chilling, take out the cones and dip the tops into the remaining mini chocolate chips, ensuring they stick well. This adds an extra layer of sweetness and crunch to your treat!
Step 5: Final Chill
Return the cones to the refrigerator for another 30 minutes. This will allow the chocolate chips to set and the filling to firm up just a tad more.
Step 6: Enjoy!
Once your Chocolate Chip Cannoli Cones have chilled, they are ready for you to enjoy! Savor each bite knowing you made a healthy version of a classic dessert.
TIPS AND TRICKS
- Opt for Low-Calorie Versions: Always choose sugar-free or lower-calorie options for ingredients like Cool Whip and pudding mix where possible. It significantly reduces the calorie count and makes it diabetic-friendly.
- Meal Prep Ready: These cannoli cones are great for meal prep! They can be made in advance and stored in the fridge for a few days, making them an easy grab-and-go snack or dessert.
- Add Fiber: To boost the fiber content, consider adding more chopped fruits or even some chia seeds into the filling.
- Storage: Store any leftovers in the refrigerator and consume them within a few days to maintain freshness. The cones may become a bit soggy over time, so it’s best to prepare them close to when you plan to serve them.
Chocolate Chip Cannoli Cones FAQ
Can I make these cannoli cones gluten-free?
Yes! You can use gluten-free sugar cones if you are looking for a gluten-free dessert option.
How can I store leftover cannoli cones?
Store any leftover cones in a sealed container in the refrigerator. Consume them within two days for the best taste and texture.
Are these cannoli cones suitable for weight loss?
Absolutely! By using lighter ingredients and portion control, these cones can be enjoyed as a guilt-free treat that aligns with your weight loss goals.
Do I need to include the pudding mix?
The pudding mix helps to create a thicker filling and enhances the dessert’s sweetness. However, you can omit it if you prefer a different texture or flavor.
CONCLUSION
In summary, Chocolate Chip Cannoli Cones are a scrumptious dessert that meets various dietary needs while remaining a treat you can indulge in without guilt. The high protein content from ricotta cheese, along with optional fiber-boosting fruits, makes these cones not only delicious but also a healthier alternative to traditional cannoli. We encourage you to try this healthier version and enjoy the delightful combination of flavors and textures. Once you make them, share your experience and any variations you tried—we would love to hear how you made this recipe your own!
PrintChocolate Chip Cannoli Cones

A healthier twist on the traditional Italian cannoli dessert, these Chocolate Chip Cannoli Cones combine creamy ricotta filling with a crunchy cone for a guilt-free treat.
- Prep Time: 15 minutes
- Cook Time: 0 minutes
- Total Time: 60 minutes
- Yield: 2 servings 1x
- Category: Dessert
- Method: No-Cook
- Cuisine: Italian
- Diet: Vegetarian
Ingredients
- 2 sugar cones (or chocolate/Oreo cones)
- 1/2 cup part-skim ricotta cheese
- 6 tablespoons Cool Whip Lite or TruWhip
- 3 tablespoons mini chocolate chips (plus 2 tablespoons for dipping)
- 1/2 teaspoon vanilla extract
- 2 servings (half a box) sugar-free Jell-O vanilla pudding mix
- 1/8 teaspoon orange extract (optional)
- 1 tablespoon orange zest (optional)
- 2 tablespoons chopped pecans (optional)
- 2 tablespoons mini cinnamon chips (optional)
- 2 tablespoons diced dried fruit (optional)
Instructions
- Mix the ingredients in a mixing bowl, combining all except for the remaining 2 tablespoons of mini chocolate chips until smooth.
- Divide the filling evenly into each sugar cone using a spoon or piping bag.
- Chill the filled cones in the refrigerator for about 30 minutes to set the filling.
- Dip the tops of the cones into the remaining mini chocolate chips, ensuring they stick well.
- Return the dipped cones to the refrigerator for another 30 minutes to set the chocolate.
- Enjoy! Once chilled, savor your Chocolate Chip Cannoli Cones!
Notes
These cannoli cones are great for meal prep and can be stored in the refrigerator for a few days. Use low-calorie ingredients where possible for a healthier treat.
Nutrition
- Serving Size: 1 cone
- Calories: 180
- Sugar: 8g
- Sodium: 150mg
- Fat: 8g
- Saturated Fat: 3g
- Unsaturated Fat: 5g
- Trans Fat: 0g
- Carbohydrates: 23g
- Fiber: 2g
- Protein: 5g
- Cholesterol: 15mg
Keywords: cannoli, dessert, Italian, healthy dessert, chocolate chip