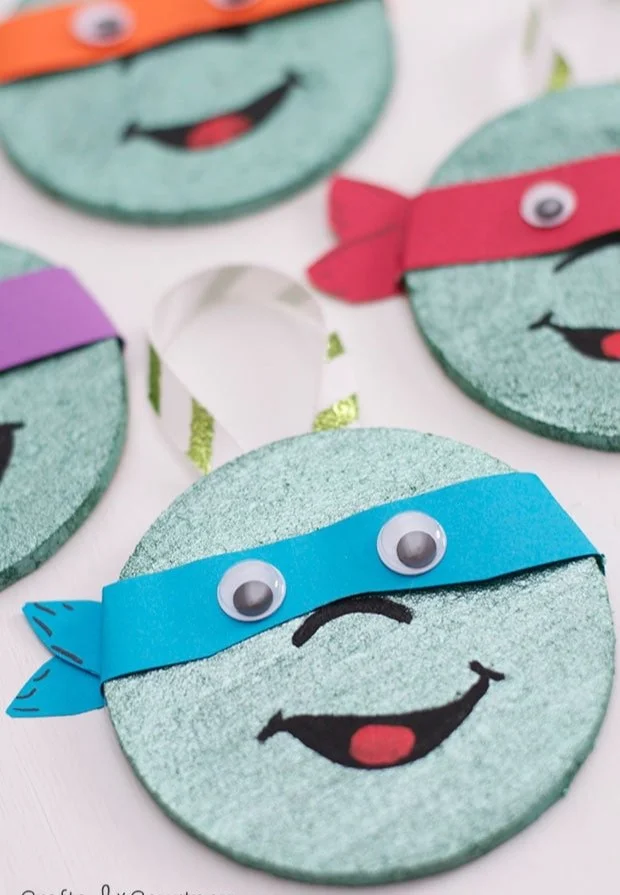
Creating fun and functional home decor doesn’t have to be complicated. One such easy DIY project is making Coaster Mask Decorations. This engaging craft lets you transform simple coasters into unique, quirky masks, perfect for adding a playful touch to your seasonal decorations or as gifts. With just a few simple materials, you can create these delightful decorations that everyone will enjoy.
In this article, we will guide you through this budget-friendly craft that is great for beginners. You will see just how easy and enjoyable it is to make these creative DIY decorations. Let’s dive in!
WHY YOU WILL LOVE THIS Coaster Mask Decoration
This Coaster Mask Decoration craft is sure to provide a creative outlet for your artistic flair. Here are a few reasons why you will enjoy making this simple craft:
- Easy for beginners: The project involves basic steps that are easy to follow.
- Uses simple materials: Most of the materials required are readily available and inexpensive.
- Budget-friendly: You can create multiple decorations without breaking the bank.
- Quick to make: With only a few steps, you’ll have your decorations ready in no time.
- Great for home decor: These masks can serve as whimsical additions to your living spaces.
- Great for gifts: They make adorable handmade gifts that friends and family will appreciate.
- Easy to customize: Add your unique flair with different designs, colors, or themes.
PROJECT DETAILS
Every craft comes with important details to help you plan effectively. Here’s an overview of what you need to know about the Coaster Mask Decoration project.
Skill Level
Beginner-friendly. Anyone can easily pick up this craft with minimal guidance.
Estimated Time
Approximately 1 hour. This includes time for drying paint and assembling the decorations.
Approximate Cost
Around $10–$15. Most materials are low-cost and can be used for multiple projects.
Best For
This craft is ideal for individual creators, family group activities, or crafting get-togethers with friends.
Project Type
A fun DIY home decor project that doubles as a creative gift idea.
TOOLS AND EQUIPMENT NEEDED
Before you start crafting, make sure you have the necessary tools and equipment on hand. Here’s what you will need:
Hot Glue Gun
A hot glue gun is essential for attaching pieces together securely. Its fast adhesion makes assembling your mask easy and efficient.
Sharpie
A Sharpie is used for drawing the facial features on the mask. Its fine tip allows for detail work on your decorations.
MATERIALS
Now let’s gather the materials needed for this Coaster Mask Decoration project. Each item plays a unique role in bringing your creation to life.
Cardstock
Cardstock is a thick, sturdy type of paper that will be used for creating the front and side pieces of your mask. It’s easy to cut and paint.
Metallic Green Paint
This paint gives the coaster its base color and adds a fun shimmer that will catch the eye.
Paint
Additional paint can be used for detailing features on the mask, such as eyes or the mouth.
Ribbon
A decorative ribbon can be attached to the top of the mask for hanging. It adds a festive touch to your finished piece.
Googly Eyes
These fun embellishments will bring your mask to life. They add personality and humor to your decoration.
Hot Glue Gun
You’ll use the hot glue gun to attach the cardstock and googly eyes to the painted coaster.
Sharpie
The Sharpie is essential for drawing facial features on your mask, giving it character.

HOW TO MAKE Coaster Mask Decoration
Creating your Coaster Mask Decoration involves a few simple steps. Pay attention to detail for the best results!
Step 1: Paint the Coaster
Start by painting the top surface of your coaster with one coat of metallic green paint. Use a paintbrush or sponge for even coverage. Allow the paint to dry completely, which should take about 30 minutes.
Step 2: Cut Cardstock
While the paint dries, cut a strip of cardstock for the front of the mask. You can also cut out two smaller shapes from the cardstock for the sides of the mask. These will help give your mask dimension.
Step 3: Attach Cardstock Pieces
Using your hot glue gun, secure the cardstock pieces onto the painted coaster. Start with the front strip, followed by the two side pieces. Ensure that they are firmly attached and positioned to create the mask’s shape.
Step 4: Add Googly Eyes
Take the googly eyes and dab some hot glue on the back of each. Attach them to the masked area on the coaster, above your cardstock shapes. Adjust their placement until they look just right!
Step 5: Draw Features
Using a Sharpie, draw the nose and mouth on the coaster. Once you’ve drawn your desired expressions, go over these lines with black paint for definition. Wait for the black paint to dry.
Step 6: Add Finishing Touches
Finally, add a small touch of red paint to create a tongue or other playful details. This is also a good time to attach a festive ribbon at the top of your mask, making it easy to hang as decoration.
TIPS AND TRICKS
Here are some useful tips to ensure your Coaster Mask Decoration turns out great:
- Choosing Materials: Pick cardstock that’s not too thick or thin for ease of cutting and gluing.
- Cutting: Use a craft knife or scissors to cut your cardstock accurately. Take your time to make clean cuts.
- Avoiding Common Mistakes: Ensure your paint is dry before attaching any cardstock. Otherwise, it may smudge.
- Better Finish: For a polished look, consider different patterns on the cardstock before attaching.
- Saving Money: Buy materials in bulk if you plan on making several masks or other crafts.
- Making the Craft Last Longer: Seal the paint with a clear spray sealant for durability if you intend to use it as decor.
- Working Safely: Be cautious with the hot glue gun. The glue can be extremely hot and may cause burns if mishandled.
VARIATIONS AND CUSTOMIZATION IDEAS
Get creative with your Coaster Mask Decoration by trying some of these variations:
- Different Colors: Use various colors of paint to create a themed mask, such as for Halloween or a birthday party.
- Different Sizes: Experiment with different coaster sizes to create large statement pieces or smaller masks.
- Seasonal Versions: Create masks for seasons, such as a snowman for winter or a flower for spring.
- Different Patterns: Use patterned cardstock or paint designs on your mask for a unique touch.
- Personalized Versions: Include names or initials using paint or markers to create special gifts.
- Different Finishes: Use matte finish paint or glossy options for different looks.
Coaster Mask Decoration FAQ
Here are answers to some common questions about making Coaster Mask Decorations:
How difficult is this project?
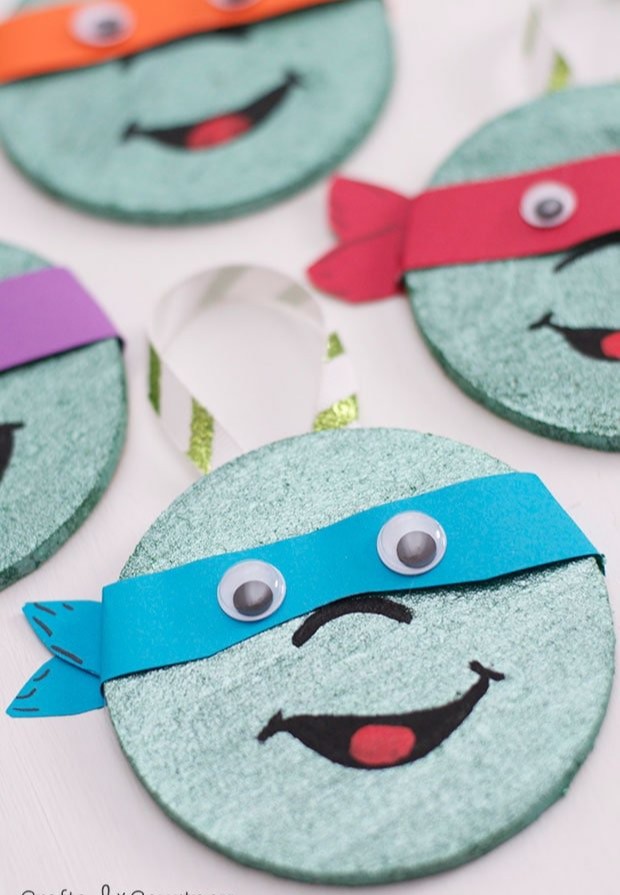
This project is beginner-friendly and suitable for people of all skill levels. The steps are simple and require minimal prior crafting experience.
What materials do I need?
You will need cardstock, metallic green paint, regular paint, ribbon, googly eyes, a hot glue gun, and a Sharpie to complete this craft. All of these materials are easy to find.
How do I store my finished masks?
Store your finished masks in a dry, cool place. They can be placed in a box or on a shelf where they won’t be crushed.
How long does this craft take to complete?
The entire process, including drying time, can take around 1 hour. Most of this time is spent waiting for the paint to dry.
Can I clean my masks?
If your mask gets dusty, gently wipe it with a soft cloth. Avoid using water or cleaners that may damage the paint.
CONCLUSION
The Coaster Mask Decoration is a fantastic easy DIY project that blends fun and creativity. It’s perfect for beginners and ideal as a budget-friendly DIY home decor addition or as a unique handmade gift. The craft is quick to make and can be easily customized based on your personal tastes or seasonal themes.
We encourage you to gather your materials and try making your own Coaster Mask Decorations! Share your experiences and any ideas for customization or variations you’ve tried. Happy crafting!
PrintCoaster Mask Decoration
Transform simple coasters into whimsical masks with this fun and easy DIY project, perfect for home decor or unique gifts.
- Prep Time: 10 minutes
- Cook Time: 30 minutes
- Total Time: 60 minutes
- Yield: 4 masks
- Category: Craft
- Method: DIY Crafting
- Cuisine: N/A
- Diet: N/A
Ingredients
- Cardstock
- Metallic Green Paint
- Paint (various colors)
- Ribbon
- Googly Eyes
- Hot Glue Gun
- Sharpie
Instructions
- Paint the top surface of your coaster with one coat of metallic green paint. Allow the paint to dry completely, about 30 minutes.
- Cut a strip of cardstock for the front of the mask and two smaller shapes for the sides.
- Attach the cardstock pieces onto the painted coaster using a hot glue gun.
- Add googly eyes by dabbing some hot glue on the back and placing them on the mask.
- Draw the nose and mouth with a Sharpie, then go over these lines with black paint for definition.
- Add final touches with red paint for a tongue and attach a festive ribbon for hanging.
Notes
Use a clear spray sealant for durability and store masks in a dry, cool place. Customize with various colors and patterns for seasonal themes.
Nutrition
- Serving Size: 1 mask
- Calories: 0
- Sugar: 0g
- Sodium: 0mg
- Fat: 0g
- Saturated Fat: 0g
- Unsaturated Fat: 0g
- Trans Fat: 0g
- Carbohydrates: 0g
- Fiber: 0g
- Protein: 0g
- Cholesterol: 0mg
Keywords: DIY, home decor, crafts, seasonal decorations, gifts