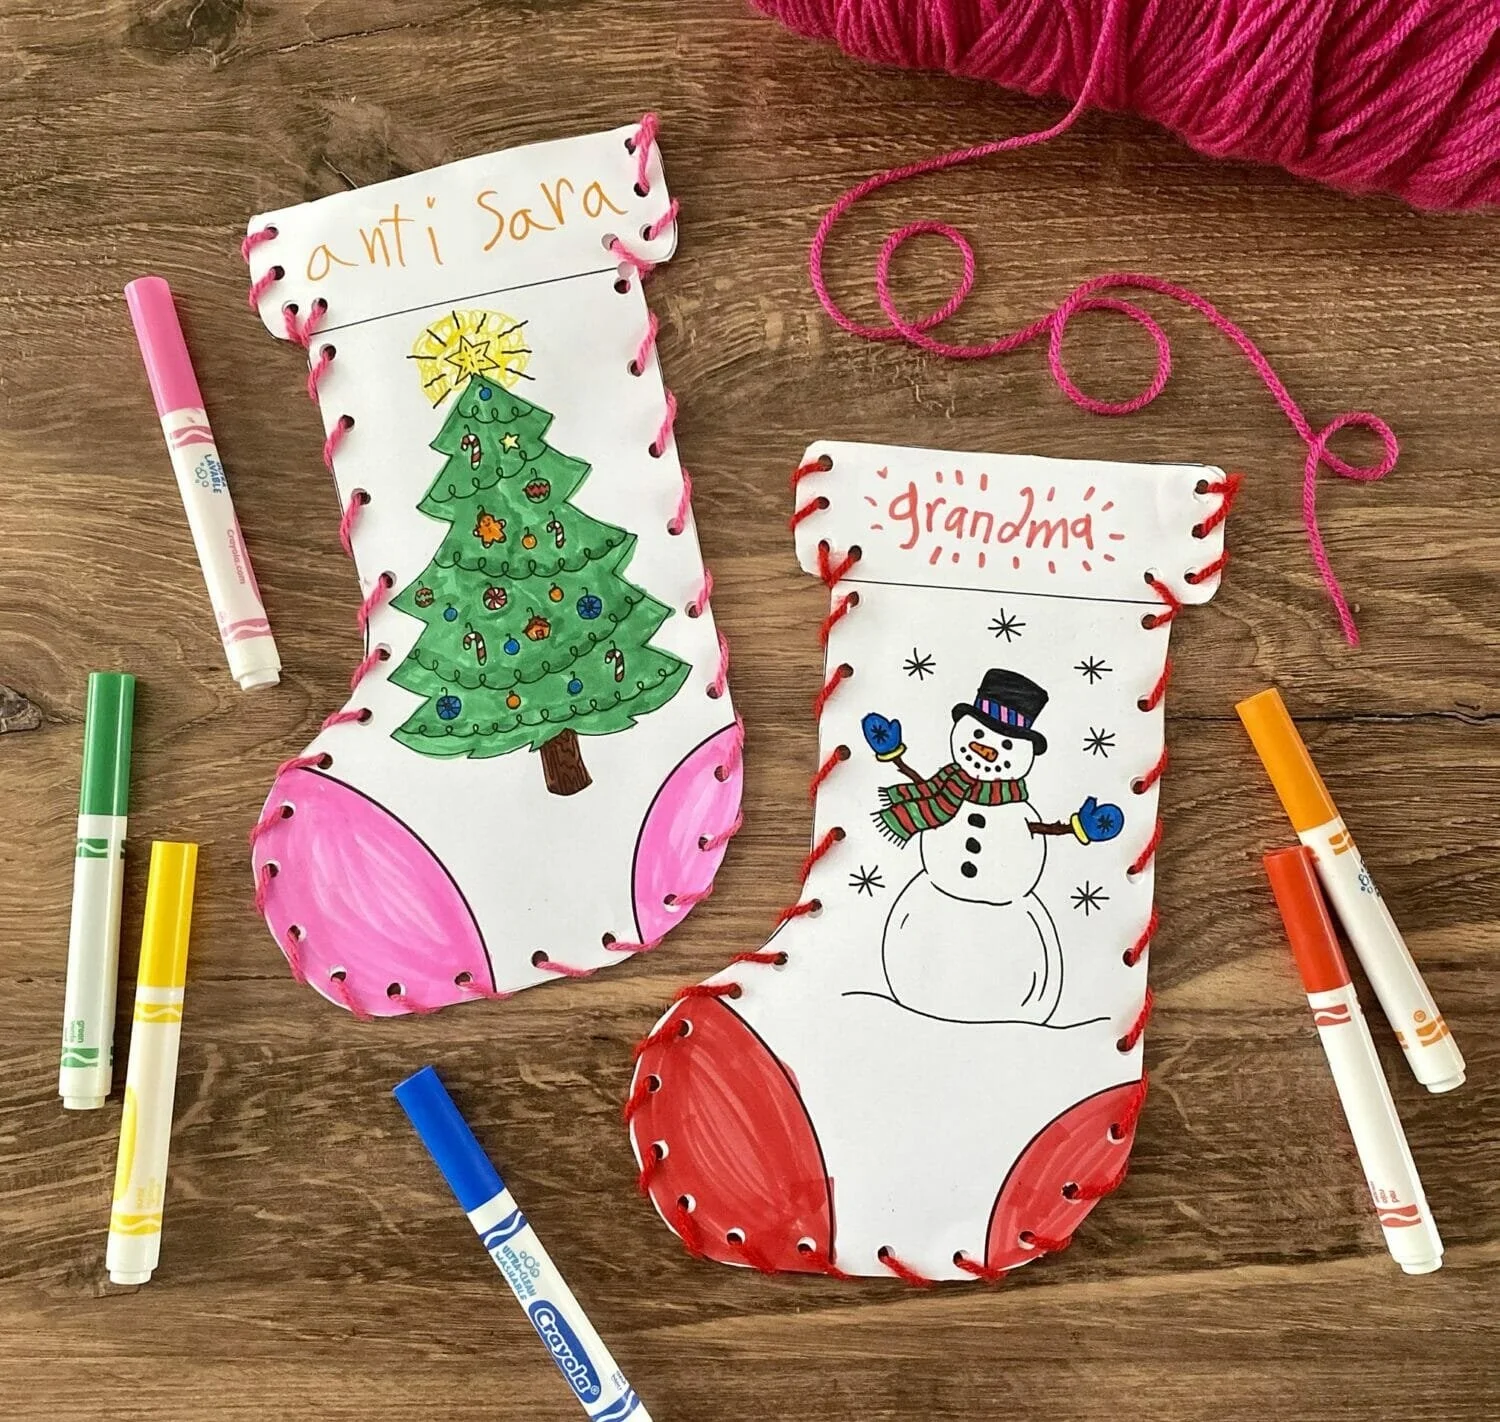
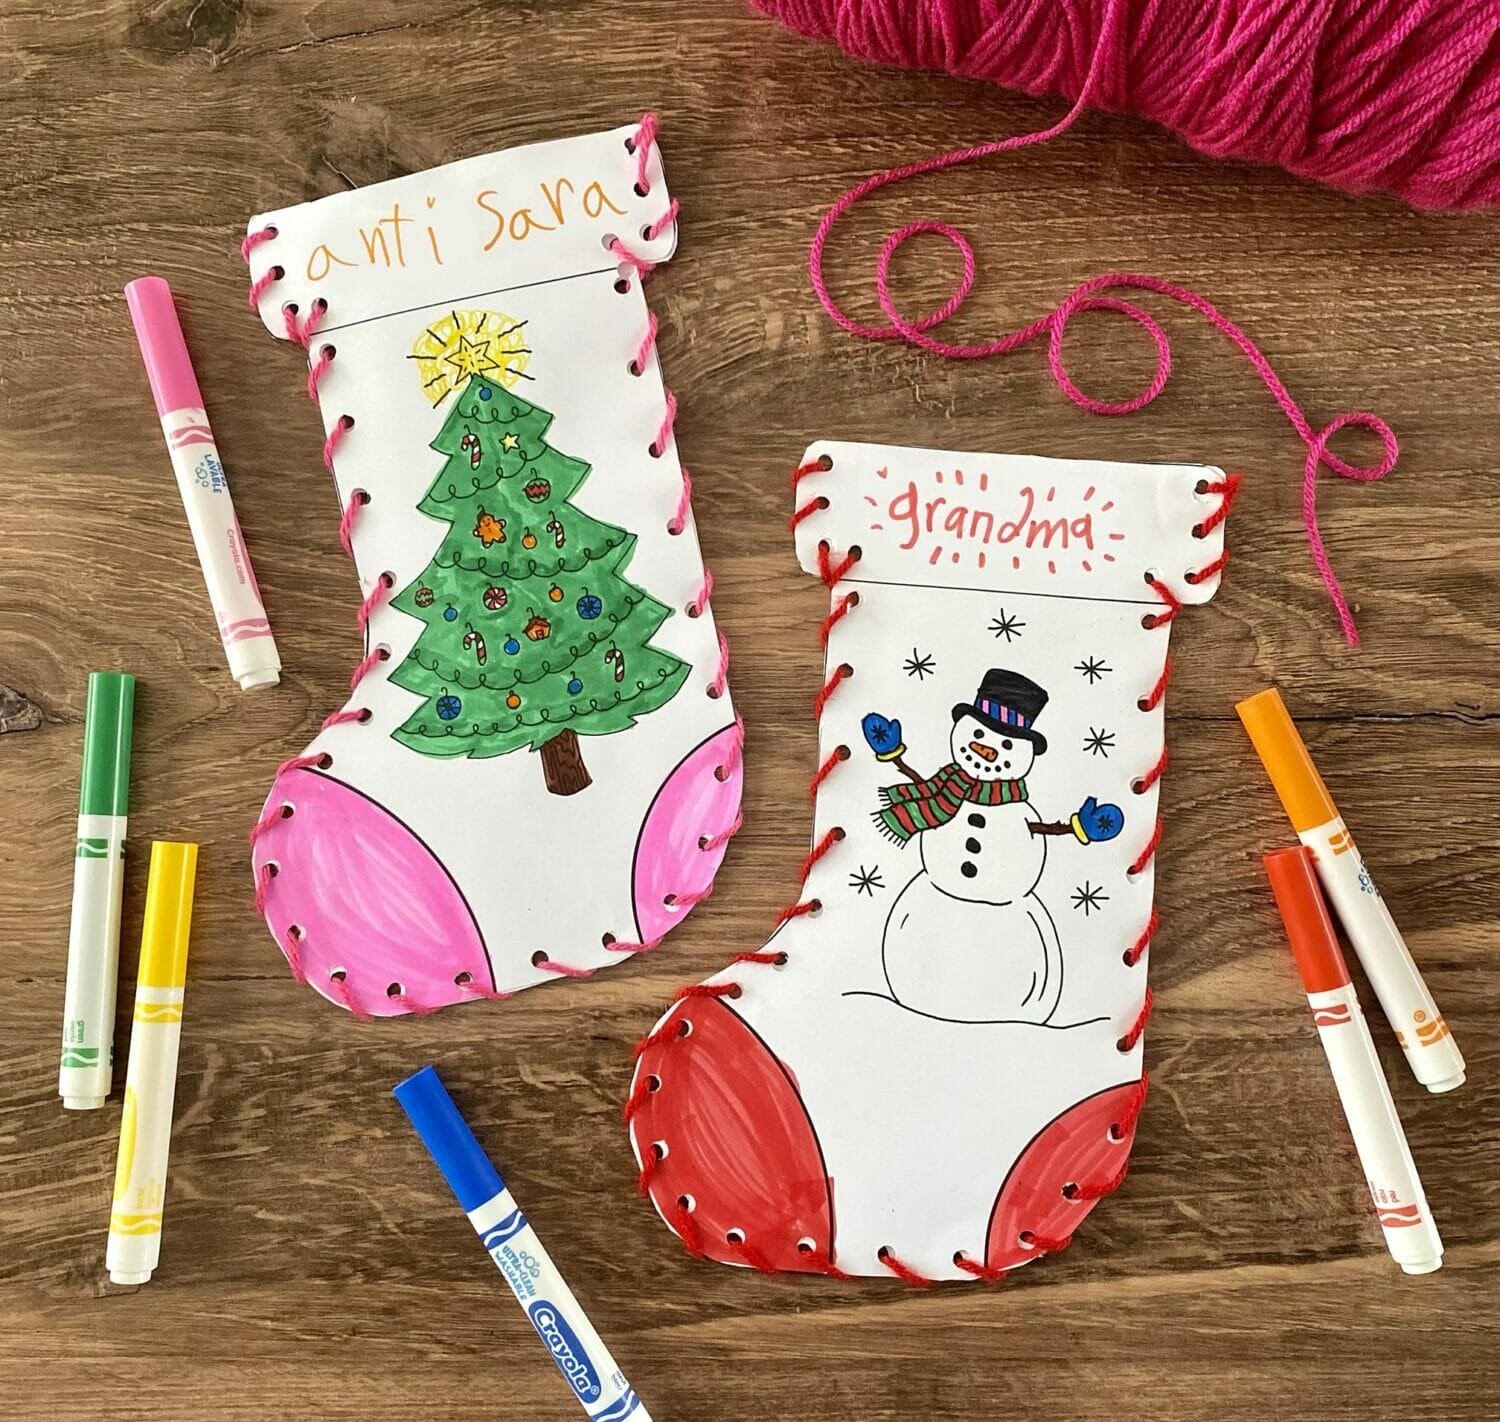
Making a Kid’s Christmas Stocking Craft is a delightful way to celebrate the holiday season. This easy DIY project combines creativity and holiday cheer, making it perfect for kids and parents alike. Stockings not only serve as festive decorations but also create a special keepsake that children can cherish for years to come. With simple materials and straightforward instructions, this craft is a fantastic choice for those looking for fun and budget-friendly crafts this Christmas.
WHY YOU WILL LOVE THIS Kid’s Christmas Stocking Craft
You will enjoy making this Kid’s Christmas Stocking Craft because it is specifically designed to be fun and engaging for both children and adults. Here are some key benefits that this craft offers:
- Easy for Beginners: The steps are simple and straightforward, making it easy for even the youngest crafters to join in on the fun.
- Uses Simple Materials: You probably already have many of the materials at home, which makes it a hassle-free project.
- Budget-Friendly: This craft won’t break the bank, allowing you to create beautiful decorations without overspending.
- Quick to Make: With a relatively short timeline, you can create these stockings in no time, perfect for busy holiday schedules.
- Great for Holiday Decorating: These stockings add a playful touch to your home decor during the festive season.
- Easy to Customize: Kids can personalize their stockings, making them unique and special for each family member.
PROJECT DETAILS
Skill Level
This craft is a beginner-friendly project suitable for all skill levels. It’s designed so that even young children can participate successfully.
Estimated Time
Expect to spend about 30 to 60 minutes on this project, depending on how detailed the decorations get and the age of the children involved.
Approximate Cost
This is a budget-friendly DIY project, with costs generally ranging from $5 to $15, depending on what materials you already have at home.
Best For
This craft is ideal for family fun during the holiday season, school events, or as a weekend project. It is perfect for all ages.
Project Type
This is a seasonal craft, making it a fantastic choice for Christmas. It doubles as both a decorative piece and a functional item for the holiday season.
TOOLS AND EQUIPMENT NEEDED
Scissors
Used to cut out the stocking templates from the cardstock, these are essential for shaping your stockings.
Hole Punch
A hole punch is used to create the holes needed for lacing yarn through the stockings. It makes the process easier and more consistent.
Tape
Tape will help secure your yarn while threading, ensuring your stockings hold together during play or decoration.
MATERIALS
White Cardstock
This material serves as the base for your Christmas stockings. The sturdy nature of cardstock ensures that your stockings will last through the holiday season.
Markers
Markers are great for decorating. Kids can use them to draw designs, write names, or create festive patterns on their stockings.
Crayons
Crayons add vibrant colors and are fun for younger children. They are easy to use, allowing little hands to create colorful designs.
Colored Pencils
These can be used for more detailed decorations since they provide fine control, making it easy to add intricate designs.
Yarn
Yarn is used for lacing the stockings together. Choose different colors to create a more festive look.
Hole Punch
It’s essential for making holes in the cardstock for the yarn to pass through. This tool helps streamline the lacing process.
Tape
Use tape to secure the end of the yarn while you lace up the stockings. This step ensures the yarn goes smoothly through the holes.
Scissors
These will help in cutting out the stocking templates and any additional decorations you may want.

HOW TO MAKE Kid’s Christmas Stocking Craft
Step 1: Print the Stockings
Begin by printing templates of the stockings. You will need one front and one back piece for each stocking. There are many free online templates available.
Step 2: Cut the Stockings Out
Carefully cut out each stocking shape. If your child is old enough, they can assist with this step. For younger children, you may want to cut them out ahead of time for safety.
Step 3: Hole Punch Each Marked Dot
Once the stockings are cut out, hole punch at each marked dot around the edges of the stockings. This will create openings for lacing with yarn.
Step 4: Decorate the Stockings
Let your kids unleash their creativity. Use the markers, crayons, and colored pencils to decorate the front of the stockings. The back can remain blank for handprints or additional doodles.
Step 5: Lace the Stockings
Using the yarn, start lacing the stockings. Begin by wrapping tape around one end of the yarn. Tie the opposite end of the yarn through the top hole of the stocking. Show your child how to pull the yarn in and out of the holes.
- For Older Children: Teach them how to wrap the yarn around the edges of the stocking while lacing.
- For Younger Children: Allow them to simply thread the yarn up and down through the holes for a more straightforward experience.
TIPS AND TRICKS
- Choosing Materials: Use bright and festive colors for materials to enhance the holiday spirit. You can also consider using upcycled materials from old crafts.
- Cutting: For neater edges while cutting the cardstock, use sharp scissors and steady hands to avoid jagged cuts.
- Avoiding Mistakes: Make sure to double-check where to hole punch. Pre-mark the locations to ensure even spacing.
- Making It Easier: If you’re crafting with younger children, do the hole punching and cutting ahead of time. This keeps the project fun and stress-free for them.
- Better Finish: To give your stockings a more polished look, consider using decorative yarn, ribbons, or glitter to finish the edges and embellishments.
- Making the Craft Last Longer: Consider laminating the finished stockings or keeping them in a dry place to avoid any stains or fading.
- Working Safely: Always supervise younger kids during cutting and hole-punching to ensure they are safe.
VARIATIONS AND CUSTOMIZATION IDEAS
- Different Colors: Use various colored cardstock or paint the stockings to personalize their appearance.
- Different Sizes: Create large and small stockings to accommodate different gifts. You can also make matching mini stockings for pets.
- Seasonal Versions: Instead of Christmas, adapt the design for other holidays or seasons to create a year-round crafting activity.
- Different Patterns: Use fabric scraps or patterned paper instead of cardstock for a textured finish.
- Personalized Versions: Let kids draw their names or a photo of a favorite character for a personal touch.
- Holiday Versions: Create themes based on popular movie characters or symbols relevant each holiday season.
Kid’s Christmas Stocking Craft FAQ
How long does it take to make the Kid’s Christmas Stocking Craft?
The craft typically takes about 30 to 60 minutes, depending on the age of the child and the amount of decoration added.
Is this craft difficult for young children?
No, this is a beginner-friendly craft. Young children can participate in decorating and lacing under supervision, with tasks adjusted to their skill level.
What materials do I need for this craft?
You will need white cardstock, markers, crayons, colored pencils, yarn, a hole punch, tape, and scissors.
How do I store the finished stockings?
After making the stockings, store them in a dry place. If you want a longer-lasting decor piece, consider using laminating sheets for protection.
Can we customize the decorations?
Absolutely! Kids can personalize their stockings with different colors, patterns, names, or even seasonal themes. It’s a great way to make each stocking unique.
CONCLUSION
Creating a Kid’s Christmas Stocking Craft is an easy and enjoyable way to spend time with your children this holiday season. This simple craft is perfect for all ages, with opportunities for personalization and creativity that make every stocking a special keepsake. It is budget-friendly, engaging, and easily adaptable for various holiday celebrations. We encourage you to try this fun craft and share your finished project or customization ideas with us! Enjoy crafting!
PrintKid’s Christmas Stocking Craft
A delightful DIY project perfect for kids and parents to celebrate the holiday season with creativity and fun.
- Prep Time: 30 minutes
- Cook Time: 30 minutes
- Total Time: 60 minutes
- Yield: 1 stocking
- Category: Craft
- Method: Crafting
- Cuisine: N/A
- Diet: N/A
Ingredients
- White Cardstock
- Markers
- Crayons
- Colored Pencils
- Yarn
- Hole Punch
- Tape
- Scissors
Instructions
- Print the templates of the stockings.
- Cut out each stocking shape carefully.
- Hole punch at each marked dot around the edges of the stockings.
- Decorate the front of the stockings using markers, crayons, and colored pencils.
- Lace the stockings using yarn, starting with tape on one end.
Notes
Supervise younger kids during cutting and hole-punching to ensure safety. Use bright colors and decorative elements for a festive look.
Nutrition
- Serving Size: 1 stocking
- Calories: 0
- Sugar: 0g
- Sodium: 0mg
- Fat: 0g
- Saturated Fat: 0g
- Unsaturated Fat: 0g
- Trans Fat: 0g
- Carbohydrates: 0g
- Fiber: 0g
- Protein: 0g
- Cholesterol: 0mg
Keywords: Christmas craft, kids craft, holiday decorations, DIY stocking, festive project