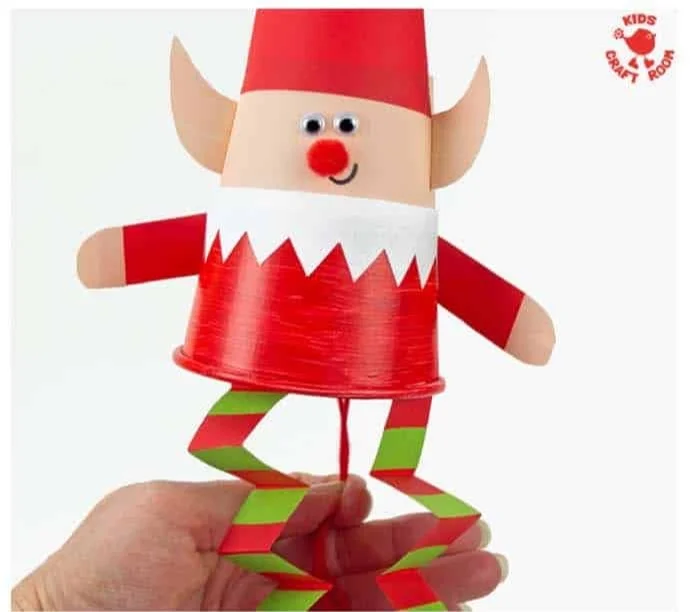
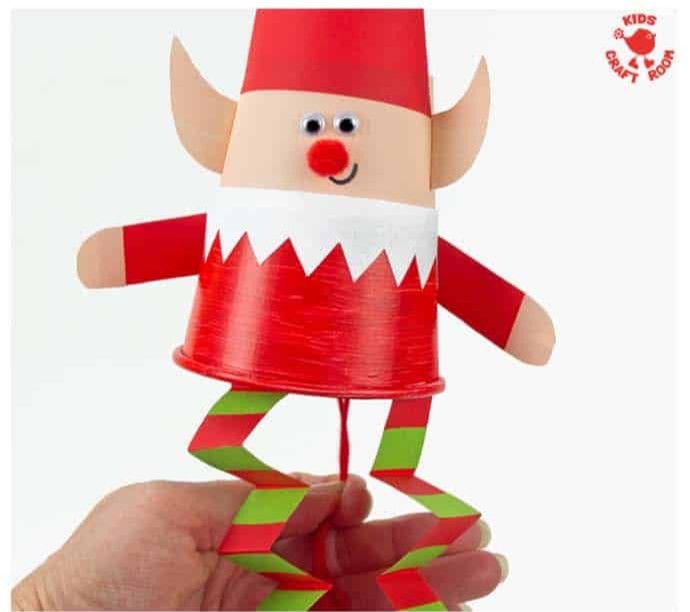
Create some holiday cheer with a fun and easy craft: the Jumping Paper Cup Elf Puppet! This simple craft project combines creativity and play, making it an excellent choice for beginners and seasonal decorating. With just a few materials you probably already have at home, you can create delightful elf puppets that can jump into your holiday festivities or serve as handmade gifts. Whether for parties, home decor, or quality time with loved ones, this DIY project is sure to bring joy.
WHY YOU WILL LOVE THIS Jumping Paper Cup Elf Puppet
The Jumping Paper Cup Elf Puppet is a fantastic craft for several reasons:
- Easy for Beginners: This craft is simple enough for anyone to follow, making it perfect for beginners or kids.
- Uses Simple Materials: Most of the materials are likely accessible at home or are budget-friendly, ensuring that you won’t break the bank.
- Quick to Make: You can whip up this puppet in under an hour, which is ideal for those looking for a fun quick craft activity.
- Great for Holidays: This craft is perfectly themed for seasonal decorating and can easily add festive charm to your home.
- Easy to Customize: Personalize your elf puppet with various designs and colors to match your decorations.
PROJECT DETAILS
Skill Level
Beginner-friendly. This project requires basic crafting skills, making it accessible for all skill levels.
Estimated Time
Approximately 30-60 minutes. This time frame includes the preparation and drying time for the paint.
Approximate Cost
Budget-friendly at around $10. You can often find most materials in your home.
Best For
Suitable for individuals or groups, including kids and craft enthusiasts, especially during the holiday season.
Project Type
This is a seasonal craft that falls under the category of easy DIY projects and homemade decor.
TOOLS AND EQUIPMENT NEEDED
Scissors
Used for cutting cardstock into shapes and strips for the elf puppet’s features.
Glue
Essential for sticking all your elements together—ensure you use a strong craft glue for the best results.
Paintbrush
Used for applying paint evenly on the paper cups and cardstock pieces.
MATERIALS
White Paper Cups
These serve as the body of the elf puppet. The classic shape allows for creative expression.
Skin Tone Paint
Used to paint the thin end of the cup, representing the elf’s face.
Red and Green Paint
Colors for the elf’s festive outfit, adding a holiday touch.
Cardstock – White, Black, Red, and Green
These provide durable material for creating various elf features like ears, hat, and shoes.
Mini Pom Poms – Red and White
Pom poms are perfect for adding fun details like the nose and hat topper.
Small Wiggle Eyes
For a playful look, these eyes will bring your elf puppet to life.
Yarn
Used for the puppet’s jumping mechanism, where the yarn allows the puppet to bounce.
HOW TO MAKE Jumping Paper Cup Elf Puppet
With your materials gathered, let’s dive into the steps to create your Jumping Paper Cup Elf Puppet.
Step 1: Paint the Cup
Begin by painting the thin end of the white paper cup with skin tone paint. This will be your elf’s head. For the fat end of the cup, use either red or green paint to represent the elf’s outfit. Allow the paint to dry completely before moving on to the next step.
Step 2: Create the Jumping Mechanism
Once the paint is dry, flip the cup upside down. With a pair of scissors (adults should handle this), carefully make two small holes in the base of the cup. Take a length of yarn (about an arm’s span) and thread both ends through the holes at the bottom of the cup, tying the ends together to create a loop that will help your puppet jump.
Step 3: Make the Elf Ears
Now, paint a small piece of cardstock with skin tone paint. Once dry, cut out two ear shapes. Glue these ears onto the sides of the cup to give your elf character.
Step 4: Create the Elf Legs
Cut thin strips of green cardstock, then glue them onto strips of red cardstock. These will form the elf’s legs. Make sure to secure them well. Once you have the legs, cut out the shape of shoes from black cardstock. Curl and concertina fold the legs, gluing the shoes on the ends. Finally, glue the legs inside the cup body.
Step 5: Add Neck Detailing
To give your elf a festive collar, cut a thin strip of white cardstock. Make zigzag cuts along one side for decoration. Glue this collar piece around the neck, just below the cup opening.
Step 6: Create the Elf Hat
For the elf’s hat, cut a triangle shape from red or green cardstock. Glue this onto the top of the cup.
Step 7: Make the Arms
Cut two arms from cardstock and two semi-circular hands from the hat-painted skin tone cardstock. Glue the hands onto the arms and then glue the arms onto the back of the cup.
Step 8: Add Facial Features
Finish your puppet by gluing a white pom pom on top of the hat, a red pom pom for the nose, and attach the wiggle eyes to create a smiley face.

TIPS AND TRICKS
Here are some helpful tips for creating your Jumping Paper Cup Elf Puppet:
- Choosing Materials: Look for recyclable items at home to cut costs. You can use leftover wrapping paper instead of cardstock for more patterns.
- Cutting: Use sharp scissors to cut cardstock easily, especially for detailed shapes like the elf’s ears and legs.
- Gluing: Be generous with the glue, especially for elements that require a strong bond, like the hat and the collar.
- Customization: Experiment with different patterns and colors for each puppet to create a family of elves!
- Making it Last: If using paint, consider sealing finished puppets with a spray sealant for durability.
- Safety: Supervise younger children when using scissors and glue to ensure safety during the crafting process.
VARIATIONS AND CUSTOMIZATION IDEAS
Get creative with your Jumping Paper Cup Elf Puppet by trying out these customization ideas:
- Different Colors: Use various shades of traditional holiday colors like blue or gold for a unique twist on the classic elf.
- Seasonal Versions: Consider making Santa, reindeer, or snowman puppets for a complete Christmas character collection.
- Patterns: Use patterned cardstock instead of plain for the hat and clothes.
- Size Variations: Create larger or smaller puppets using different paper cup sizes.
- Personalized Elements: Add a name tag around the arm or outfit for a personalized touch.
- Accessories: Attach tiny handmade props like presents or candy canes for added storytelling fun.
Jumping Paper Cup Elf Puppet FAQ
Q1: Is this craft suitable for children?
Absolutely! This craft is beginner-friendly and perfect for children with adult supervision, especially when using scissors.
Q2: How long will this craft take?
On average, it takes about 30-60 minutes to complete, depending on drying time and crafting speed.
Q3: Can I reuse the materials?
Yes, materials like cups and cardstock can be found in most homes. Feel free to repurpose any additional craft materials for other DIY projects.
Q4: What should I do to clean my puppet if it gets dirty?
If your puppet gets dirty, gently wipe it with a damp cloth. Avoid soaking as it may ruin the paper.
Q5: How can I make this craft last longer?
To make the puppet last, consider using a sealant on the paint once it dries, or avoid heavy handling and display it as part of your holiday decor.
CONCLUSION
Creating the Jumping Paper Cup Elf Puppet is an easy DIY project that is perfect for beginners and festive gatherings. With simple materials and quick steps, you can craft delightful puppets that brighten your homes or become charming handmade gifts. Enjoy customizing your elves and perhaps even gather family or friends for a crafting session. Share your finished projects and imaginative variations; we’d love to hear how your unique puppets turn out! Happy crafting!
PrintJumping Paper Cup Elf Puppet
A fun and easy craft project perfect for beginners, creating delightful elf puppets that add holiday cheer.
- Prep Time: 10 minutes
- Cook Time: 20 minutes
- Total Time: 60 minutes
- Yield: 1 puppet
- Category: Craft
- Method: DIY
- Cuisine: Seasonal
- Diet: N/A
Ingredients
- White Paper Cups
- Skin Tone Paint
- Red Paint
- Green Paint
- Cardstock – White, Black, Red, and Green
- Mini Pom Poms – Red and White
- Small Wiggle Eyes
- Yarn
- Glue
- Scissors
- Paintbrush
Instructions
- Paint the thin end of the white paper cup with skin tone paint for the elf’s head. Use red or green for the elf’s outfit.
- Create the jumping mechanism by making holes at the base of the cup, threading a length of yarn through, and tying it in a loop.
- Make the elf ears by painting cardstock with skin tone paint, cutting out shapes, and gluing them onto the cup.
- Create legs with green and red cardstock strips, adding black cardstock shoes, and glue them inside the cup.
- Add a collar from white cardstock with zigzag cuts around the neck of the puppet.
- Create an elf hat from a triangle of red or green cardstock and glue it onto the top of the cup.
- Make arms from cardstock, attaching hands and then gluing them to the back of the cup.
- Add facial features with pom poms and wiggle eyes for a playful look.
Notes
Use recyclable materials to save costs and personalize each puppet for a unique touch.
Nutrition
- Serving Size: 1 puppet
- Calories: N/A
- Sugar: N/A
- Sodium: N/A
- Fat: N/A
- Saturated Fat: N/A
- Unsaturated Fat: N/A
- Trans Fat: N/A
- Carbohydrates: N/A
- Fiber: N/A
- Protein: N/A
- Cholesterol: N/A
Keywords: holiday craft, DIY puppet, Christmas decorations, easy crafts, seasonal activities